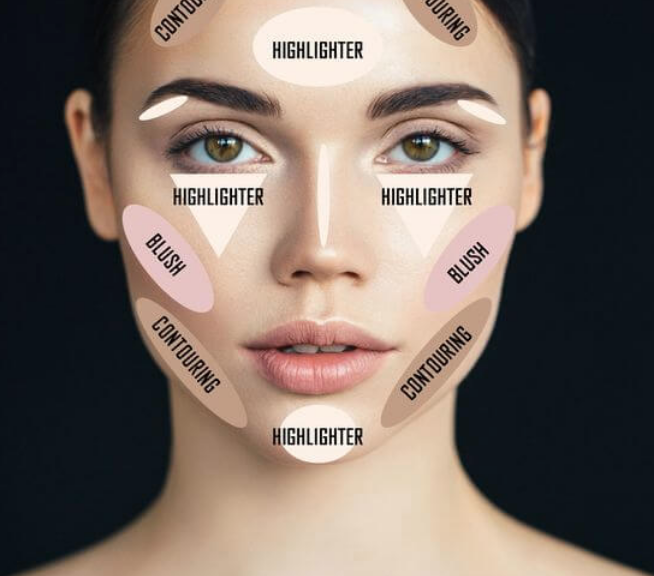
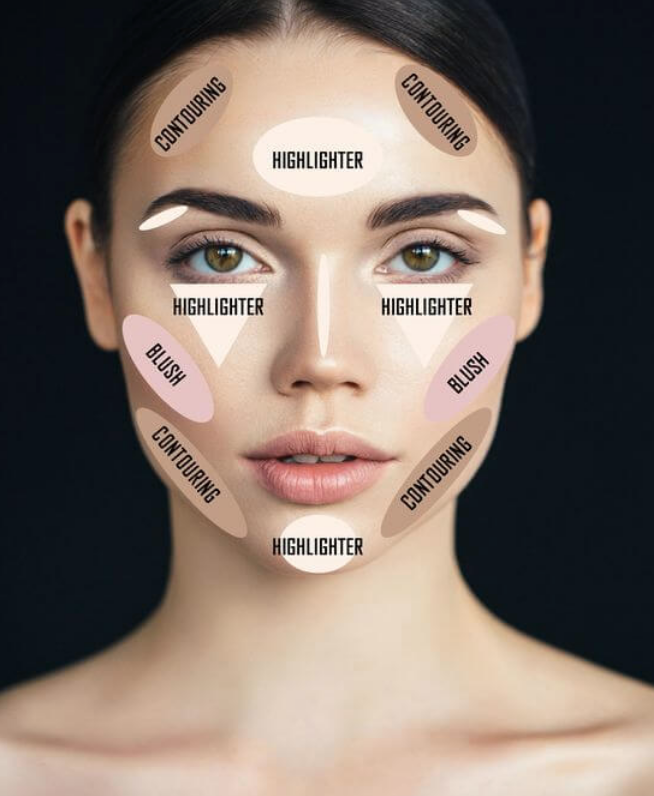
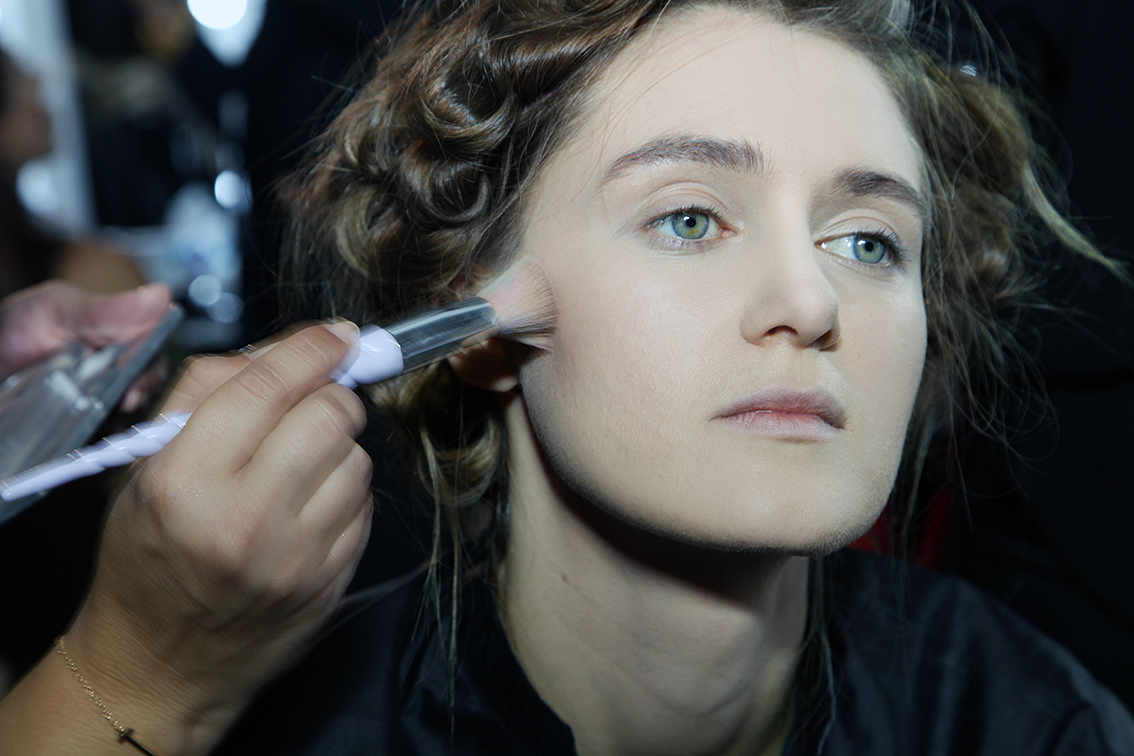
Setting your foundation Tips
Setting your foundation Tips. We’ve all been there. You spend all this time perfecting your skin with foundation and concealer, and it looks great – awesome! Now you don’t want that to move, so you set it with some powder. And bam! Just like that: cake face. Now what?
Powder is great for setting your makeup and making sure it doesn’t slide around, but the slightest excess of it can take you from amazing to ‘ew’ in about 2 seconds flat. But don’t worry, there’s a way to fix that. All you need to do is apply your powder with a taco. Wait, what? Yes, you heard us: a taco–a powder puff taco, that is. The “taco” method is one that’s been taught in makeup academies for years and will ensure that makeup stays put while cake face stays in the past. Intrigued? Read on.
Setting your foundation Tip 1: Make sure any excess oil is gone
Excess oil is the number one way for makeup to cake up on your face. To prevent that from happening, you need to make sure it’s gone before you set with powder. After you’ve applied your foundation and concealer, take an oil blotting sheet, or even a tissue, and gently blot any excess oil or product away.
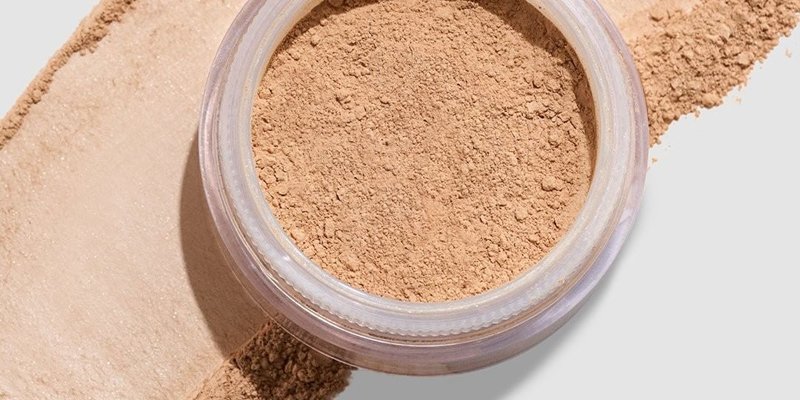
Setting your foundation Tip 2: Pour loose, colorless powder onto puff
Grab a powder puff (it can be large or small) and with it laying flat, deposit a small amount of loose, colorless powder onto the center of the puff. It is imperative here that you are using a powder that is 100% translucent. Using a tinted powder can alter the color of your foundation or even change the way it looks throughout the course of the day.
Setting your foundation Tips 3: Fold puff into taco shape and rub together
Here’s where the “taco” part comes in. You want to fold up the edges of your powder puff, creating a “taco” shape, with the loose powder inside the pocket you’ve just formed. Now, take both sides of the “taco” and rub them together well in order to really get the powder into the puff.
Setting your foundation Tips: 4 Fold “taco” in the other direction and repeat
Open the powder puff up and fold it in the other direction. So, if you folded it horizontally the first time, fold it vertically this time, or vice versa. Repeat the same process of massaging the sides together.
Setting your foundation Tips: 5 Knock off the excess
Unfold the puff and gently knock off any excess by flicking the underside of the puff. This ensures that you won’t be applying too much powder onto your face.
Setting your foundation Tips: 6 Press and roll puff into skin
With your now powdered puff, take it and form it into a “taco” again, this time with the powdered side on the bottom. Then, gently press and roll it onto the skin. Don’t swipe! This will disturb the makeup underneath. By pressing and rolling, you are locking in the foundation and concealer and ensuring that the makeup is really melting into the skin.
Setting your foundation Tips: 7 Finish off with a setting spray
Finish the face off with a few spritzes of your favorite setting spray. Doing this will get rid of any residual powder that may be laying on top of the skin, make you look fresh, and will lock in the makeup even more. No cake face here!
Our next batch of the Platinum Makeup Course is on January 9, 2022. Together, let’s explore the amazing world of makeup.
If you have any questions, please don’t hesitate to contact us at 052 834 9964 or email us at info@thelipstickmakeup.institute
You can also check out or students work at: