Category Archives: #schoolphotography

Learning in Makeup Diploma

Learning in Makeup Diploma

Learning in Makeup Diploma

Becoming a makeup artist is an exciting journey that is so cool. 

First and foremost, having a passion for makeup is essential.

If you love playing  with colors and styles, you’re already on the right track.

Next, consider enrolling in a professional makeup school.

Formal education provides you with essential skills and techniques.

Moreover, it builds you up , which is crucial when starting out.

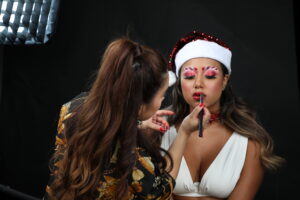
Therefore, practice on friends and family whenever possible.

As I have noted this not only helps refine your skills but also helps you build a portfolio.

At the same time  strong portfolio showcases your work to potential clients or employers,  show  creativity.

Furthermore, staying updated with the latest trends and products is important.

Hence, follow popular makeup artists on social media and attend industry workshops.

However, this keeps your skills current and  shows  you to new techniques and tools.

Staying up with what is going on  you can offer the latest looks to your clients.

Makeup Institute in Dubai
Firstly Skin Preparation and Skincare
  •  Learn about different skin types like oily, dry, and combination.
  • Start with cleansing to remove dirt and oil.
  • Hydrate the skin with moisturizer to keep it smooth.
  • Apply primer to create a smooth base for makeup.
  • Once the skin is prepped, you’re ready to apply makeup.
Secondly  Color Theory and Foundation Matching
  • Know how colors work together complement each other.
  • Match foundation shades to your skin tone for a natural look.
  • Use different colors to hide imperfections like redness or dark circles.
  • Once the foundation matches your skin tone, you can move on to other makeup steps.
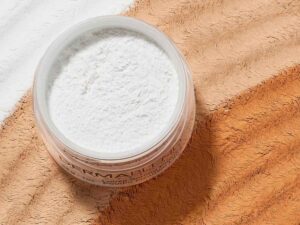
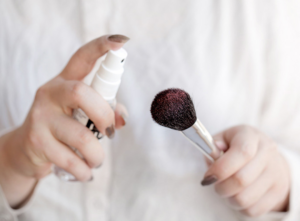
Thirdly Makeup Tools and Products
  • Essential Tools: Brushes and sponges help apply makeup evenly.
  • Types of Makeup: Foundation, concealer, blush, eyeshadow, and lipstick are common products.
  • Choosing Products: Pick products that suit your skin type and tone.
  • Transition: With the right tools and products, you can start applying makeup.
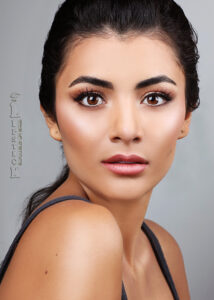
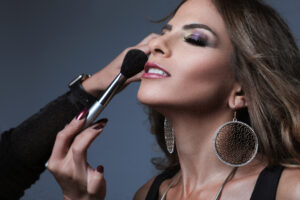
Fourthly  Face Makeup Techniques
  • Apply foundation using brushes or sponges.
  • Cover blemishes or dark spots with concealer.
  • Use makeup to define cheekbones  highlight features.
  • Finish with powder or setting spray to make it last longer.
  • After face makeup, move on to eye makeup.
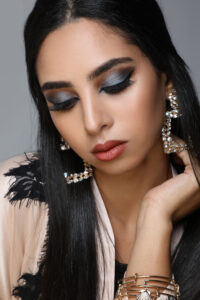
Fifthly Eye Makeup Techniques
  • Use brushes to blend different colors for a beautiful look.
  • Draw lines close to the lash line for a defined look.
  •  Apply mascara to dark and lengthen lashes; false lashes for add drama.
  •  Once eyes are done, complete the look with lip makeup.
Sixthly Lip Makeup Techniques
  • Choosing Lip Products: Lipstick, gloss, or liner for color and definition.
  • Applying Lipstick: Use a brush or direct apply for a smooth finish.
  • Transition: After applying lip color, complete with final touches.
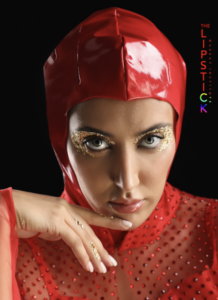
Seventhly Special Effects Makeup (SFX)
  • Creating Effects: Make bruises, scars, or wounds using special makeup products.
  • Using Prosthetics: Apply artificial parts like noses or ears for realistic looks.
  • Transition: Special effects makeup adds creativity to your skills.
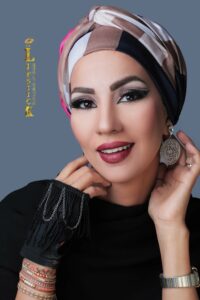
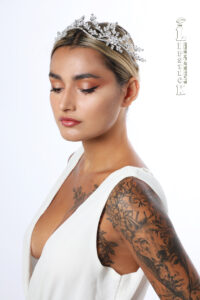
Eightly Bridal and Event Makeup
  • Understanding Bridal Makeup: Natural yet radiant look for brides on their special day.
  • Event Makeup: Glamorous makeup for events like parties or photoshoots.
  • Transition: Different occasions call for different makeup styles.
Professionals and Client Communication
  • Consultation Skills: Ask clients about preferences and any skin concerns.
  • Hygiene Practices: Keep tools clean for safe and hygienic makeup application.
  • Transition: Professionals ensures clients trust your skills.
Because Portfolio Development and Marketing is important
  • Creating a Portfolio: Gather photos of your best work to show your skills.
  • Marketing Yourself: Use social media and networking to find clients and jobs.
  • Transition: A strong portfolio and marketing strategy can lead to opportunities.
Continuous Learning and Skill
  • Staying Updated: Keep learning about new trends and techniques in makeup.
  • Attending Workshops: Join classes or workshops to improve skills.
  • Feedback and Improvement: Use feedback to get better at makeup.
  • Transition: Continuous learn helps you grow as a makeup artist.
Learning in Makeup Diploma


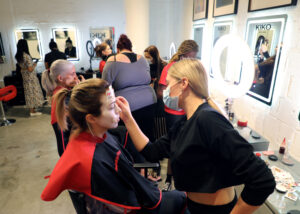
We do the self makeup course over 2 days at The Lipstick Makeup Institute. 

Also In the light of peoples lives being so busy its easier this way. 4.5 hours a day and you can practise in-between. 

Afterwards you will reap all the rewards of the best education and this will serve you well. 

By and large you will leave The Lipstick Makeup Institute packed with all skills to start your own business.

However, because we will welcome you with open arms. Bring your friends too. 

All in all Don’t miss such a great opportunity and book your seat now 6 students in a group.

Although we soon launch our online portal as well. 

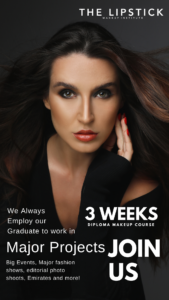
Platinum Makeup Diploma.

Become a professional makeup artist in 3 weeks. Afterwards you will be a part of The Creative Show Team.

10am till 4pm

Want to join?

Further details contact us : 052 834 9964

Enrol Now and become a makeup artist in 3 weeks.

How to choose a lipstick shade

How to choose a lipstick shade

So the rule is, if you have warm undertones, then opt for a lipstick that also has warm undertones – easy right?

Warmer lipsticks have reddish, peach, orange or even yellowish undertones and tend to lean towards orangey hues, like coral, gold, copper, and all the way to siennas and browns. Peachy pink shades, orange-toned reds, and rosy pink shades will complement your skin tone best.

How to choose a lipstick shade

How to choose a lipstick shade for cool skin tones:

If you’ve determined that your undertone is cool, then look for lipsticks that also have cool undertones.

Cool-toned lipsticks will have blue and purple undertones. Look for blue hues like plum, cherry, mauve, crimson, and purples.

Neutral skin tones have both cool and warm tones, so there’s pretty much nothing that doesn’t suit you. Seriously, stop rubbing it in already!

One of our fave shades has to be the stunning red hue Miss America, which is a universal red shade that looks beautiful on everyone. Seriously, we’ve tried it on cool, warm, and neutral undertones and it’s so flattering as it has this insane luminosity to the color that allows the pigment to pop against any skin tone.

For any loyal Liquid Matte Lipstick lovers, don’t worry we kept and revamped eight of our most popular shades and created eight totally new shades so you’ll be able to enjoy the new formula and feel sexy and confident in your choice of lip shade.

All in all Lipstick Makeup Institute in one of the leading makeup school in Dubai.

Next Batch starting 22nd June Weekend Classes.

Enroll Your Course only 6 seats in 1 class.

However, Furthermore any inquiry feel free to contact

We look forward to seeing you at The Lipstick Makeup Institute, give us a call anytime on +971 (0) 528349964.


Also Feel free to ask any question on our official email or instagram

Basically we are one of the best celebrity makeup school in Dubai.

Although we soon launch our online portal as well. 

Use Setting Powder To Airbrush

Use Setting Powder To Airbrush

Use Setting Powder To Airbrush

As far as beauty staples go, our beat wouldn’t be the same without setting powder. Seriously, on a recent vacay, the moment we realized we’d forgotten setting powder.

how to use setting powder properly, and all our pro makeup tips that will take your entire beat to the next level. Consider this your setting powder masterclass.

What is Setting Powder?

A setting powder is a finely-milled powder that is used to set liquid complexion products, but it can do SO. MUCH. MORE! A good setting powder helps increase the longevity of your makeup, combats midday shine, and gives your complexion an airbrushed finish. There are typically two types of setting powder – pressed and loose.


Loose setting powder: A loose setting powder is a finely milled powder (the finer, the better) that blends and melts seamlessly with your makeup to increase the staying power and provide a smooth-skin finish.

How to use loose setting powder: She’s a multitasker, to say the least. Opt for a light dusting of powder to set, smooth, and mattify, or you can use loose powder for baking your makeup, AKA when you apply a thick layer to different areas of your face to brighten and sculpt.

Pressed setting powder: Pressed powder is (you guessed it) a pressed, finely milled powder that delivers a soft veil of coverage, typically with a softer, more natural finish than loose powder. It’s also great for mattifying touch-ups on the go, smoothing skin texture, and increasing the longevity of cream formulas. Wear pigmented pressed setting powders alone or on top of your other complexion products.

Use Setting Powder To Airbrush

Find the Right Setting Powder Shade

Finding the right shade for any complexion product is like cracking a cheat code. While you’ll find many loose powders are translucent, some can leave a white cast, so we always recommend finding a shade that complements your skin tone. It’s also important to note that you may require different shades depending on your desired result.

Prep Your Skin for Powder

We realize there’s a ton of info, so we’ll keep things short: if your skin is dry or you haven’t exfoliated recently, your setting powder is more likely to settle into fine lines or crease in smile lines, thereby making your skin look dry and flakey rather than smooth.


All things considered, I believe we at The Lipstick Makeup Institute are the best in Dubai. 

All in all we are very personal and don’t have huge classes, we are small, very cool and educated. 

By all means check around all the schools but we are confident you will choose us. Coupled with experience and opportunity we are very high up there on the list. 

By the same time you can choose your days and hours as we are very flexible. 

By and large we are here. 

Call us on

+971 (0) 52 83 499 64


Setting Powder Tips

Setting Powder Tips

Powder to Bake

Baking is one of our all-time fave makeup hacks. It involves applying a thick layer of loose setting powder on top of your cream complexion products. It’s typically done to brighten the undereye, but you can also bake your chin, nasolabial folds, and the center of your forehead to set your makeup – basically, any areas of your face where makeup tends to crease or is prone to oiliness. 

How to Bake: Dab a heavy layer of a loose setting powder onto areas you want to bake using a damp makeup sponge or powder puff. Allow the baking powder to sit on your skin for three to five minutes, then sweep off the excess with a loose fluffy brush. 

Setting Powder Tips

Use Setting Powder to Snatch

Now we’ve covered the baking basics, here’s the real baking tea. If you’re a TikToker, you’ll know what’s up *wink wink.* When placed strategically, a loose setting powder (in your brightening shade) can also be used to snatch the natural contours of your face for a more sculpted, lifted final look that lasts day to night. Literally, you don’t even need to contour!

Setting Powder Tips

First, apply your brightening concealer shade to the inner and outer corners of your undereye, and for an extra snatch, from the outer corner of your mouth in a line under your cheekbone. Once you’ve blended out your concealer, pack on your loose-setting powder using a damp sponge or powder puff. Wait three to five minutes, then dust off the excess powder using a fluffy brush

Control Oil With Setting Powder

If you have oily or combination skin and are prone to midday shine, setting powder will be your BFFL. Simply grab a loose or pressed powder and a large fluffy brush and dust your entire beat with a light coating of powder. 

Use Powder To Set Your Undereyes

Rather than baking, you can use setting powder to set your undereyes lightly. Dip a small round, medium-fluffy brush in powder, and lightly press the brush into your undereye. This will prevent creasing, brighten, and set, and complements a no-makeup makeup look more effortlessly.

Use Setting Powder on Your Lids

If you find your eyeshadow, or any other cream products on your lid, are prone to creasing, setting powder will (as per) save the day. All you need to do is take a small fluffy brush and dust your entire lid with setting powder after using cream products and before applying your eyeshadow.


Use Setting Powder on Your Pout

After applying matte lipstick, use a densely-packed flat brush, pack the translucent powder onto your lips, leave it to set for three to five minutes, then dust off the remaining powder. Finish by adding one final layer of color by dabbing the lip with lipstick

However, Furthermore any inquiry feel free to contact

All in all we look forward to seeing you at
The Lipstick Makeup Institute, give us a call anytime on
+971 (0) 528349964.

because we will welcome you with open arms. Bring your friends too. 

Also Feel free to ask any question on our official email or instagram

Basically we are one of the best celebrity makeup school in Dubai.

Although we soon launch our online portal as well. 

Get your skin summer ready

Get your skin summer ready

The experts are here to share their latest skin care advice.

When it comes to combating dry skin, the main mantra is simple yet crucial: hydrate, hydrate, hydrate! Crafting a skin care routine tailored to address dryness involves selecting products that work to both replenish lost moisture and lock in moisture. Follow these steps from the skin science experts at Barcelona-based ISDIN for a nourishing and hydrating skin care routine:

  • Gentle and nourishing oil cleanser
  • Revitalizing eye cream
  • Hydrating serum
  • Targeted moisturizer
  • Broad-spectrum sunscreen


Get your skin summer ready

Get your skin summer ready

Step 1: Gentle and nourishing oil cleanser

Selecting the right cleanser is pivotal for parched skin. Harsh cleansers can strip away skin’s natural oils, further impairing its natural defenses and making any irritations worse. What can help? Opt for a gentle cleanser that respects your skin’s moisture barrier, such as an oil cleanser. This type of formula is an excellent choice for a deep cleanse without stripping the skin.


Step 2: Revitalizing eye cream

The delicate under-eye area is particularly susceptible to environmental stressors, such as UV radiation, temperature fluctuations, stress and pollution. These factors can also compromise the skin barrier.

Step 3: Hydrating serum

Integrate a hydrating serum into both your morning and evening skin care routines to replenish moisture levels and soothe dryness. 


Step 4: Targeted moisturizer

Seal in the moisture with a nourishing moisturizer. This step helps to maximize hydration and fortify the skin’s natural moisture barrier. Which formula is the best choice? Reach for a lightweight yet potent formula designed to deeply hydrate and support overall skin health. A moisturizer enriched with hyaluronic acid can help provide long-lasting hydration.

Firstly, do your research on the web and instagram to see all the works from the students.

Secondly, give them a call to discuss the requirements and practices. 

Thirdly, call and see all the schools so you get a good feeling about the one you want to join and the course. 

Lastly, make sure you choose the exact right course for you so you can benefit from all the knowledge. 

Afterwards you will reap all the rewards of the best education and this will serve you well. 

By and large you will leave The Lipstick Makeup Institute packed with all skills to start your own business.

Although above all your clients will be so very happy. 

In short we are here to teach you not to take money. 

Owing to the fact that our teachers are the best and our classes are really small and personal. 


However have a look at our website so you get a better understanding of what we do. 

Learn Eye Shadow Makeup

Learn Eye Shadow Makeup

Eyeshadow Tip #1: Know Your Eye Shape

Getting to know your eye shape is essential when you’re trying to elevate your makeup game. Of course, there’s no “one-size-fits-all” with makeup, but knowing what typically complements your eye shape can seriously level up the final look.

 for hooded eyes, there’s typically less eyelid space to play with, so blending shadows up and outwards gives more depth to the lid space. Similarly, to elongate round eyes, you can play with dramatic wing styles to switch up your look.


Eyeshadow Tip #2: Perfect Your Blending Technique

Now that you have the tools, you need to level up your blending technique. Here are our top tips:

Mix eyeshadows: Don’t be afraid to mix and match eyeshadows on your brush to create a more harmonious look. Make sure you tap off any excess pigment before applying it to your lid to reduce fallout.

Pat, then blend: To create an even base, use a dense brush and pack the product onto the lid by gently pressing the powder onto the skin. Then blend it out using back-and-forth motions (think: windshield wipers).

Blend outwards: To lift the eye, drag the eyeshadow outwards, up towards the tail of the brow. This will create a subtle cat-eye effect, even without a winged liner.

Eye Shadow Makeup

Learn Eye Shadow Makeup

Eyeshadow Tip #3: Don’t Forget the Lower Lash Line


A little eyeshadow on the outer corner of the lower lash line goes a long way. For an everyday look, use softer hues, like a soft brown, then opt for a deeper shade for a more dramatic look. Apply the shadow using a small dense brush, then blend out using a slightly larger, fluffier brush. You can also tight-line your lower lash line with a beige eyeliner pencil (white can be too harsh) to create the illusion of bigger eyes.


Eyeshadow Tip #4: Contour Your Lids with Eyeshadow

Regardless of the look you’re going for – from a natural look to a smokey eye – always define your crease by contouring your lid. You’ll add depth and definition to the eye by simply creating the illusion of a shadow in your crease. Start by taking an eyeshadow two to three shades deeper than your skin tone. Your bronzer shade will work perfectly. Pro tip: The secret is slowly building up the eyeshadow with a soft fluffy brush, using a back-and-forth motion.

All in all we look forward to seeing you at
The Lipstick Makeup Institute, give us a call anytime on
+971 (0) 528349964.

because we will welcome you with open arms. Bring your friends too. 

Also Feel free to ask any question on our official email or instagram

Basically we are one of the best celebrity makeup school in Dubai.

Although we soon launch our online portal as well. 

Hygiene Beauty Products

Hygiene Beauty Products We Should Never Share


In the same way that you wouldn’t lend to your toothbrush to anyone, you shouldn’t share certain beauty products. Our bodies and skin are rife with invisible bacteria and we can never be sure of someone’s level of hygiene. Despite your generous nature, it’s best not to share: Treatments in pots: The contents may be contaminated, as we use our fingers to apply them. Day cream, eyeshadow, lip gloss, body lotions… All of these come in pots or bottles and should be strictly kept for personal use. It’s important that you don’t increase the risk of adding bacteria to your products. So it’s wise to give your hands a thorough wash before dipping your fingers into your favourite products. And make sure you firmly close their lids to keep them better preserved.

Hygiene Beauty Products

Lipstick: Never lend your lipstick to someone – even if it’s your best friend!

Viruses and bacteria (herpes, thrush, cold sores) thrive in our mouths and are not visible to the naked eye. We can be carriers of certain illnesses without having symptoms, but that may not the same in your case!

So better to be safe than sorry and keep your lipstick under wraps. Ditto for lip gloss and balms.

Mascara: Our eye zone is incredibly sensitive and prone to infections including conjunctivitis, styes and orbital cellulitis. Even if your mascara wand looks clean when you take it out, don’t take any risks by sharing it with others! If you can’t bear to say “”no””, then opt for silicone mascara wands (as do pros), which are easy to clean. Eyeliner: As with all parts of the eye, the mucous membrane is particularly at risk of infection. So keep your eyeliner to yourself – its oily tip is a bacterial breeding ground! Compacts: It’s not the compact itself that’s risky, but rather the sponge, applicator or brush that comes with it. By sharing your powder, you’re also sharing germs.

Loose powder, compact foundations, bronzers should be for you and you only. Brushes: You’ll be okay if you wash your brushes – kabuki, blusher, bevel and fan brushes – after each use. If that’s not the case, don’t share them. Bacteria love them and their bristles! Nail files: As with nail clippers, these should not be doled out. When we give ourselves a manicure/pedicure, we dislodge bacteria and grime hidden under our nails.

Even if you keep them for personal use, it’s wise to wash and dry your hands before using them.

Nail varnish, however, is fine to share as bacteria aren’t capable of surviving in their bottles. The same goes for perfume (the alcohol content zaps bacteria), sprays (as we don’t touch them with our fingers) and pencils (which can be sharpened to get a clean surface).


However, Furthermore any inquiry feel free to contact

All in all we look forward to seeing you at
The Lipstick Makeup Institute, give us a call anytime on
+971 (0) 528349964.

because we will welcome you with open arms. Bring your friends too. 

Also Feel free to ask any question on our official email or instagram

Basically we are one of the best celebrity makeup school in Dubai.

Although we soon launch our online portal as well. 

Keep your party skin glowing all night

Keep your party skin glowing all night

Prep-up

The idea is to cleanse thoroughly before applying your make-up, so your complexion stays perfect for as long. Kick-off the process the day before, by drinking lots of non-alcoholic fluids. Drink plenty of water, tea, herbal or fruit infusions, and hydrate your skin with a suitable moisturizer. Before going to bed, apply a moisturizing mask with active ingredients that will deeply penetrate the skin. This Micro-essence contains Salicylic Acid which accelerates skin renewal & mildly exfoliates to refine pores & skin texture. It has a watery texture that easily absorbs in your skin and hydrates it from within. And on the big day itself, start with a very light scrub; that exfoliates your skin and makes it glow naturally. Apply an eye contour product to reduce puffy eyelids and bags, leaving you looking wide-eyed and fresh-faced.

Keep your party skin glowing all night

Keep your party skin glowing all night

Prepare The Base

Begin with a moisturizer to plump up the skin and boost circulation for a natural rosy look. Apply a make-up base (firming, if necessary) that will set your makeup, smooth out pores and eliminate signs of tiredness. A corrective base or primer will even out your skin tone: try a purple tint if your complexion is dull, or green if you need to reduce redness. Now you’re ready for foundation. You only need a small amount: the more you blend it in, the longer it will last. Make sure your foundation matches the colour of your neck; and your cleavage. And for a lasting effect, opt for a mattifying or high-definition product.

Apply The Right Make-up

To brighten the skin, apply an illuminator under the eyebrows, on the cheekbones, to the bridge of the nose and just above the chin. You can even gently shade under the cheekbones to highlight your bone structure. Top it off with a touch of blusher on the apples of the cheeks. Set your make-up by evenly applying a light coat of powder. And here’s a pro tip: mist your face, holding the spray 50cm away, to firmly fix your make-up.

Pair your glowing skin with an elegant shiny dress and make all head turns in your party all night long.

Above all now that you know the hacks to make your glow skin last longer.

However, Furthermore any inquiry feel free to contact

All in all we look forward to seeing you at
TheLipstick Makeup Institute, give us a call anytime on
+971 (0) 528349964.

because we will welcome you with open arms. Bring your friends too. 

Also Feel free to ask any question on our official email or instagram

Basically we are one of the best celebrity makeup school in Dubai.

Although we soon launch our online portal as well. 

However for any question feel free to get in touch

052 8349964

Makeup Tips

Makeup Tips


Quick Makeup Tips for Bridal Makeup on Oily Skin

You don’t have to give up makeup altogether just because you have oily skin. Knowing what compliments your skin type is important.Makeup Tips

These professional suggestions for applying makeup if you have an oily complexion come from a cosmetic professional and a
Lipstick Makeup Institute


You can check with your makeup artist on the following to see if they can accommodate them in your look.

Priming your skin is a must

Using a cosmetic primer will help your makeup remain in place if you have oily skin. We recommend a Oil Control Primer Or Pore Perfecting Primer. Apply it following a facial cleansing but before applying foundation, powder, or any other makeup.

 
Prepare your eyes
Eye Creases are one of the challenges for a nice eye makeup finish.
Use an eyelid-specific primer. This provided an ideal canvas for eye makeup and liner. Now you are ready to do any eye makeup.


Don’t use too much powder

Applying a lot of face powder seems like the appropriate move. But going too far could have the opposite effect by causing your pores to produce extra oil.
Only the shining portions should be covered with powder. Utilize a matte transparent product to reduce shine on all skin tones.
If you accidentally apply too much powder, dab it off with a moist makeup sponge.


Keep blotting sheets on hand

If you are prone to oiliness, your makeup will shine by lunchtime no matter how beautiful and matte it seems in the morning.
Some blotting papers only lift the oil from your skin.
Instead of rubbing the paper on your skin, the secret to using blotting papers without removing all of your makeup is to press it where your skin is oily and then roll it off.

Use non Comedogenic Products


After that invest in cosmetic items that are oil-free and noncomedogenic, which means they won’t clog your pores, because your skin already generates more oil than you need. Foundation and blush are two such products.

 
Generally use glycolic acid-infused face cleansers and toners as well, which reduce extra oil.


Try to find “long wear.” makeup.
Makeup may be made to smear, smudge, or slide by using water or oil. Stick to eye products that are waterproof, water-resistant, or long-wearing for this reason.


Consider soft, not slick, skin

When it comes to morning usage, gentler moisturizers that hydrate without being oily are preferable to those thick anti-aging treatments. A serum could be used. It is often lighter.


Remember to use sunscreen;
Chemical Sunscreens based out of avobenzone are a great pick as they dont give white cast, ideal for a makeup layer above this.

Also each skin type is distinct and has its own advantages and disadvantages.

So picking the finest makeup for an oily face and properly preparing the skin are the keys to getting your oily skin to stay covered by makeup. Use cosmetics that will limit the production of oil on your skin rather than drying ones. Using the tips and suggestions in this article, you may properly prepare your skin so that your makeup will last all day. So give them a try we’re confident your skin will thank you..

Further More Enrol Now

All in all you get the professional portfolio and work with us on our clients.

Because we are best

Thinking of start your career? Call us today on 052 834 9964 email our team or check out more details The Lipstick Makeup Institute

Boost your career Lipstick Makeup Institute

Join Now  Celebrity Makeup School.


Choose Your Foundations

Choose Your Foundations

Choose Your Foundations For The Best Results This Season

Best ways to enhance your foundation to the season!


The foundation must be changed from season to season. Is it conceivable? The most straightforward response is no. However, the foundation you use in the winter is inappropriate for the season. It is preferable to have at least two distinct foundations for extreme cold and hot temperatures. Combining them will get the greatest results. .


The base is simple to match from season to season. If you’re looking for a solution to the question, “How can I alter my foundation from season to season?” you’ve come to the correct spot. Simply reading this post will provide you with the answers.


Make the base more watery


The most difficult challenge you confront is regulating moisture in your skin on sunny days. It is simple to incorporate a moisture-promoting chemical into the foundation.

To the foundation, add a few drops of your preferred moisturizer. You now have a foundation with a moisturizing and dewy finish. In chilly weather, the diluted moisture helps moisturize the skin.


Diluting foundation with moisturizer will allow your natural skin tone to shine through. In the summer, you may dilute the foundation with SPF. As a result, it will shield the skin from harmful UV rays.


Modify the application technique


To apply foundation, most individuals use their fingers, a sponge, or a brush. During a season change, there is a modest alteration in skin tone among sunscreen users. If you normally apply foundation with a brush, experiment with using your fingers. It only need a tiny amount of product. To blend out the foundation, use a wet sponge.


Choose your foundation
 

Using a little bit of foundation


The fashion industry is gravitating toward the no-makeup look. As a result, you must load on the foundation. When applying foundation, you may concentrate on the areas that need to be evened out. As a result, having a great appearance will be simple for you. It will also keep too many things off our shelves.


Choose Your Foundations & combine two colors of Foundations


Blend the foundation with a deeper color. Always remember that a darker foundation must be applied after a lighter one. Newer techniques combine two foundations of the same colour. After that combine the bright and dark foundations. It will provide you with a precise and superior foundation appearance while also improving your complexion.


Combine the foundation and bronzer


To make the light foundation more intense, combine it with some bronzer. It will provide the appearance of being sun-kissed while also deepening the shade. By applying it over the nose, chin, forehead, as well as cheeks, you can get a bronzer appearance for the entire face.


Conclusion


Foundations offers us a nice appearance. However, you must exercise caution while finding the best match for your skin tone. When applying foundation, it is critical to consider both your skin tone and undertone. You now understand how to alter your foundation from season to season.


Follow the ideas above to improve your appearance. Makeup generally not only includes only your face but also your hair, without proper hairdressing makeup will not finish. At last if you want a good hair course opt a hairdressing training at Lipstick Makeup Institute.

Choose Your Foundations

All in all Join Lipstick Makeup Institute 

Learn from professional makeup educators

Contact us 

052 834 9964