Category Archives: Uncategorized

How to behave on a makeup appointment

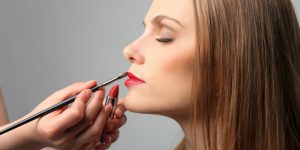
Maryland-makeup-artist-dc-kelley-unthank-weddings

I think this topic is a big question all the time!

First of all we make up artists are human beings like you clients.

We have feelings like anyone else and also like respect and appreciation.

We are not plastic surgeons and robots!

Why I’m telling this?

Because most of the clients are not clear with the realistic expectations.

What makeup can do and what not?

Lets clear up why are we using makeup?

We are talking about classical glamorous looks.

We are applying makeup to enhance the natural beauty of the face and correct the imperfections!

Thats it easy and simple.

The makeup will not make you look like Kim Kardashian or Jennifer Lopez or who ever….

You don’t want to hide behind a mask created of foundation.

And of course much more!!

Unfortunately nowadays we are facing these unrealistic expectations. And what will happen at the end you will get a “bad makeup artist” reputation because you can’t make a Kim from everyone.

Well  ladies just to inform you this is not working like that.

First of all you need to be clear with yourself what is possible to bring out from your face and what not.

You don’t know it?

Thats why we are here … the professional makeup artists!

Lets start with some tips how to behave on a makeup appointment:

  1. You know that you are going for a makeup appointment so PLEASE DONT WEAR MAKEUP! And now you’re asking why? All of us want happy clients happy client equals happy makeup artist! The makeup will be perfect on a clean face and thats why there is no point of applying makeup for the makeup appointment. Anyway the makeup artist will clean up your  face and of course the mascara is a nightmare to clean up and after reapplying again. So make our lives easier and come with clean and moisturised face for your appointment.

2. Research your artists work before you book an appointment!As i said before we are all human beings with feelings. Bad comments and judging before even starting the makeup on your face is really painful for us! As for anyone else. If you know the artists work and you book an appointment with her or him you can be sure that you are in good hands and you dont have to judge or question every single move what she or he is doing!

3. Don’t be late!

If you are booked in at 2pm please be there at 2pm. Not 1.45 or 2.30 or other time. We are working on time…and time is a very precious thing. Being late is not a condition its a choice. All of us we know the conditions of the traffic, time, etc… so be prepared and be on time please!

4. Give time for the makeup

You are late and now you are rushing your artist to do a magic on your face for 15 minutes. Im really sorry ladies but this doesn’t work like this. A good work needs time. If you know that you will require a glamorous and complicated makeup don’t expect to be ready in 15 minutes!

5. Don’t judge the makeup from a foundation! The makeup in process can’t be judge. All of us, artists we have a different style of application. What you do at home in your bathroom, or watching you tube videos is one thing. The other is when you go to a professional and she or he will do your makeup. It will look different and its absolutely normal!

6. When we say close your eyes that means close it and don’t open till we say open. Opening your eyes can destroy the texture of the eyeshadows especially if we are working with Aqua (watercolours). So please follow the instructions of the artist. We know exactly what we are doing!

7. Trust  your artist

In my opinion this is one of the most important factors in this relationship. Without trust you will destroy the artists life and experience, as well as yours also. No one wants to leave the makeup appointment with bad feeling, terrible experience and even tears in eyes.

To avoid this discuss with your artist the desired look, the occasion, dress, style everything so there won’t be any misunderstanding and disappointment.

8. Relax and enjoy

The makeup application should be a nice and relaxing experience.

All you need to do is to sit, relax and enjoy. The rest is on us!

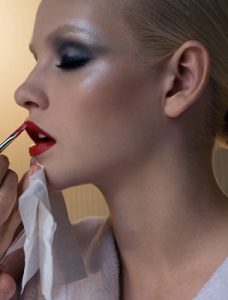
Makeup-Blog-Makeup-Hygiene-No-nos-Career-As-a-Makeup-Artist-Applying-Lipstick-with-Makeup-Brush

9. You asked for the price. And you got it.

The following question: No discount? or What is your last price?

Dear ladies that makeup artist paid for her studies, paid so much money for her makeup set and brushes. Energy, time and experience.

All this and most of the time we are talking about discounts and last price.

Please respect our work and effort! We are working hard to make you look the best as you can. Asking for discounts all the time and saving money on the makeup makes our work less important and not respected.

10. We often hear this: “Ahh its just makeup i will do mine ”

or

“Why is it so expensive i just want a simple makeup?”

To answer the first question:

Whatever you do, wherever you go the first thing you will check on the others is THE FACE!

Not the dress, shoes, accessories, hair etc… but THE Face!

When you talk to the people they will look at your face as they are talking to you… not to your dress or hair!

On your wedding you are the center of attention so you want to make sure that you look absolutely perfect! So start from your face with a perfect MAKE Up!

The answer to the second question is doesn’t matter how simple makeup you want it still takes all the steps…foundation, corrector, concealer, powder, eyebrows, eye shadows, mascara, blusher and lipstick. The difference is between the application technique and intensity in colours, but we are still using the same products and doing the same steps. So thats why you are paying the much money even its a simple look.

11. Using mobile phones while you are getting your makeup done

Absolutely no! Everyone can live without a phone for maximum 1 hour. Using phones, taking selfies while doing the makeup is not only annoying for the artist but makes our job really difficult.

Let us do our job and after the makeup you can take really good selfies with your beautiful makeup  on!

No OFFENCE to anyone… this is just the 17 years experience and the every day happening in this makeup artist life.

These are just simple tips how make our lives easier and to make sure both sides are happy and satisfied.


Backstage-Beauty-10-Best-Makeup-Tips-Weve-Heard

Do’s and don’t in daytime makeup


Hi everyone!Here we are again to teach you on what is the best do wear and not in daytime makeup.

Do’s

*do use a foundation that matches your skin tone exactly

*do softer colour for the lower lash line.Lining all the way around   your eye in blacks an extreme look that’s best saved for nighttime.

*do use matte eyeshadows

*soft peachy and soft orange shade blusher

*dry contouring

*light fresh color lipstick


b5851a7b7201dea6bac7fa36aa1dd50b

bright_makeup_for_fall-400x400

Don’t

*no to heavy eyeliner

*no to dark Eyeliner

*no to dark lipstick

*not too much contouring

*no to dark mascara

*dark and bold eyebrows


TIP: Keep it simple and less and more.

Thanks for reading the topic for today

See you tomorrow and we will talk about on how to do makeup in 10 minute daytime look.


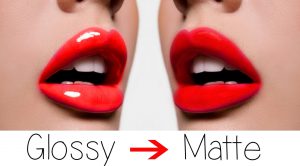
About Matte lips

Glossy VS Matte

maxresdefault-3

Yesterday we were talking about the luscious, glossy lips.

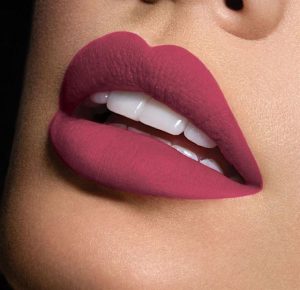
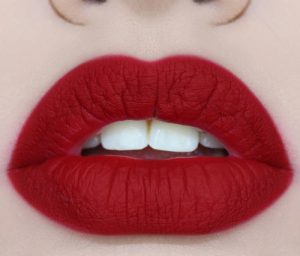
Todays topic is The Velvety Matte Lips.

MATTE-LIPS

The matte lips can be tricky.

Why?

Because if your lips are dry and cracked the matte lipstick will look really bad and cheap.

The same rules are on when you are prepping the lips for the matte lipstick.

  1. use a scrub to remove the dead skin
  2. lip balm or vaseline is a must
  3. remove the lip balm and make sure your lips are product free
  4. apply a bit of concealer to make sure your lipstick will last all night long
  5. apply lipliner! Its essential, because it defines the lips, you can be more precise and making your lipstick long lasting.
  6. fill up the lips with your matte lipstick. Use a lip brush in this case you will be more precise with lines and the lipstick will look rich and full. Also the lipstick will last  more longer. Do long and clean strokes with your lip brush. The texture of the matte lipsticks are more dry then the creamy ones its obvious because of the matte finish. We can suggest you the new Kryolan Matte Lipsticks. They are giving you the perfect matte velvety finish but at the same time the texture is not so dry.

Now its time to get on practicing.

The more you practice the better you will be in application the right lipstick colour and your lips will be perfectly defined.

lipstick-make-up

Thank you guys in tuning in!

Tomorrow we will talk about ombre lips stay with us to know more tips and tricks!

Lipstick do’s and don’t


Lipstick is an essential part of almost every woman’s daily makeup routine. However, many women shy away from the red tones they find in the cosmetic aisle. Fortunately, you can pull off those brave shades with a little lipstick know-how. Here are ten dos and don’ts of wearing red lipstick:


images-1


1. WEAR DARKER FOUNDATION.

If you’re going to go bold with your lip color, you’ve got to have a complementary backdrop for your face. For those with lighter skin tones, it’s a good idea to choose foundations that will provide darker, olive bases. Red lips can be too much of a contrast against pale skin. The darker your lips are, the darker your foundation should be.

2.DON’T BE AFRAID TO BLEND COLOURS.

Do you like the look of red lipstick, but think it might be too loud for you? There’s an easy solution: customize your shade. Simply take a lighter hue like coral or mauve and blend it with that rose or burgundy you’ve been eyeing. The result will be a more muted tone that nearly anyone will be comfortable wearing.

3. USE IT FOR THE RIGHT OCCASION.

While everyone loves red, luscious lips, the look isn’t appropriate for every social situation. Some of the deeper shades can be a little jarring to people you run into at the gym or the kids’ soccer game. Likewise, you want everyone to be listening to your business proposal at that morning office meeting, not staring at your lips. Only paint your kisser red when you know you’re dealing with a fun, playful atmosphere, such as a night out with the girls. Then, you’ll be one step ahead in painting the town red!

4. DON’T OVER DO IT.

If you want to avoid all the lipstick smudges and stains, you can start by only applying a light coating to your lips. This is especially important for red lipstick since it’s easier to spot on teeth and collars. Rolling once or twice around your lips should be sufficient to achieve the desired effect. For even more control of your coverage, spread the lipstick using a lip brush. Just remember that a little dab will do you.


_MG_4759


Thank you! for your time on reading the tips and tricks for today!

Tomorrow we will talk about the lipgloss when and where to wear it!


How to make your lipstick stay for long hours


Hi everyone today we will talk about on how to make your lipstick stay for long hours.

Rocking red lips is the fastest way to look glam and festive for the holidays. But with so many yummy treats to snack on and maybe a few smooches under the mistletoe, that red lipstick could end up everywhere but your lips if you’re not careful. To avoid clown mouth, follow these super-easy steps to keep your lipstick where it belongs—on your gorgeous pout!


IMG_4248c


1. Exfoliate. Scrub your lips with the rest of your face while you’re in the shower in the morning. A gentle exfoliator will smooth over the flakes that come with winter’s chapped lips.

2. Moisturize. With the temperatures dropping faster than you can say “pumpkin spice latté,” moisturizing everything, including your lips is key. Stock up on a long-lasting chapstick to keep your pucker from getting chapped and use it before applying lipstick to help it go on smoothly.

3. Prime & Line. Use an easy-to-apply lip primer to set the stage for the bold color. Once it’s absorbed, outline you lips in a liner that’s the same shade of your natural lip color.

4. Add Your Red. Apply your red lipstick of choice in two swipes. Blot a couple times on a tissue and repeat with another swipe of lipstick, followed by another blot. Do this until you score your desired color strength.

5. Set with Powder. You heard us, powder—on your lips. A light, transulescent powder will help keep the color in place even after you enjoy a huge mug of hot chocolate!

 Tips

  • Always make sure that your lip liner is freshly sharpened so that you’re not transferring any bacteria from it onto your lips.
  • If you want a special touch, just add lip gloss in the center of your lips to create a bright glossy effect.
  • Blotting excess moisturizer prevents lipstick from sliding off.
  • It is a good idea to use a nude lip liner since it goes with most lipsticks and doesn’t create a harsh line.
  • It might sound a tad radical but throwing your make-up pencil sharpener in the dishwasher or washing by hand can also be very efficacious in removing bacteria. If you have a twist-up pencil it never hurts to break off the tip and wipe with alcohol before using.


Tomorrow we will talk about the proper way to apply lipliner

Hope to see you again tomorrow!


Our lovely Successful Student from Silver Media Make Up Course.

Another beautiful souland successful student  has just  passed  through, “The Lipstick Makeup Institute” has successfully fulfilled her course and departed armed with knowledge and  skills that will see her through her next phase of life as a successful make up artist.

Our lovely Tatiana was graceful enough to have chosen Lipstick to educate her and fuel her with the knowledge that she will only get from educators who really understand their field.

In this industry there are a lot of so called , “Make Up artists” out there who don’t know anything! That isn’t me just trying to make out that we are better than anyone else I am just stating a fact.

Tatiana just finished , The Silver Media Make Up course.

Here is the description of the Course, if you are interested.

Silver Make Up Course (5 days 30 hours)

Creative make up course:

  1. Fantasy make up
  2. Avant-garde make up
  3. Special visuals make up
  4. Face (body) painting make up
  5. Stage make up

 What the students get:

A course booklet which provides step to step guides

Professional set of brushes to use whislt on the course

All make up will be provided by the school

Set of products worth AED500

Opportunity to work with professional models

The rare chance to work in a professional operating studio

Working with professional photographers

3 professional photo of the students work

After completing the course our students are entitled for huge discounts with different brands

            International Certificate

The Silver make up course is for a make up artist who wants to improve its skills in the creative make up field.

Previous knowledge in make up is required.

Just take a look at Tatiana’s final Portfolio she left the course with as all students leave with professional images taken by our sister company, YH Studios DXB

_MG_0082e _MG_0952e _MG_1951e

So if you want a Porfolio like this and the best training you could possibly have then contact us. We would would so glad and proud to have you come and join us.


More about choosing the correct Blusher for your skin tone. (part 2)

Continue reading More about choosing the correct Blusher for your skin tone. (part 2)

Blusher application and the right colour for you

Hi guys welcome back. Yesterday we talked about False Lashes!


Today we talk about blushes!


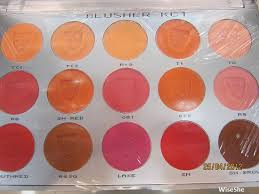
We have all seen those people that were far too much blusher and look a bit like a clown. This often causes many of us to stay away from blusher and not use it for fear of looking like a fool. The aim of this article is to explain the benefits of using blusher and how to apply it to get the right effect.

When Blusher is used correctly it will add a natural glow to the skin as well as adding contours to the face. It is a great tool and should appear in any woman’s makeup bag.

What Type of Blusher?

When looking for blusher you will find you can get it as a powder, cream of even a gel. They all have different qualities and it is a good idea to pick one that you feel comfortable using. The creams and gels will stay on the longest but the powders will come with more choice of colour. Powder must be applied over foundation whereas other types can be applied on bare skin.

What Colour should You Choose?

When choosing the colour of your blusher, you should first consider your skin tone and then, the look that you want to achieve. Now let’s consider the types of colours and how they work.

Cool colours – These are colours that tend to have a blue undertone and will add freshness and a healthy glow to your face. For light skin go for a pink and a plum or similar will work for darker skin. If you are wearing a brown or orangey lipstick don’t use a cool colour for your blusher.

Warm Colours – These will normally have orange undertones and they work best for contouring the cheeks and adding definition to the face. If you have a light complexion then you should think about using a light apricot whereas a burnt orange may be better for those with darker skin. Don’t use a warm blusher if you are going to wear a cool lipstick or a lip colour that has a blue undertone.

Universal Colours – These are those shades that generally come in between the cool and warm colours. The advantage of these is that they suit everyone and go with any share of lipstick. For light skin you are best to go with a peach, for medium skin rosewood works well and red is best for darker skin.

Natural Colours – These are the neutral beiges and browns. These have very little red in them and are best used as a bronzer rather than a blusher and can in fact be use alongside your usual blusher.

Unknown-3


TIP for the day:If you were at all worried about blusher you should not be now. Experiment, try different colours, just remember that blusher should be subtle and look natural

Stay with us tomorrow as we will share some awesome tips about your makeup steps and how to do them in a right way. This will save you some time and money of course!

Don’t miss it!


IMG_8457email

_MG_4946

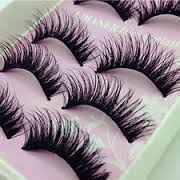
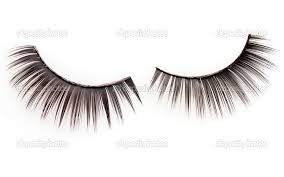
All about false lashes and how to apply it

12605495_1751012468451004_8182255944933402758_o
 1
 Size the lashes. Before gluing the lashes on, you will need to make sure they are not too wide for your eye. Hold the lash strips up against your eyelid, and trim them down on the sides if necessary.
  • If the lashes are too long for your personal taste, consider trimming the individual lashes down to achieve a more natural look. Lashes should be longer toward the outer corner of the eye

2

Apply the lash glue to the outer seam of the eyelash strip with an applicator or small brush. Allow the glue to dry for a moment before applying it to your lashes.

  • Alternatively, you can squeeze a thin line of lash glue onto the back of your non-dominant hand. Then, gently run the outer seam of the eyelash strip along it.
3
Place the strip on your eyelid, positioning it as close as possible to your natural lashes. Bring the strip down from above, not from the front. This is to ensure that you get as close as possible to your lashline.[1]
4
Allow the glue to dry naturally. Once the strip is in place, you do not need to press or hold it.
5
Apply mascara to your lashes. This will help blend your natural lashes with the false ones, achieving a more natural look. You can use black, brown, or dark gray mascara.
6
Apply liquid eyeliner along your upper lids. Be sure to fill in any gaps between the false lashes and your own to make them look more natural. Use black, brown, or dark gray liner.
7
Use makeup remover to remove false lashes. Dip a q-tip in eye makeup remover and gently rub it along your lash line. Allow the remover to sit for a minute, and gently pull off the strip.
images-2
images-1

Thats all for today my ladies!

Tomorrow will learn about blusher application

Don’t miss it!

Perfect Smokey Eyes look part 2

Your smokey eye style makeup is comprised of a collection of different looks you create. Each element of makeup is characterised by its colour, finish, and performance. If your makeup is chosen correctly and your looks are skilfully combined, you are a woman with makeup sense.

The application


Smoky eyes application 1

Outline your eye contour with a black eye pencil, all the way around. Make the line thicker along the upper lashes.

Smoky eyes application 2

With a brush or a sponge applicator, apply your base colour eyeshadow on the mobile eyelid and above the crease, about halfway to the eyebrows, blending slightly.

Smoky eyes application 3

With a pointy sponge applicator, apply contour colour eyeshadow all the way around your eyes, blending it well with the pencil line.

Smoky eyes application 4

Half-close your eyes and apply contour colour in the crease.

Smoky eyes application 5

You will now need to define the outside corners of your eyes using a horizontal “V” shape. The position of the pointy end of the “V” will control the apparent shape of your eyes.

Smoky eyes application 6

With a medium-sized soft round brush (you can also use a flat one, holding it sideways), blend the eyeshadows on the upper eyelid. With a flat brush, blend the eyeshadows on the lower eyelid.

Repeat your contour colour application with a sponge, as many times as needed to achieve a deep shade. Blend again with brushes after every application.

Apply highlight colour eyeshadow or facial powder under your eyebrows to ease the blending of the dark contour and add some volume to your eye makeup.

For an irresistible deep regard, outline the inside contour of your eyes with eye pencil. Use darker-than-usual eyebrows and lots of mascara to finish the look. Your eyes should now be smokier then ever before!

To keep your bright eye makeup in balance, try a stronger blush, and keep your lips pale with a light gloss application.


Don’t forget the perfect smokey eyes are all about blending and practice.

Smokey Eye
Smokey Eyes

See you all tomorrow as we discuss about Lipsticks and will give you amazing tips how to get perfect lips by applying the lipstick in a correct way