Tag Archives: blending

Another Successful Make Up Student

We are always so proud that students travel across the globe to choose our make up institute over any other to to teach them the skills that they need to advance them into the world of Make Up.


I am always flattered when I ask them, How did you find us”? and they say that they google, “Make Up Schools in Dubai” and they looked at what all the schools had to offer and they like the look of our website, our testimonials, the work that we do and they see what the students are achieving and we are far ahead of any other make up institute. It means that we have done our job well.


The reason that we achieved this is because we opened the make up Institute because we are passionate about it and this is the most apparent attribute and this is clear for anyone to see.


Its not just a business but its our life and we just love it. 


I am not just saying it but our students feel at home here and get really sad when their courses are over as we do. Once you leave the Institute we don’t forget you though. We keep in touch with our students and try to involve them in our Fashion Shows and any event we can. We really do care about our students. They become a part of  our small family here.


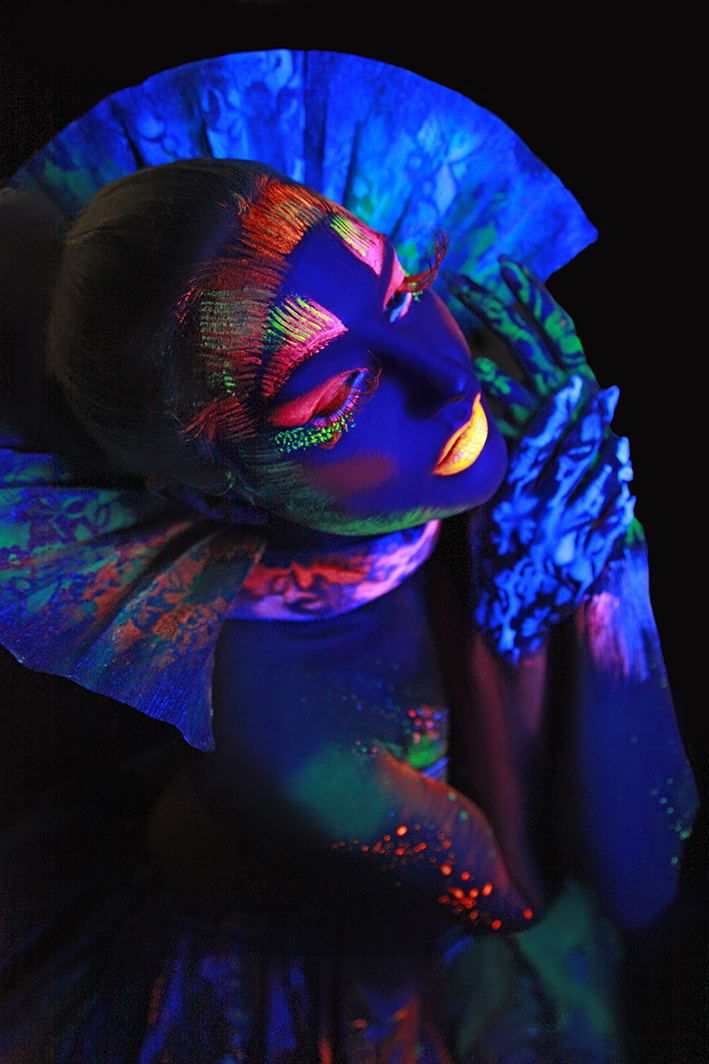
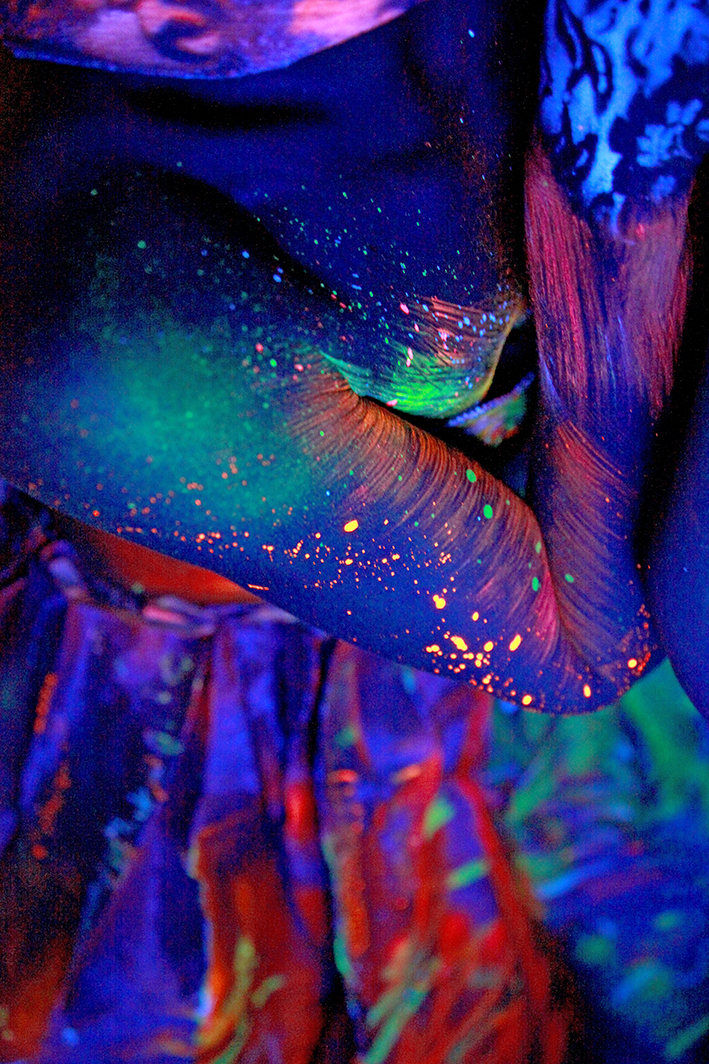
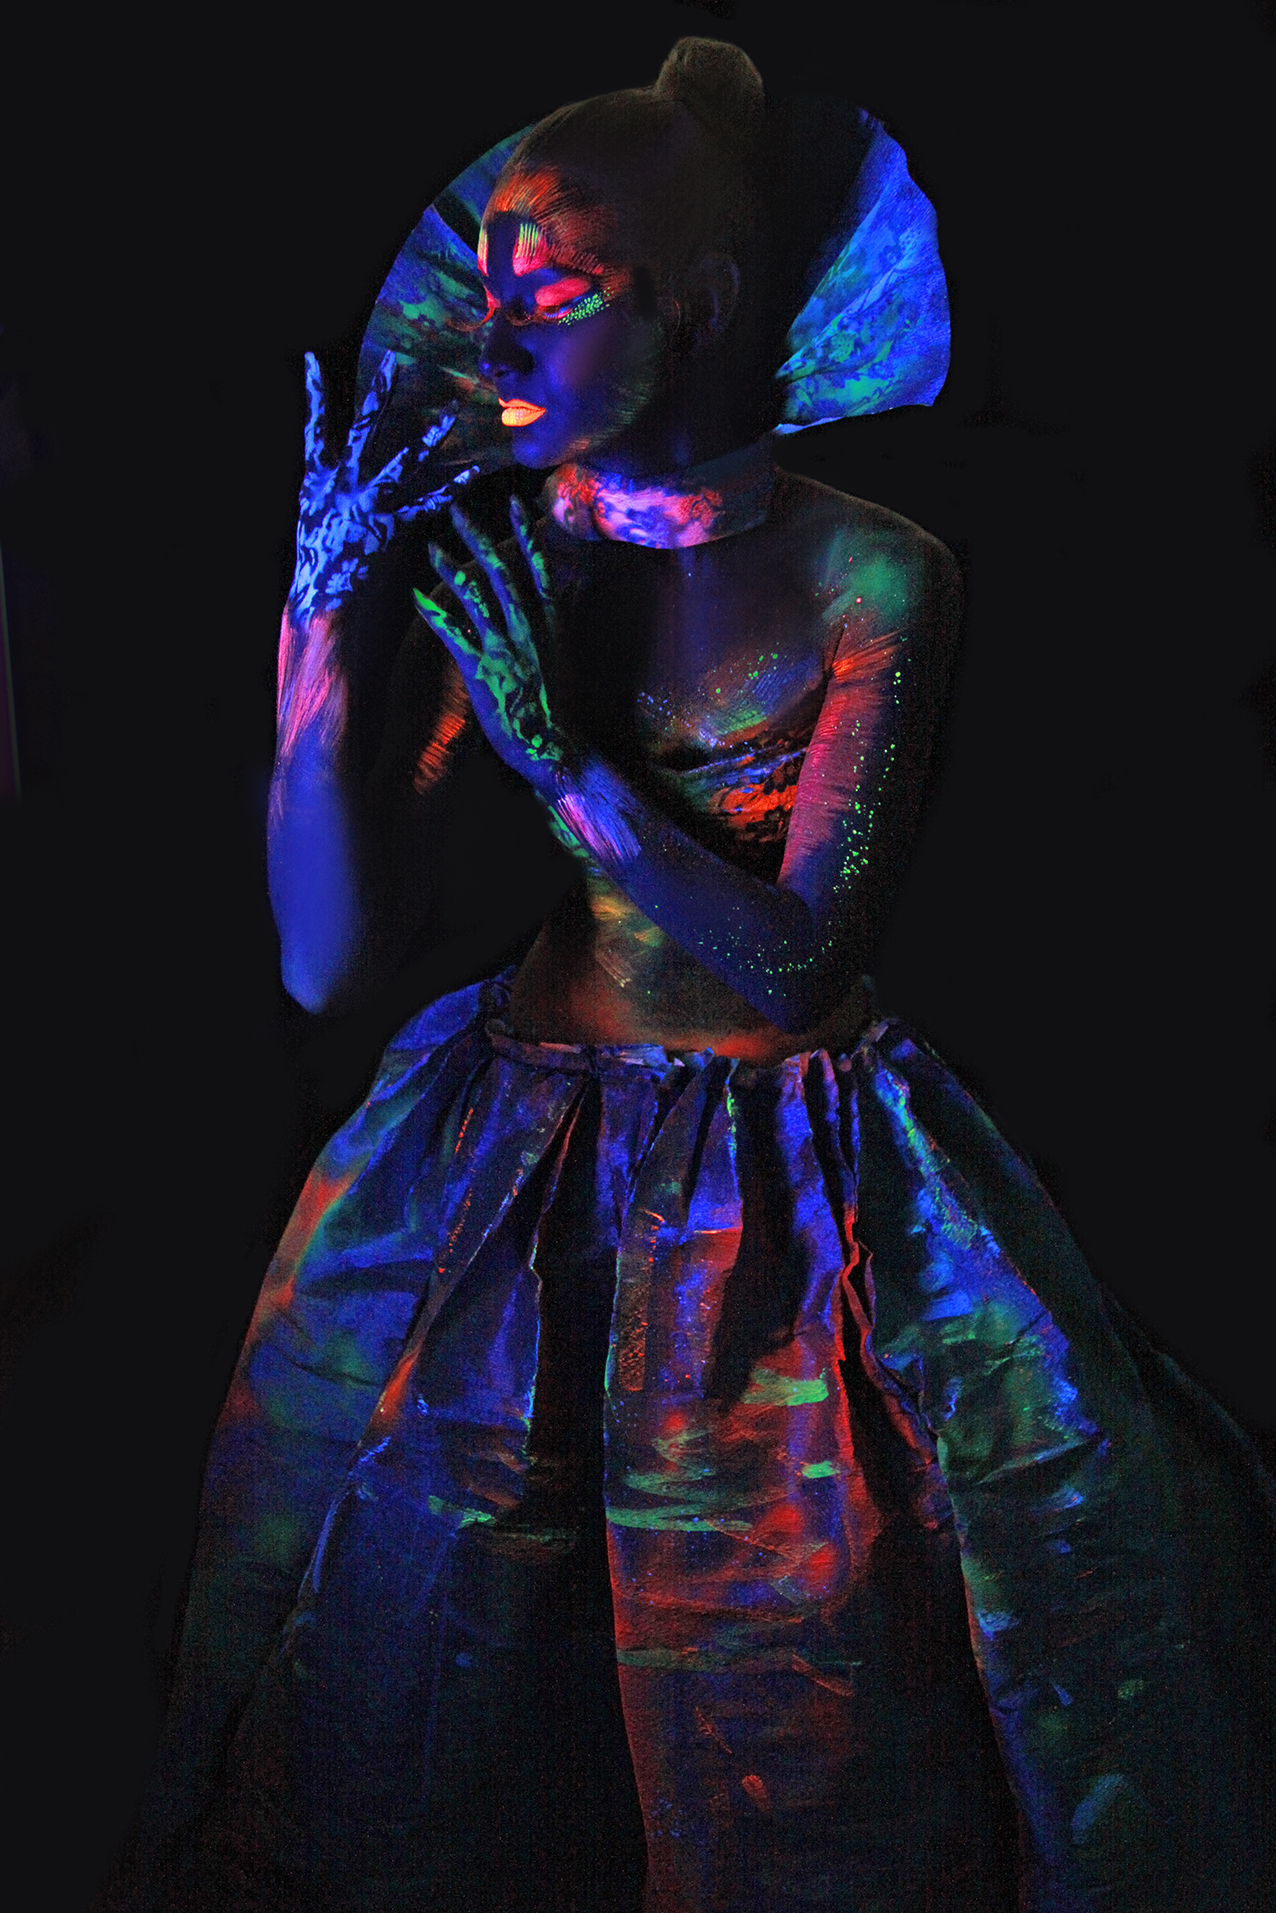
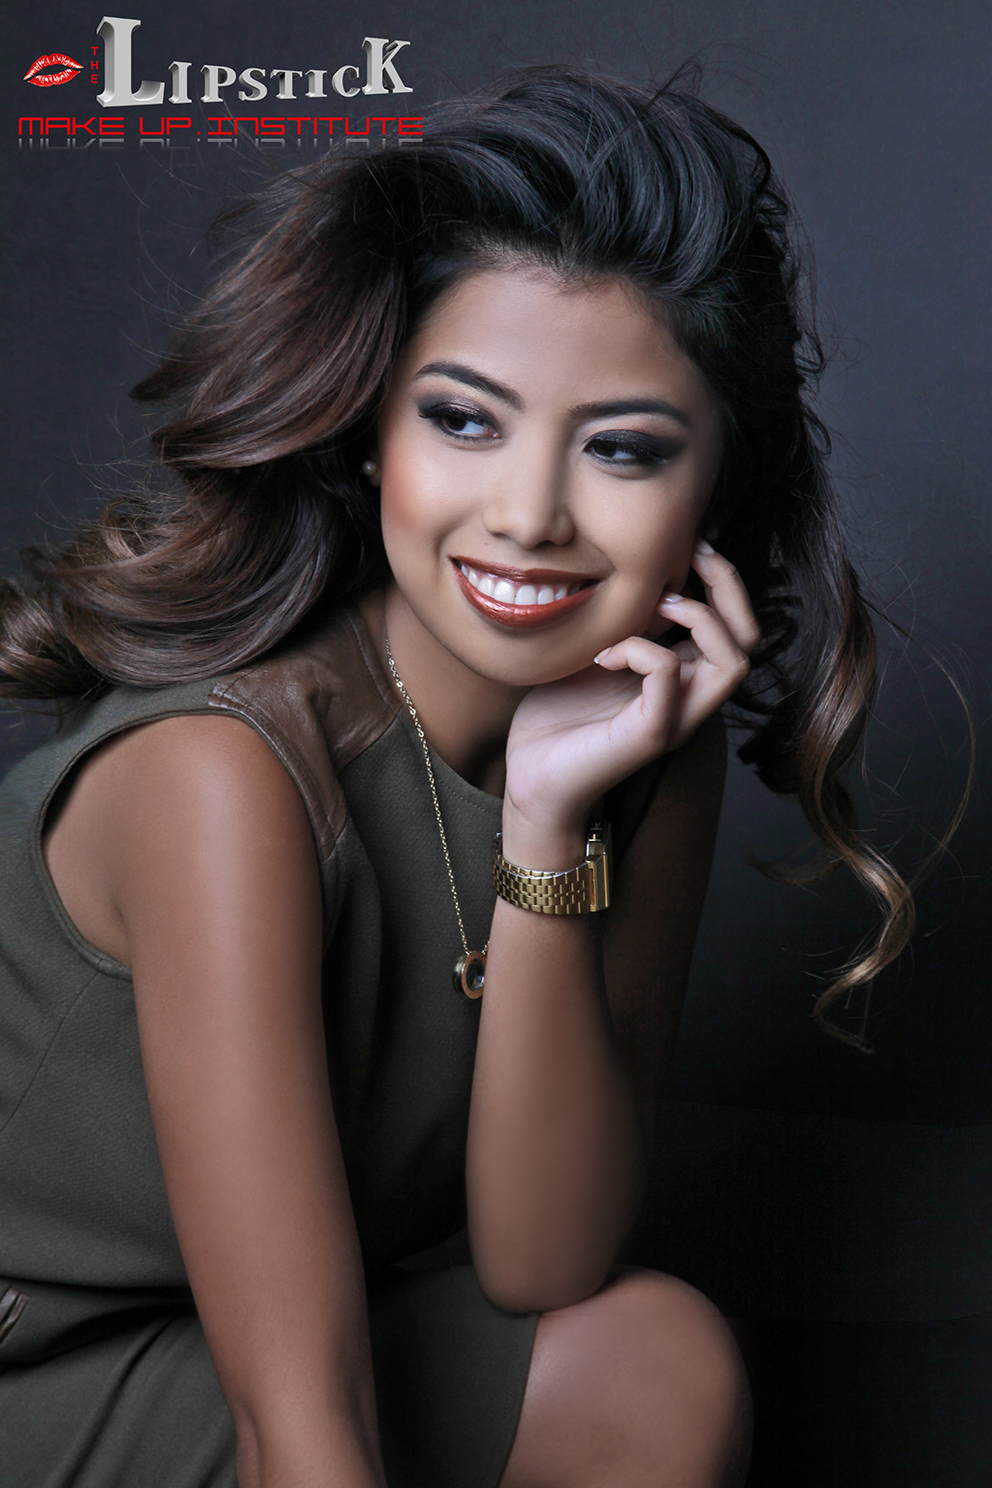
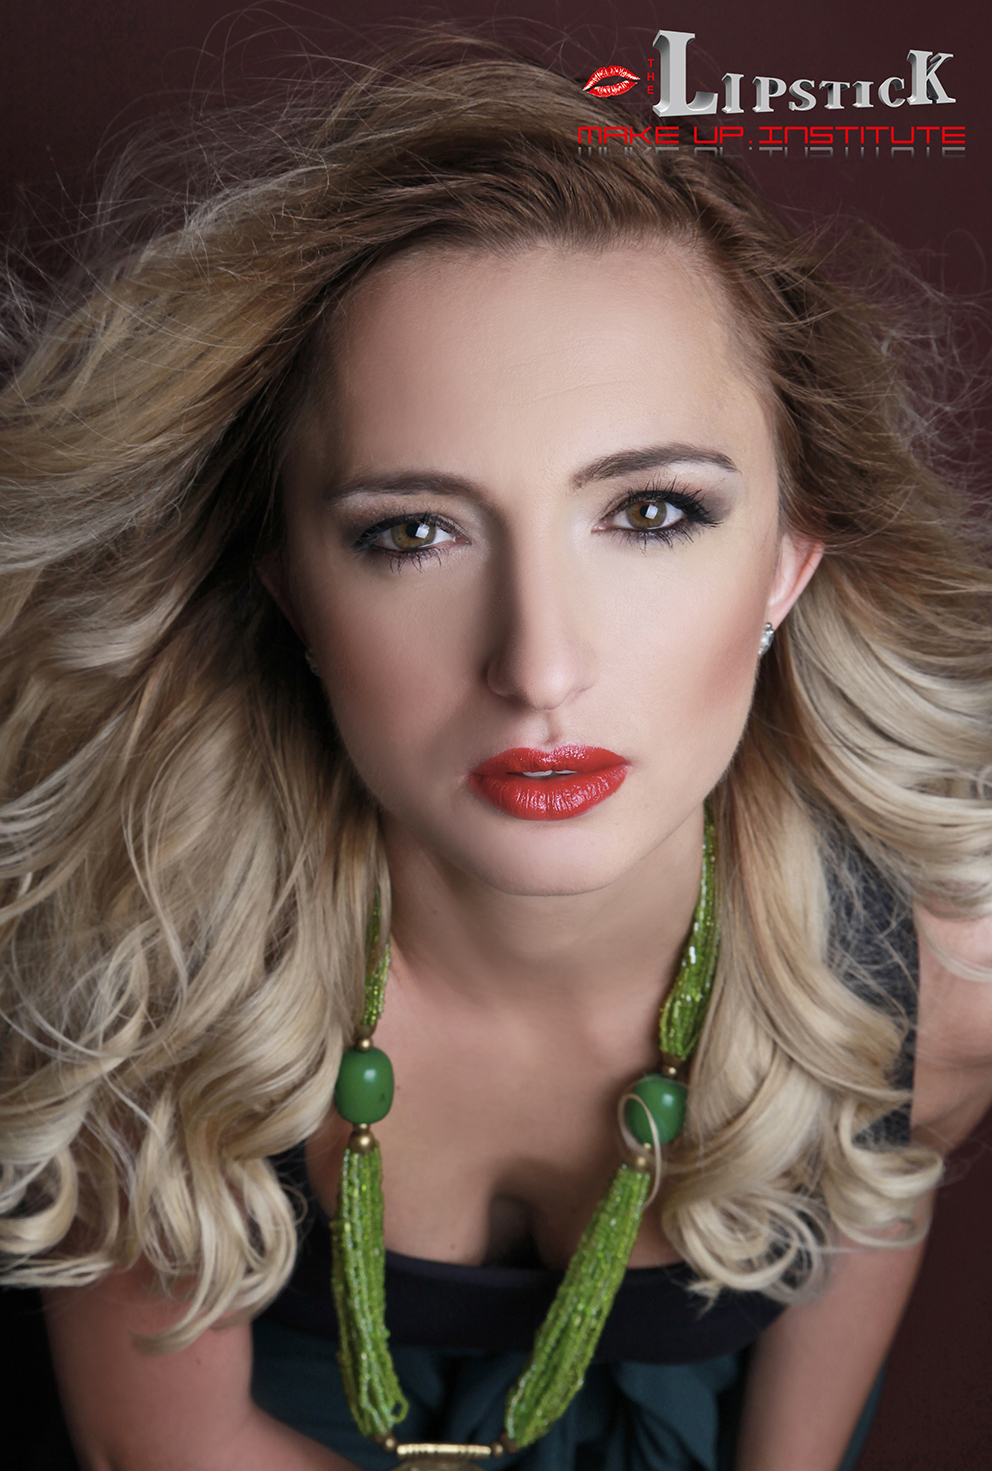
The other great attribute that puts Our Make up institute better than any other in Dubai is that we have a sister company, YH Studios DXB and all our students get professional images for their portfolio, how many depends on what course they have chosen


This is such a great advantage for the students to have such images in their portfolio as believe e when i tell you that I have interviewed over 60 make Up Artists and no one! has any professional images. I advertised for a “teacher” and one applicant sent me face cards, I couldn’t understand this at all. I asked her that all the years she claims to be a make up artist and have taught for so may years yet she send me , Face Charts. Unreal.


I know how important it is to have a portfolio and a  diary of your achievements. I have been a photographer for 28 years so I really do know the value of a portfolio and thats why when we were  comprising the courses it was imperative that we incorporated professional photographs for the students portfolios.


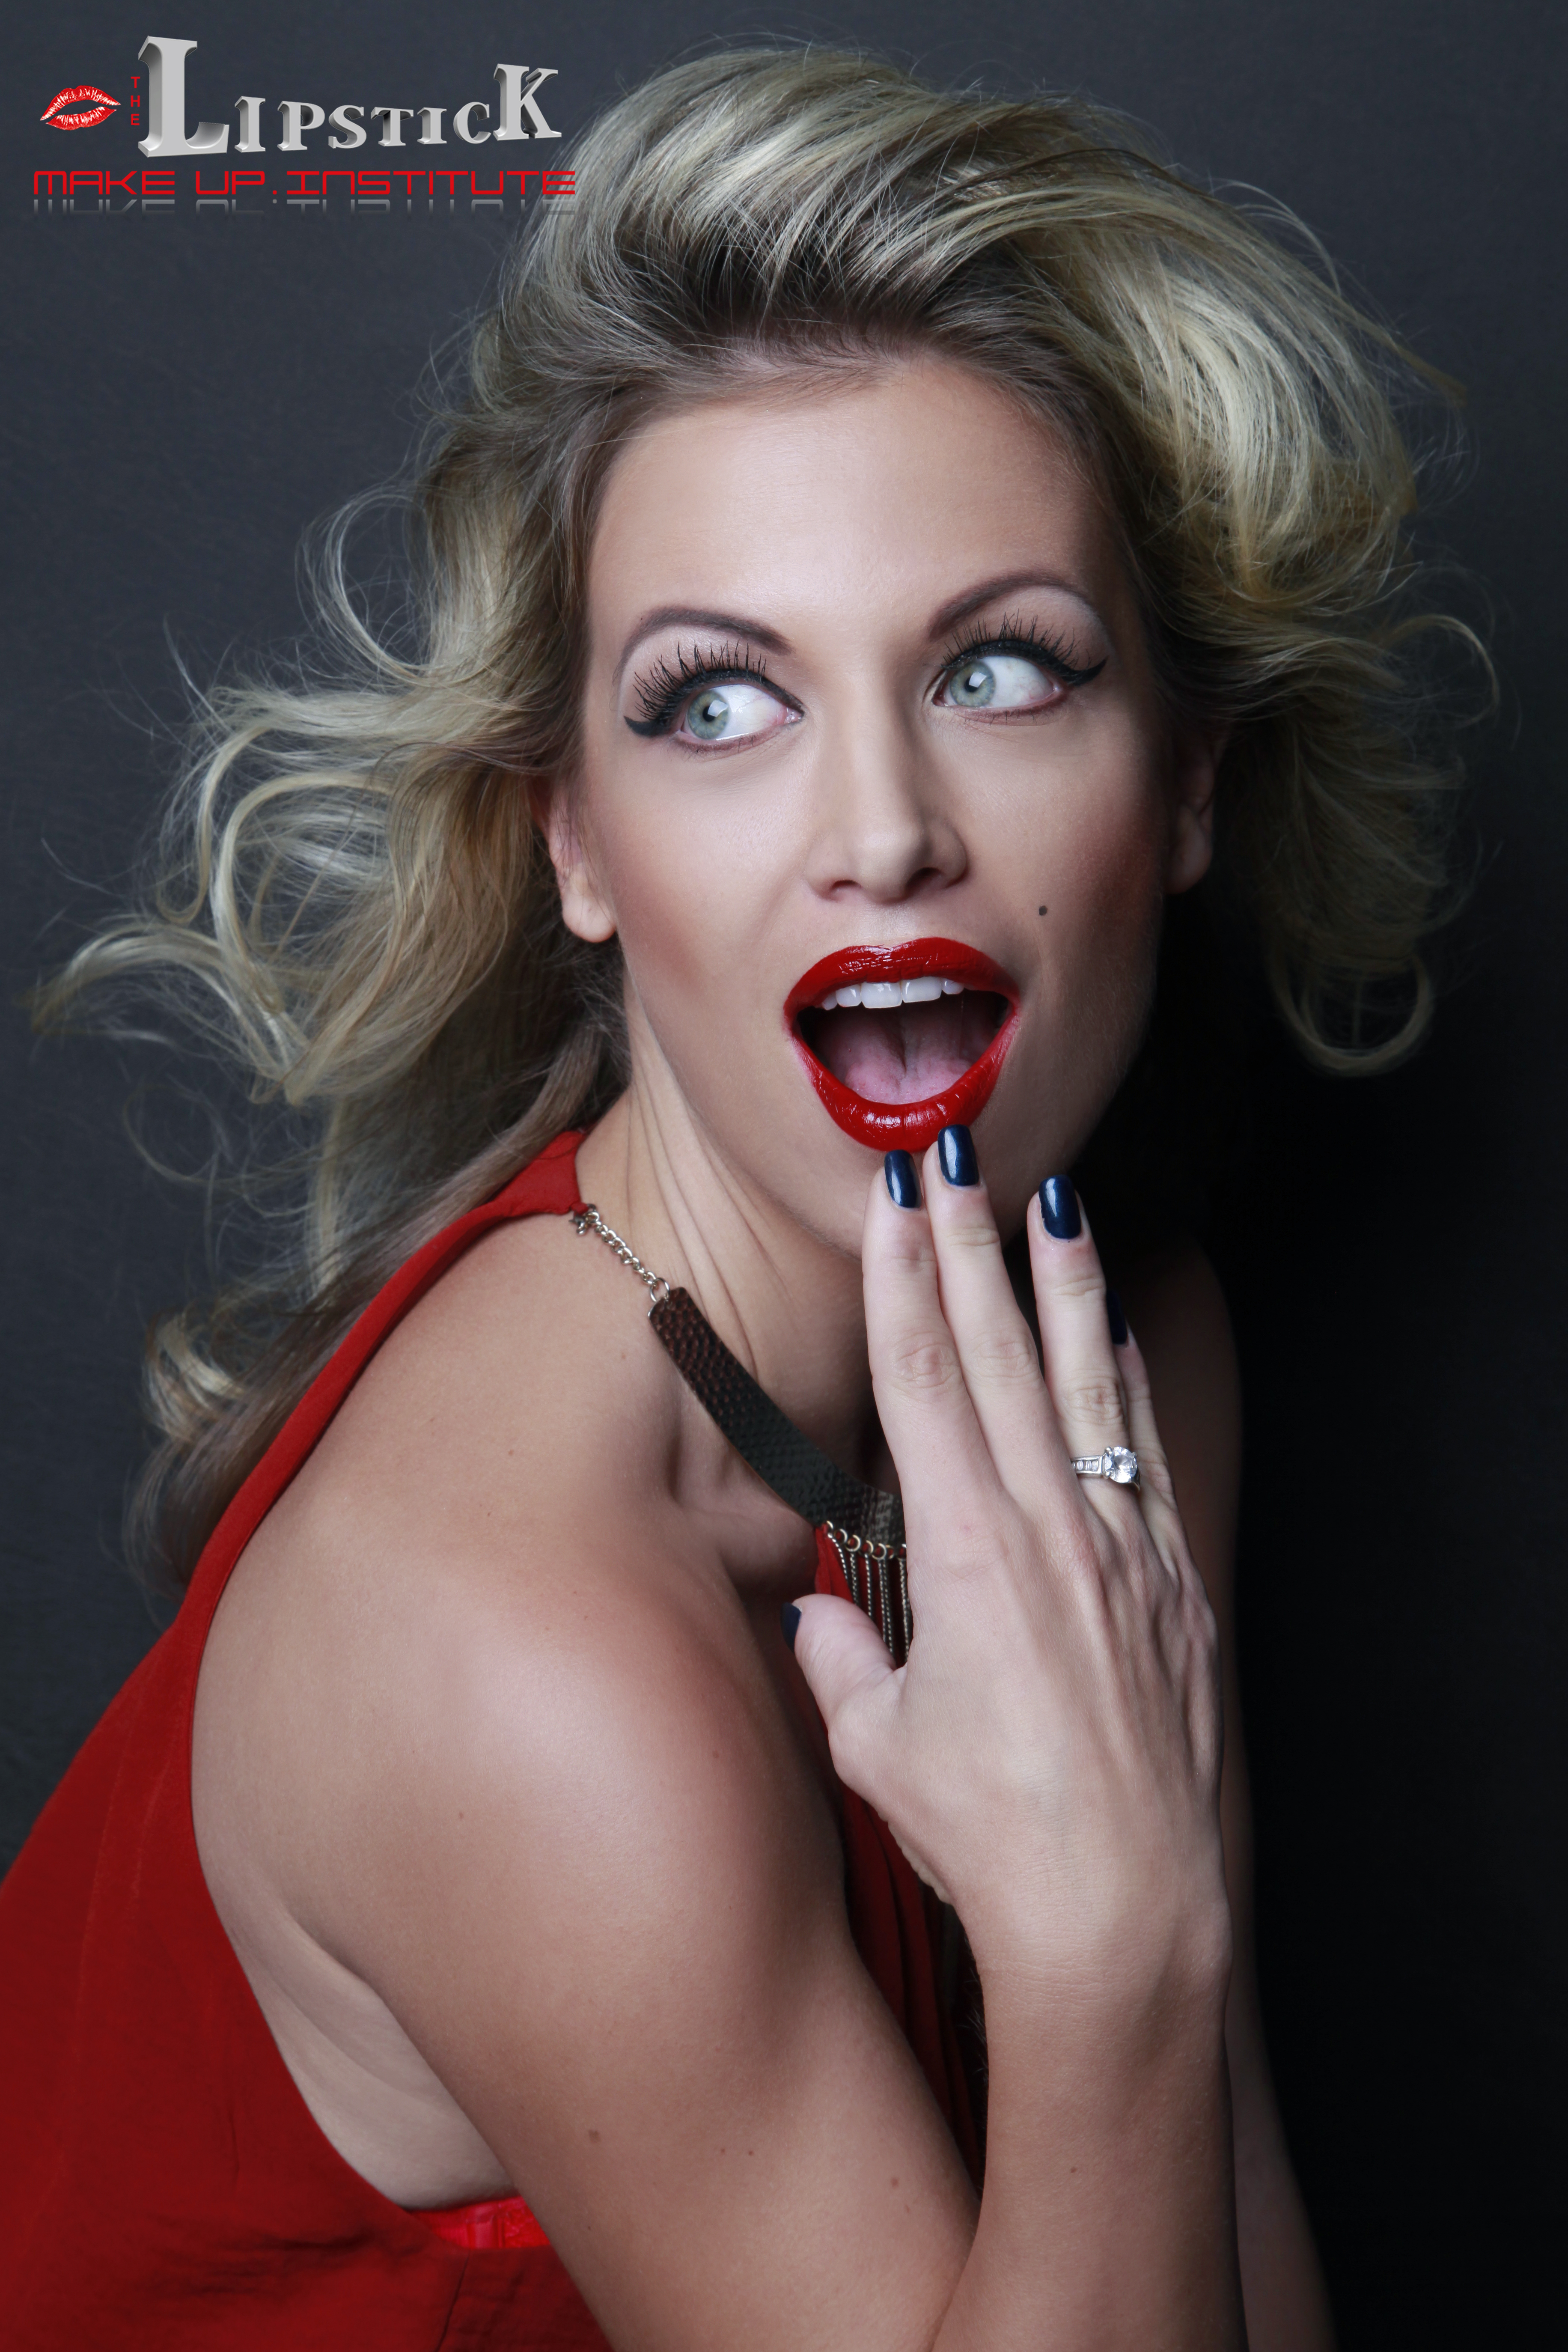
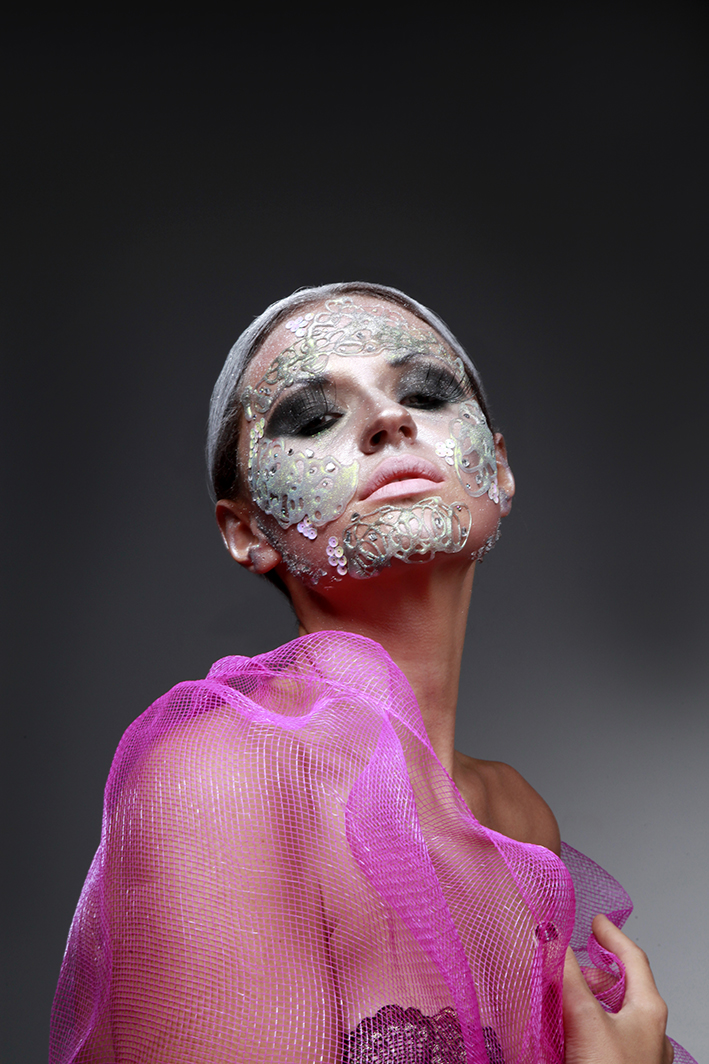
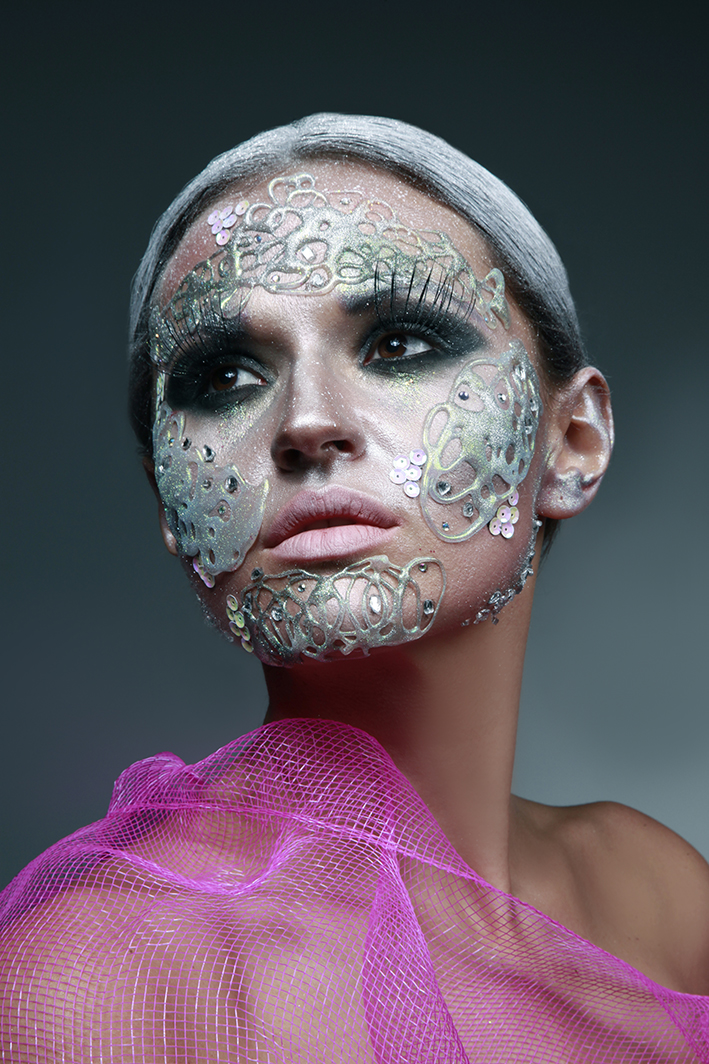
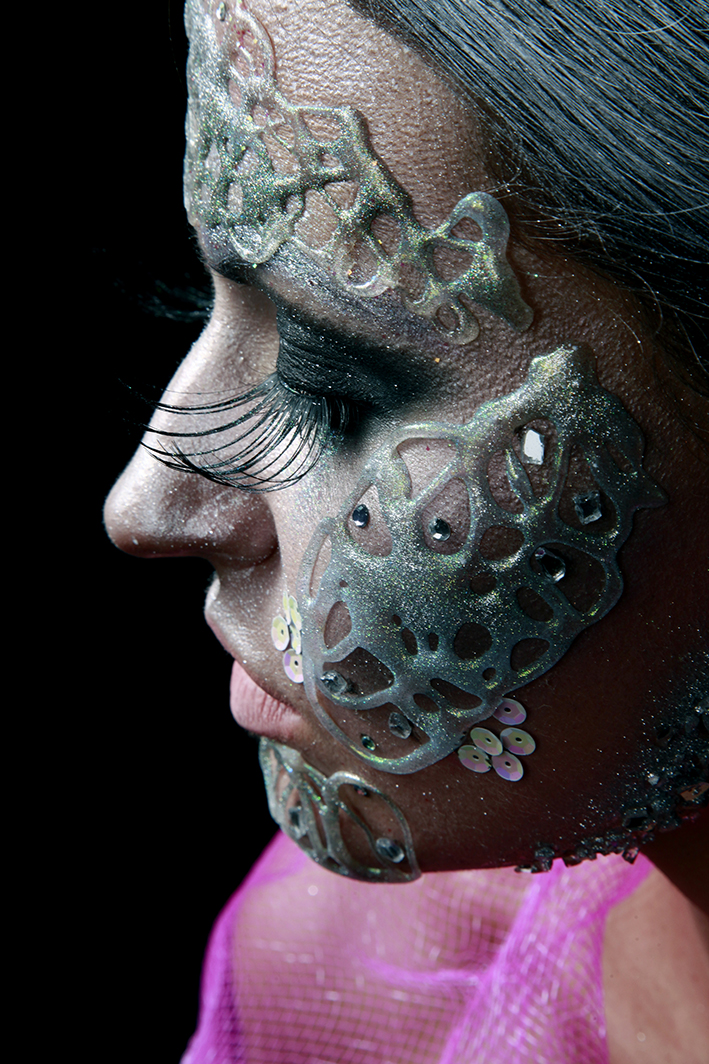
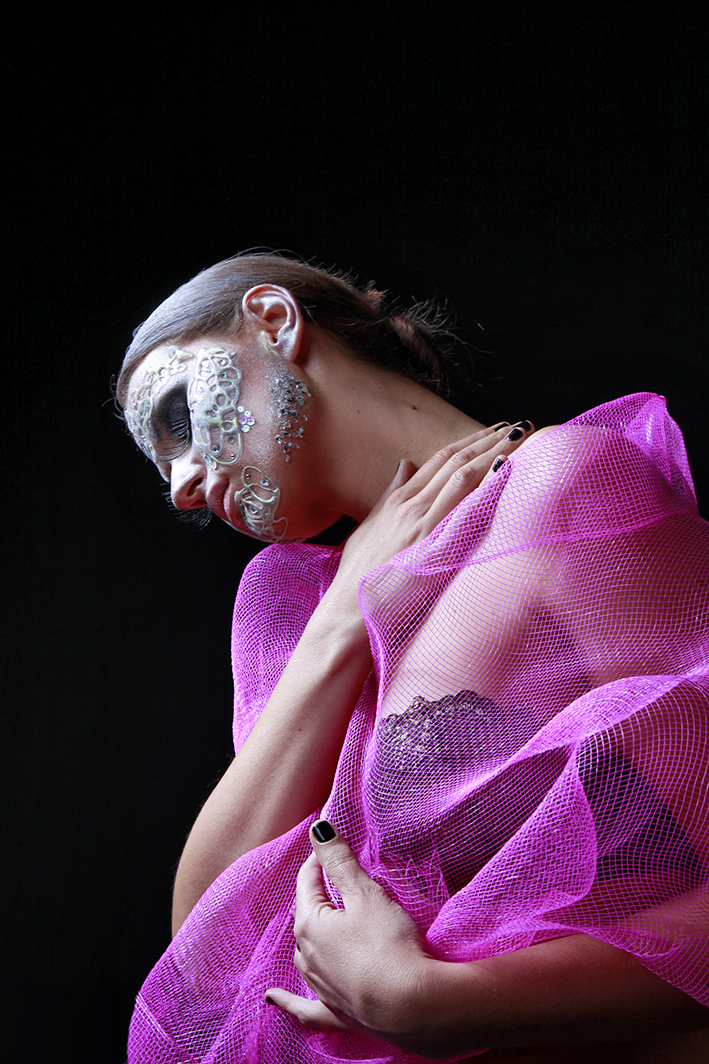
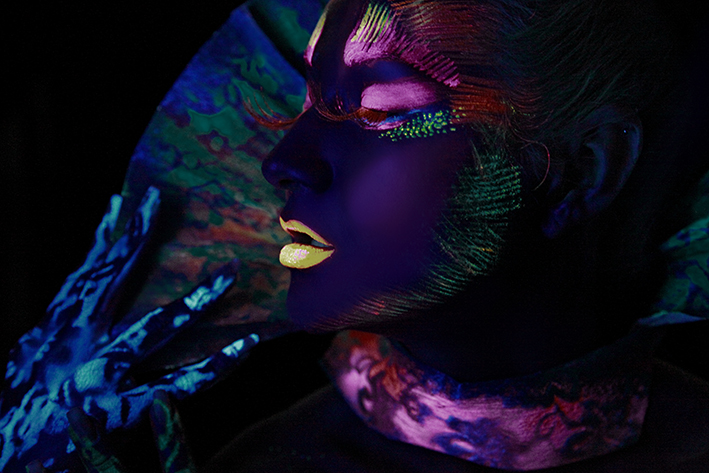
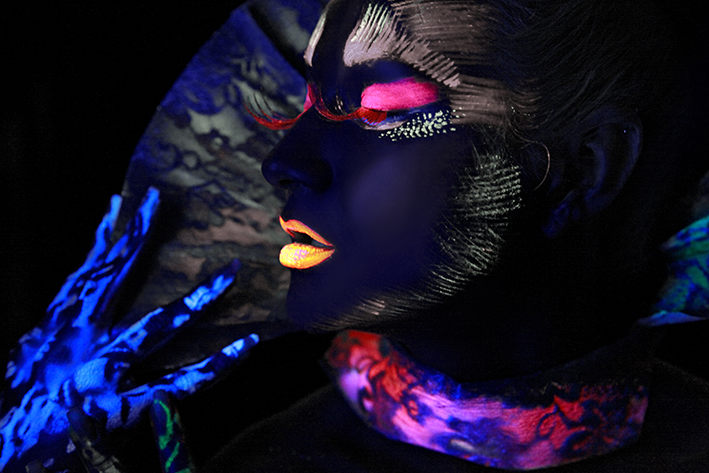
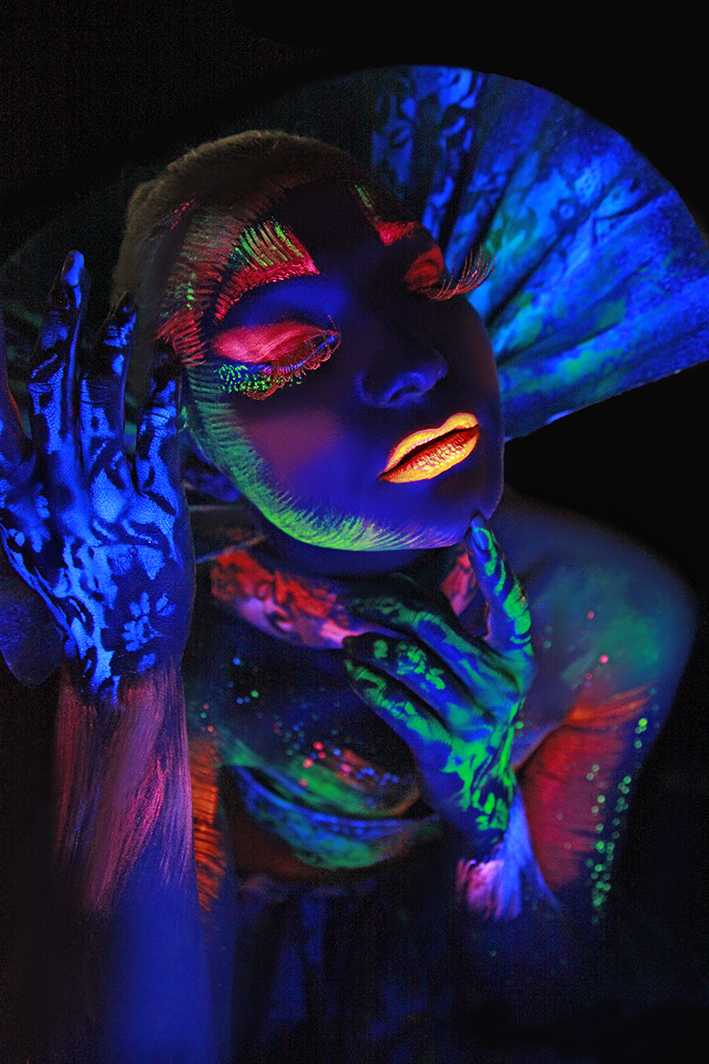
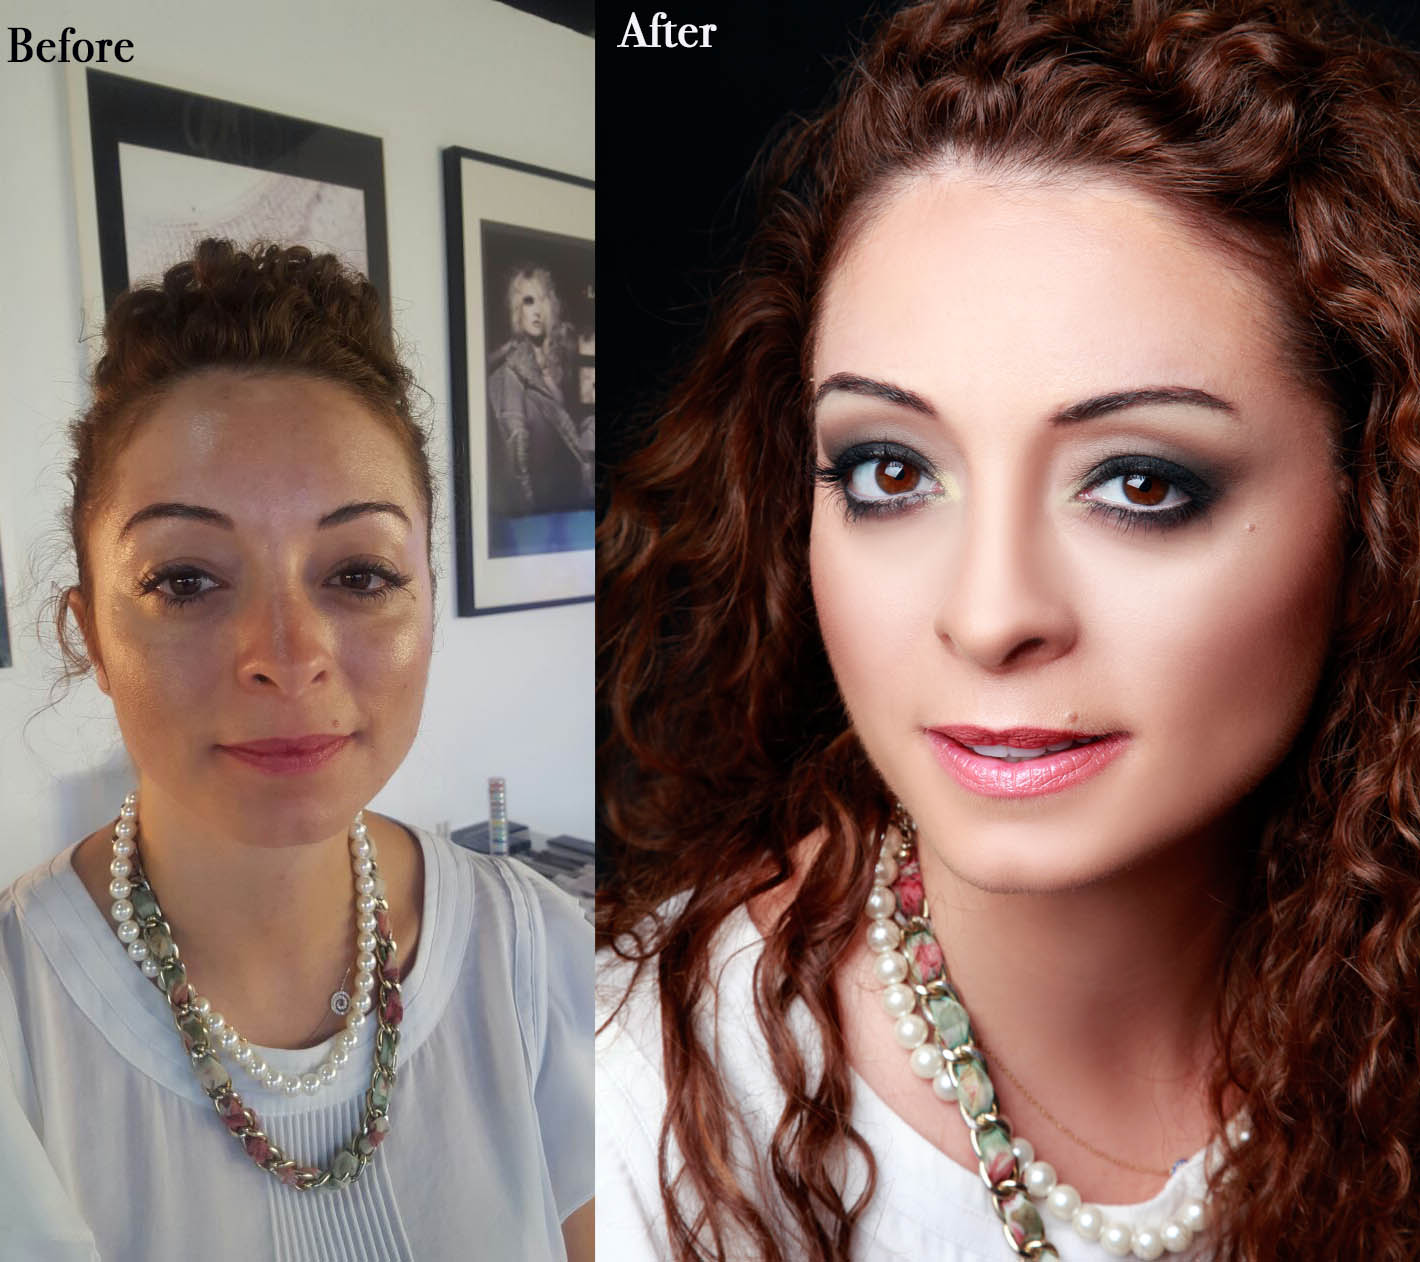
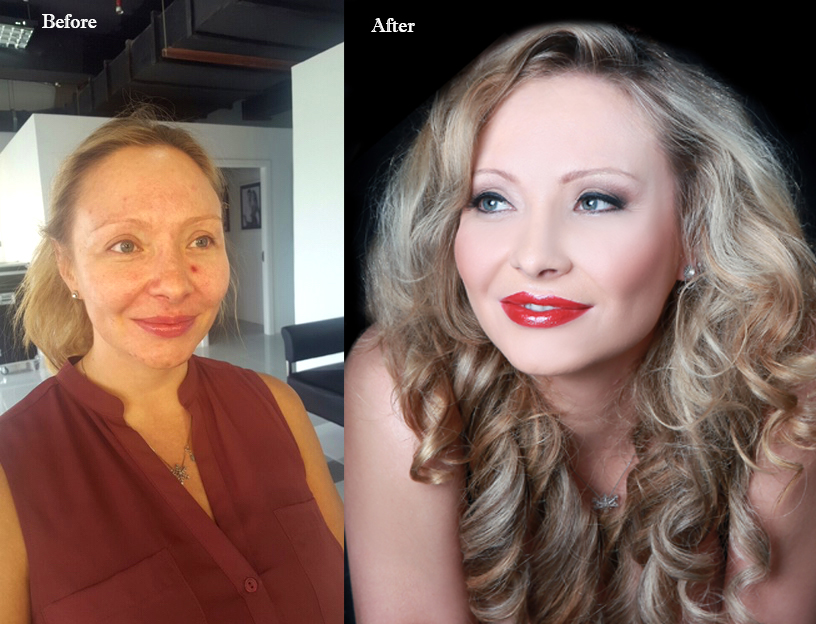
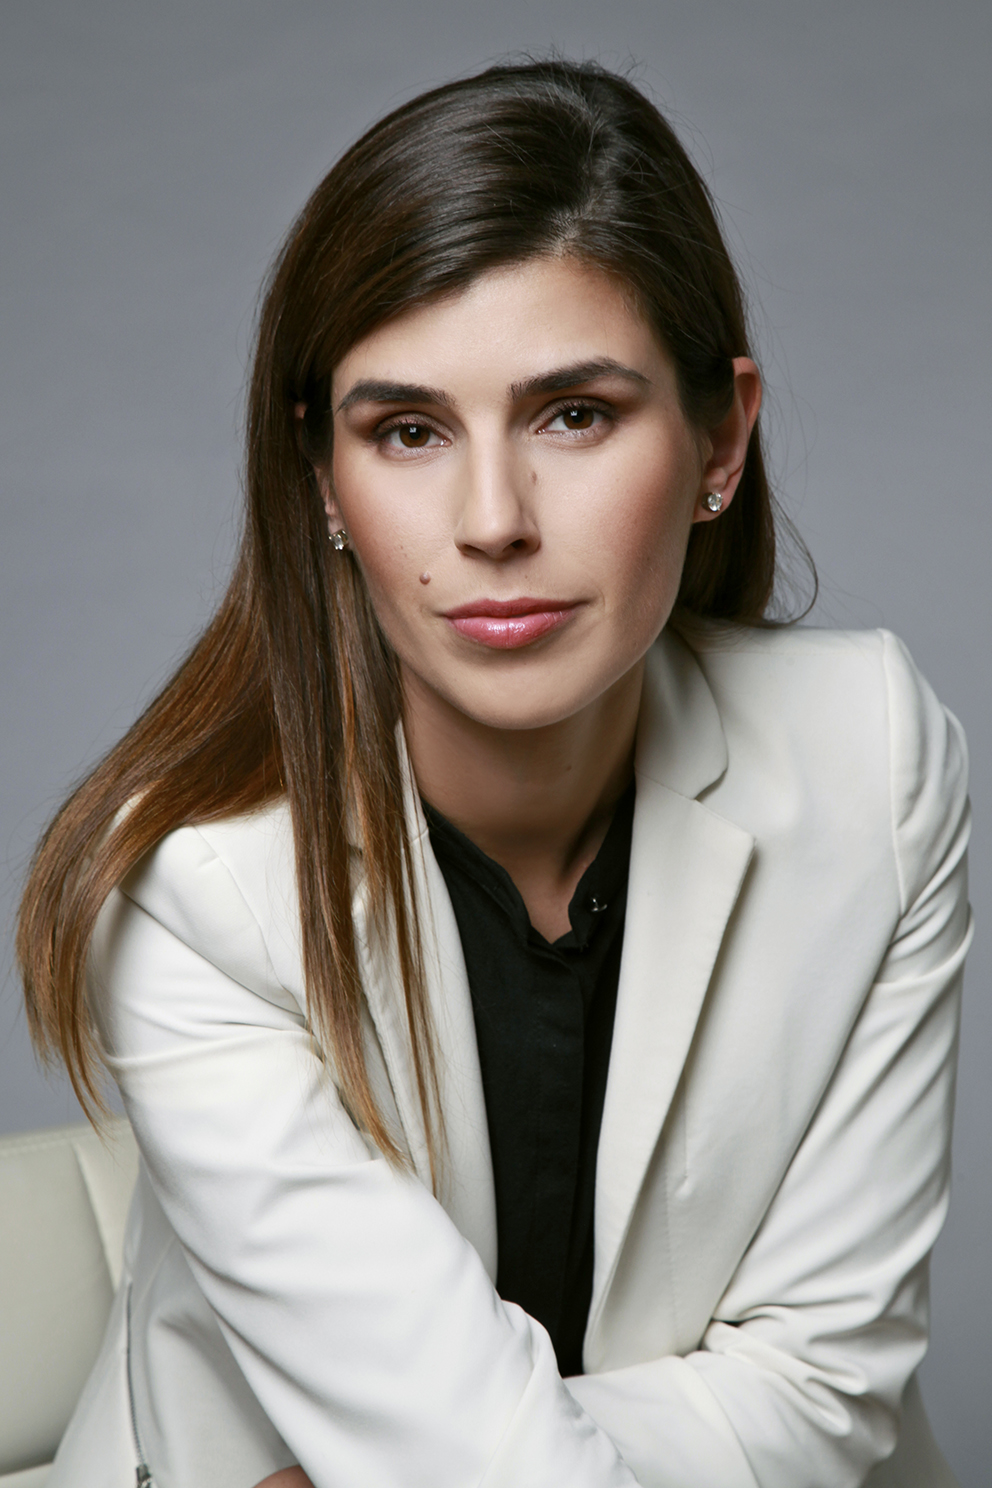
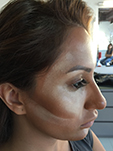
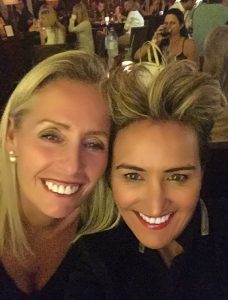
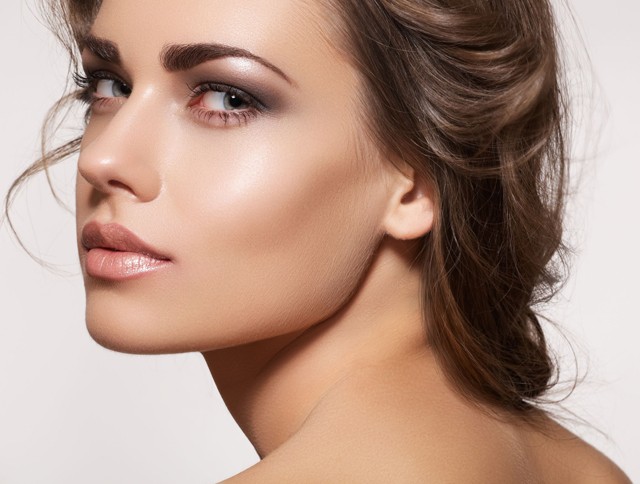
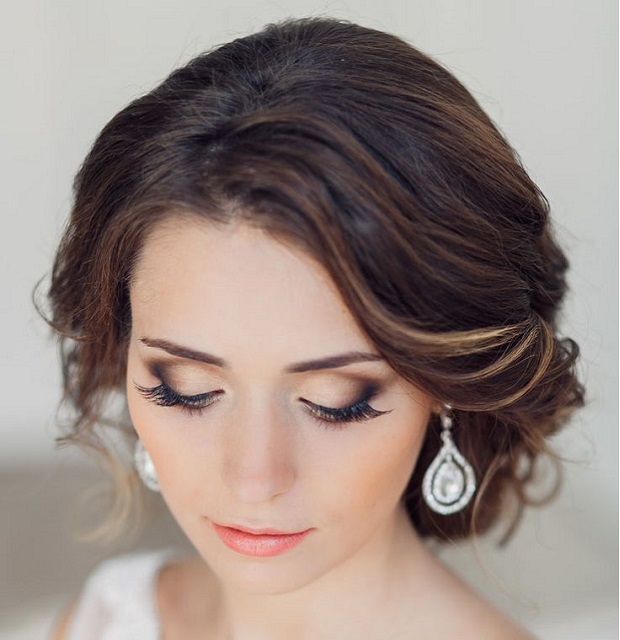
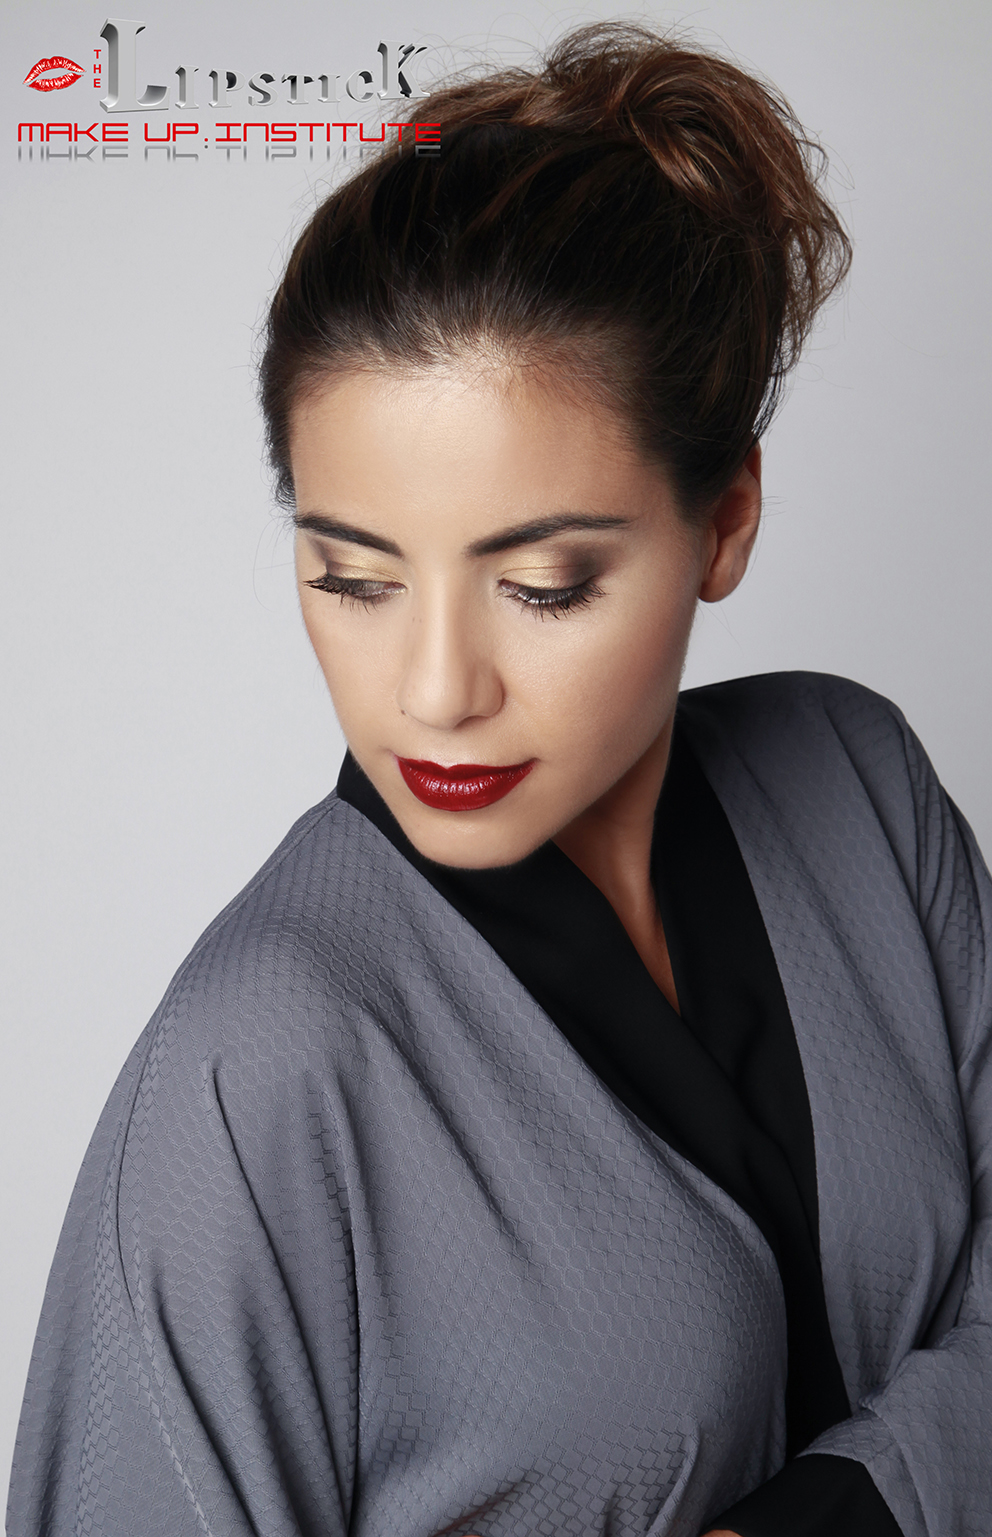
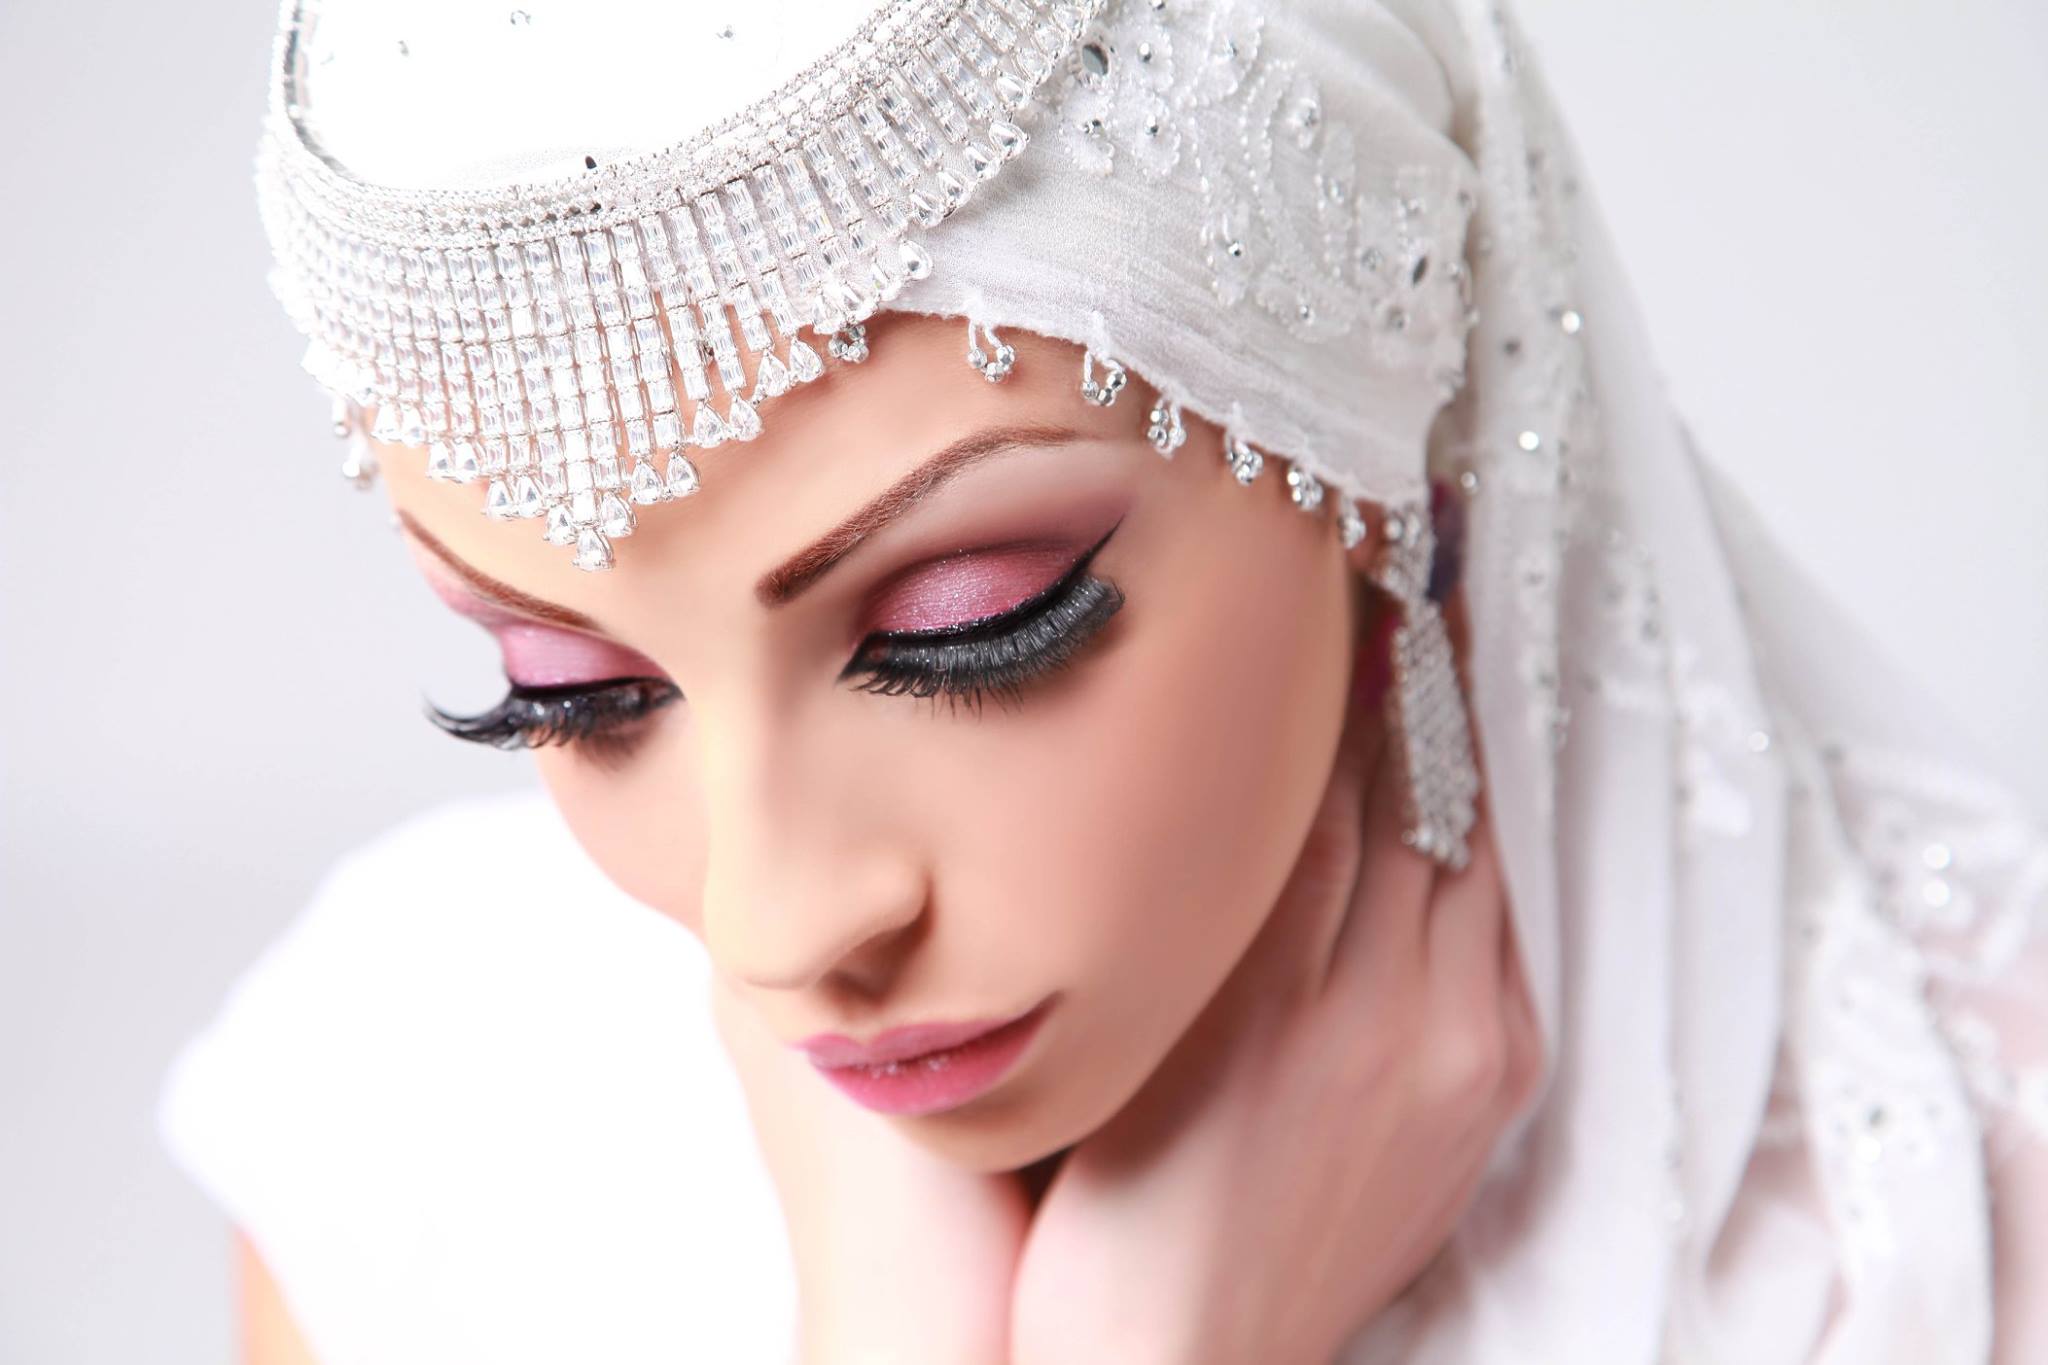
Here are the results of one of our students who has just finished a 3 Day Bronze Course.


Amazing pictures with great talent.

img_4040

Bronze 1

Bronze 2


Creative UV Makeup Training Day for All The Lipstick Teams

“We love what we do and do what we love”

Thats Our Motto and we stick to it!

And the most we love is to create yet unseen looks and concepts in makeup and showcase it to all of you.

Yesterday was a Creative makeup training day in our Institute for The Lipstick Team.

We love our team and they deserve the best training.

We were presenting 2 completely different looks:

  1. Avant-garde makeup

2. Fantasy makeup – body painting with UV Glow colours


About the Avant-garde style

The term avant-garde refers to innovative or experimental concepts or works, or the group of people producing them. Pushing boundaries with the  development of Cubism, Pablo Picasso was part of the early 20th-century art world’s avant-garde. He in fact Personifies this style!

So we were pushing our boundaries and combined loads of different makeup application techniques in our Creative Make Up day.

Of course as always we were using Kryolan products so much glitters, gellafix, crushed mirror, sequences, crystals, Supracolors in colours, Aquacolors and glitter powders and pure colour pigments.

Our concept was to create something different and special.

Inspired by high fashion and fantasy looks, to create an aqua, watery impression followed by glow and shine.

Our models final look is really impressive, different and extraordinary but still she looks beautiful and feminine.

Fantasy look with UV glow colours

Our another look was inspired by the fantastic Galaxy.

This is how we created the, “Galactical Princess” Look, Sparkly and bright.

Handmade skirt, painted top and collar were the main contents of this look.

It was a real fun look to work on Our Lipstick Teams were fascinated as they had never been involved in anything like this before. A complete transformation before their eyes.

I was applying the UV colours in the dark under the UV light with the whole team watching it.

Of course it was a bit challenging but that was the most interesting part in it.

For the whole look we were using Kryolan products.

Kryolan UV glow aqua colors, UV glow eyeshadows and Hair spray and a free hand to draw some funky lines and splash the colours all over the models body.

We really enjoyed creating the look and looking forward to the next project.

Creation Number 1

_MG_6885 _MG_6890 _MG_6902b _MG_6909 _MG_6914

Creation Number 2

_MG_6921

_MG_6929b

_MG_6929bb

_MG_6930    _MG_6952

_MG_6960     _MG_6967 _MG_6968

_MG_6927e

Free Open Day at The Lipstick Makeup Institute

You love makeup but you don’t know how to apply it?

Your dream is to have a flawless skin what looks fresh and healthy glowing?

Tried million times to contour and highlight but you ended up with harsh lines on your face?

We have a solution for you!!!

Visit us on the 16th of July from 11am and watch  in live how the right makeup transforms you and get the best handy tips for your makeup application.

We will talk about skincare, the foundation, contours and highlights, eye makeup, mascara, blusher and the lipstick.

Will answer all your questions and talk about your doubts about makeup.

All the information you need to start to experiment in front of your mirror!

Also you will have a fantastic chance to get a 30% discount on our courses if you book yourself on that day!

So be ready … we are ready for you all

See you on the 16th July from 11am… don’t miss it!

Please check out our makeovers

99 B before 22nd copy BF 1

Cocktail Makeup


taniawallerx3

It’s fun to get all glammed up every now and again, and what better way to do just that than with a makeover made JUST for cocktail parties. We teamed up with our fast beauty pals KRYOLAN.

Finding the dress is the easy part. Deciding what makeup to team with it? One big headache. Red lip, nude lip, eye liner, no eyeliner, the party prep dilemmas are endless!

Here’s how to create a celeb worthy cocktail look in 20 minutes flat. They don’t call it fast beauty for nothing!

How to get the cocktail look:

1. Cleanse the skin, then instantly moisturize and prime with ultimate makeup prep.

2. Use a brush to apply foundation and dab concealer under eyes or on any blemishes.

3. Cover the entire eye area up to the brow bone with shimmering cream eye shadow.

4. Create a fast, feline flick with liquid liner pen.

5. Apply mascara starting at the base of the lashes and jiggling up.

6. For definition, apply bronzing powder to apples of cheeks and sweep to the temples.

7. Finish look by filling in brows with a brow pencil and a slick of lip gloss on the lips


superthumb


kljkhjghfjg1

Thank you everyone for the time.

Tomorrow we will talk about the 20 mins cocktail makeup.

Daytime eye makeup


The daytime eye makeup will be light, soft and refreshing.

hqdefault-3

Most of the time we are using neutral colours like beige, cream, champagne, grey and brown.

Use just a touch of makeup on your eyes.

You don’t want to be over the top. Its just a simple daytime look.

Use matte colours they look more settled than the shiny ones.

Keep it soft and simple

Don’t forget the less is always more!

If you want to go with just a bit of makeup you can:

-apply a base colour on your eyelid – cream or beige and apply one layer of mascara

-for a bit of a different appearance apply a base colour on your eye lid and a dark brown colour close to your lash line it will look like you have an eye liner but at the same time it will look very soft

– in case you lie to experiment with different application techniques do the following :

apply a base colour on your eye lid – beige colour

take a middle brown eyeshadow and define your crease line

take a darker brown and apply a thin line close to your lash line

apply two layers of mascara

img-thing

These are simple tips to make your eyes look fresh and pretty.


Good luck with experimenting and keep practicing

See you all tomorrow as we talk about the importance of blusher.


Ramadan DISCOUNT On Self Application Course

Want to learn how to do your own make up Perfectly?

Then book yourself in for A Self application Class. Call us +971 528249964 . 

We have a Ramadan Special on this course only 30% Discount so book NOW and look amazing all the time with the techniques we will teach you.   You will learn how to ben properly, learn all about foundations and choosing the correct colour for your skin.

You will learn how to contour and make the most of your bones structure or hide it if you so wish with the correct contouring, anything is possible.

How to apply your day make up in 10 minutes and look flawless and natural. Everything we will teach you will change your life literally!

Daytime and evening look. Whatever the occasion, work or party look and feel amazing. 

You will wonder why you have never done it before!

We will also take a professional portrait of you when you finish your make up as a Ramadan Gift. 

_MG_5003 IMG_3969 IMG_6689 IMG_9407 Continue reading Ramadan DISCOUNT On Self Application Course

Lipstick do’s and don’t


Lipstick is an essential part of almost every woman’s daily makeup routine. However, many women shy away from the red tones they find in the cosmetic aisle. Fortunately, you can pull off those brave shades with a little lipstick know-how. Here are ten dos and don’ts of wearing red lipstick:


images-1


1. WEAR DARKER FOUNDATION.

If you’re going to go bold with your lip color, you’ve got to have a complementary backdrop for your face. For those with lighter skin tones, it’s a good idea to choose foundations that will provide darker, olive bases. Red lips can be too much of a contrast against pale skin. The darker your lips are, the darker your foundation should be.

2.DON’T BE AFRAID TO BLEND COLOURS.

Do you like the look of red lipstick, but think it might be too loud for you? There’s an easy solution: customize your shade. Simply take a lighter hue like coral or mauve and blend it with that rose or burgundy you’ve been eyeing. The result will be a more muted tone that nearly anyone will be comfortable wearing.

3. USE IT FOR THE RIGHT OCCASION.

While everyone loves red, luscious lips, the look isn’t appropriate for every social situation. Some of the deeper shades can be a little jarring to people you run into at the gym or the kids’ soccer game. Likewise, you want everyone to be listening to your business proposal at that morning office meeting, not staring at your lips. Only paint your kisser red when you know you’re dealing with a fun, playful atmosphere, such as a night out with the girls. Then, you’ll be one step ahead in painting the town red!

4. DON’T OVER DO IT.

If you want to avoid all the lipstick smudges and stains, you can start by only applying a light coating to your lips. This is especially important for red lipstick since it’s easier to spot on teeth and collars. Rolling once or twice around your lips should be sufficient to achieve the desired effect. For even more control of your coverage, spread the lipstick using a lip brush. Just remember that a little dab will do you.


_MG_4759


Thank you! for your time on reading the tips and tricks for today!

Tomorrow we will talk about the lipgloss when and where to wear it!


Dos and don’ts in your makeup routine

How does your makeup routine look like?

I believe all of us we have some different habits about makeup application.

Basically there are no rules in makeup. All you need is a clean makeup, stylish and well blended!

Lets start with the Dos:

1.Make sure you take care of your skin. This is the first DO!

Use a scrub monthly once or twice, face cleaning gel or foam, toner every day and moisturising cream.

2. Start your makeup on a clean and moisturised skin.

3. Always try the foundation on your face near to the jawline area to check the colour.

4.Apply the foundation in thin layers

1_1384507824_640x640

10-Makeup-Dos-and-Donts-6

bridal-makeup

daf0b7845d6a7ae22c5984d7be4e2ecf


5.Try to use thin layers if you use cream contours and highlights

6.Use Translucent powder instead of pressed powder

7.Use 3 shades lighter shadow on your brows than your brow colour

8.Use matte eye shadows for daytime look

9.Apply peach-orange tones on your cheeks giving you immediate fresh look

10. Glossy lips look more healthy than matte ones, don’t forget to apply a lipgloss for the nice finishing

Now lets see the DON’TS

1. Don’t over draw your natural lips.

2.Don’t apply blush to your cheeks without blending

hqdefault

3.Don’t forget to wash your makeup off at night

4.Don’t go crazy with drawn-in-eyebrows

5.Don’t be afraid of a little sparkle and glitter.

dd1

dd2

6.Don’t be extreme with your concealer shade.

7.Don’t wear clumpy mascara

8.Don’t get stuck in a rut with your makeup routine

maxresdefault

9.Dont be afraid to experiment with different colours

10.Dont panic if you made mistakes you can always work with mistakes and fix them but if not you will take off the makeup and start again. Makeup is not a plastic surgery you can always start to apply it again and again!

After the tips what and how to do the conclusion is

-Less is always more

-Keep your makeup simple

-The right foundation colour is one of the most important things in makeup

– Blend, blend and blend

-Always keep your makeup clean. No mascara smudges and dark patches under the eyes because of the dark eyeshadows


Practice makes perfect so don’t give up after the first or second fail! The makeup can always be better!


Click on our blog tomorrow as we will give you some awesome tips how to look gorgeous just with 10 minutes makeup

See you


Our lovely Successful Student from Silver Media Make Up Course.

Another beautiful souland successful student  has just  passed  through, “The Lipstick Makeup Institute” has successfully fulfilled her course and departed armed with knowledge and  skills that will see her through her next phase of life as a successful make up artist.

Our lovely Tatiana was graceful enough to have chosen Lipstick to educate her and fuel her with the knowledge that she will only get from educators who really understand their field.

In this industry there are a lot of so called , “Make Up artists” out there who don’t know anything! That isn’t me just trying to make out that we are better than anyone else I am just stating a fact.

Tatiana just finished , The Silver Media Make Up course.

Here is the description of the Course, if you are interested.

Silver Make Up Course (5 days 30 hours)

Creative make up course:

  1. Fantasy make up
  2. Avant-garde make up
  3. Special visuals make up
  4. Face (body) painting make up
  5. Stage make up

 What the students get:

A course booklet which provides step to step guides

Professional set of brushes to use whislt on the course

All make up will be provided by the school

Set of products worth AED500

Opportunity to work with professional models

The rare chance to work in a professional operating studio

Working with professional photographers

3 professional photo of the students work

After completing the course our students are entitled for huge discounts with different brands

            International Certificate

The Silver make up course is for a make up artist who wants to improve its skills in the creative make up field.

Previous knowledge in make up is required.

Just take a look at Tatiana’s final Portfolio she left the course with as all students leave with professional images taken by our sister company, YH Studios DXB

_MG_0082e _MG_0952e _MG_1951e

So if you want a Porfolio like this and the best training you could possibly have then contact us. We would would so glad and proud to have you come and join us.


All about false lashes and how to apply it

12605495_1751012468451004_8182255944933402758_o
 1
 Size the lashes. Before gluing the lashes on, you will need to make sure they are not too wide for your eye. Hold the lash strips up against your eyelid, and trim them down on the sides if necessary.
  • If the lashes are too long for your personal taste, consider trimming the individual lashes down to achieve a more natural look. Lashes should be longer toward the outer corner of the eye

2

Apply the lash glue to the outer seam of the eyelash strip with an applicator or small brush. Allow the glue to dry for a moment before applying it to your lashes.

  • Alternatively, you can squeeze a thin line of lash glue onto the back of your non-dominant hand. Then, gently run the outer seam of the eyelash strip along it.
3
Place the strip on your eyelid, positioning it as close as possible to your natural lashes. Bring the strip down from above, not from the front. This is to ensure that you get as close as possible to your lashline.[1]
4
Allow the glue to dry naturally. Once the strip is in place, you do not need to press or hold it.
5
Apply mascara to your lashes. This will help blend your natural lashes with the false ones, achieving a more natural look. You can use black, brown, or dark gray mascara.
6
Apply liquid eyeliner along your upper lids. Be sure to fill in any gaps between the false lashes and your own to make them look more natural. Use black, brown, or dark gray liner.
7
Use makeup remover to remove false lashes. Dip a q-tip in eye makeup remover and gently rub it along your lash line. Allow the remover to sit for a minute, and gently pull off the strip.
images-2
images-1

Thats all for today my ladies!

Tomorrow will learn about blusher application

Don’t miss it!