
Continue reading More about choosing the correct Blusher for your skin tone. (part 2)
Tag Archives: full coverage
Blusher application and the right colour for you
Hi guys welcome back. Yesterday we talked about False Lashes!
Today we talk about blushes!
We have all seen those people that were far too much blusher and look a bit like a clown. This often causes many of us to stay away from blusher and not use it for fear of looking like a fool. The aim of this article is to explain the benefits of using blusher and how to apply it to get the right effect.
When Blusher is used correctly it will add a natural glow to the skin as well as adding contours to the face. It is a great tool and should appear in any woman’s makeup bag.
What Type of Blusher?
When looking for blusher you will find you can get it as a powder, cream of even a gel. They all have different qualities and it is a good idea to pick one that you feel comfortable using. The creams and gels will stay on the longest but the powders will come with more choice of colour. Powder must be applied over foundation whereas other types can be applied on bare skin.
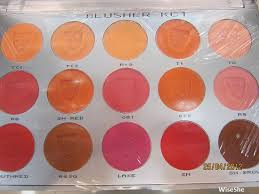
What Colour should You Choose?
When choosing the colour of your blusher, you should first consider your skin tone and then, the look that you want to achieve. Now let’s consider the types of colours and how they work.
Cool colours – These are colours that tend to have a blue undertone and will add freshness and a healthy glow to your face. For light skin go for a pink and a plum or similar will work for darker skin. If you are wearing a brown or orangey lipstick don’t use a cool colour for your blusher.
Warm Colours – These will normally have orange undertones and they work best for contouring the cheeks and adding definition to the face. If you have a light complexion then you should think about using a light apricot whereas a burnt orange may be better for those with darker skin. Don’t use a warm blusher if you are going to wear a cool lipstick or a lip colour that has a blue undertone.
Universal Colours – These are those shades that generally come in between the cool and warm colours. The advantage of these is that they suit everyone and go with any share of lipstick. For light skin you are best to go with a peach, for medium skin rosewood works well and red is best for darker skin.
Natural Colours – These are the neutral beiges and browns. These have very little red in them and are best used as a bronzer rather than a blusher and can in fact be use alongside your usual blusher.
TIP for the day:If you were at all worried about blusher you should not be now. Experiment, try different colours, just remember that blusher should be subtle and look natural
Stay with us tomorrow as we will share some awesome tips about your makeup steps and how to do them in a right way. This will save you some time and money of course!
Don’t miss it!
Perfect Smokey Eyes look part 2
Your smokey eye style makeup is comprised of a collection of different looks you create. Each element of makeup is characterised by its colour, finish, and performance. If your makeup is chosen correctly and your looks are skilfully combined, you are a woman with makeup sense.
The application

Outline your eye contour with a black eye pencil, all the way around. Make the line thicker along the upper lashes.

With a brush or a sponge applicator, apply your base colour eyeshadow on the mobile eyelid and above the crease, about halfway to the eyebrows, blending slightly.

With a pointy sponge applicator, apply contour colour eyeshadow all the way around your eyes, blending it well with the pencil line.

Half-close your eyes and apply contour colour in the crease.

You will now need to define the outside corners of your eyes using a horizontal “V” shape. The position of the pointy end of the “V” will control the apparent shape of your eyes.

With a medium-sized soft round brush (you can also use a flat one, holding it sideways), blend the eyeshadows on the upper eyelid. With a flat brush, blend the eyeshadows on the lower eyelid.
Repeat your contour colour application with a sponge, as many times as needed to achieve a deep shade. Blend again with brushes after every application.
Apply highlight colour eyeshadow or facial powder under your eyebrows to ease the blending of the dark contour and add some volume to your eye makeup.
For an irresistible deep regard, outline the inside contour of your eyes with eye pencil. Use darker-than-usual eyebrows and lots of mascara to finish the look. Your eyes should now be smokier then ever before!
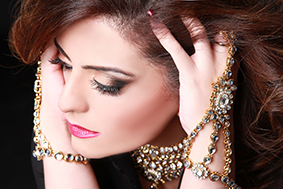
To keep your bright eye makeup in balance, try a stronger blush, and keep your lips pale with a light gloss application.
Don’t forget the perfect smokey eyes are all about blending and practice.
See you all tomorrow as we discuss about Lipsticks and will give you amazing tips how to get perfect lips by applying the lipstick in a correct way
How to get the perfect Smokey Eyes. Tips and tricks from The Lipstick make Up institute
Smokey Eyes
Smokey eyes have become a classic party eye makeup look. The secret of this trend’s popularity is that smoky eyes can change your face dramatically, transforming the girl-next-door into a stylish diva.
Once you learn and master these application and blending techniques, the transition will take you only a few minutes. You can then have irresistible-looking eyes, even if they are not big or bright.
In this article you will learn:
- how to choose the texture of your eye makeup.
- which are the most flattering shades.
- easy and mess-free application techniques.
Colour

You will need one black eye pencil, at least two colours of powder eyeshadow, and dark mascara to produce a fantastic smoky eyes effect. Once you have mastered how to do this your confidence will go through the roof and when your friends see what you have done on your eyes they will ask you every time you are going out with them if you will do their eyes too. I promise, just see!!
You will know what I am talking about!
The base colour should be a rich shimmery (not metallic) powder texture. Choose a shade slightly darker than your skin tone. You may choose neutral beige or grey colours for a soft and sophisticated look; or use a bright base for a dramatic look.
The contour colour must be a dark, matte, or slightly shimmery colour. Choose between dark brown, blue, green, or purple, depending on the colour of your attire. Use black with any outfit for a stunning effect.
You may add a third shade to your smoky eyes: a slightly shimmery highlight colour applied just under the eyebrows. This will enlarge the eye area and also soften any demarcation lines that remain after blending. Your normal facial powder can produce the same result if you are aiming for a more sophisticated look.
Choose soft black eye pencil or kohl for an enhancing all-around contour. Never use liquid eyeliner; it is for crisp lines, not the soft and sultry look we are aiming for here.
Black thickening mascara and stronger-than-usual eyebrows are in tune with smoky eyes makes.
Stay tuned tomorrow as we discuss on the right application for smokey eyes.
Lipstick make Up Team at Mori Sushi
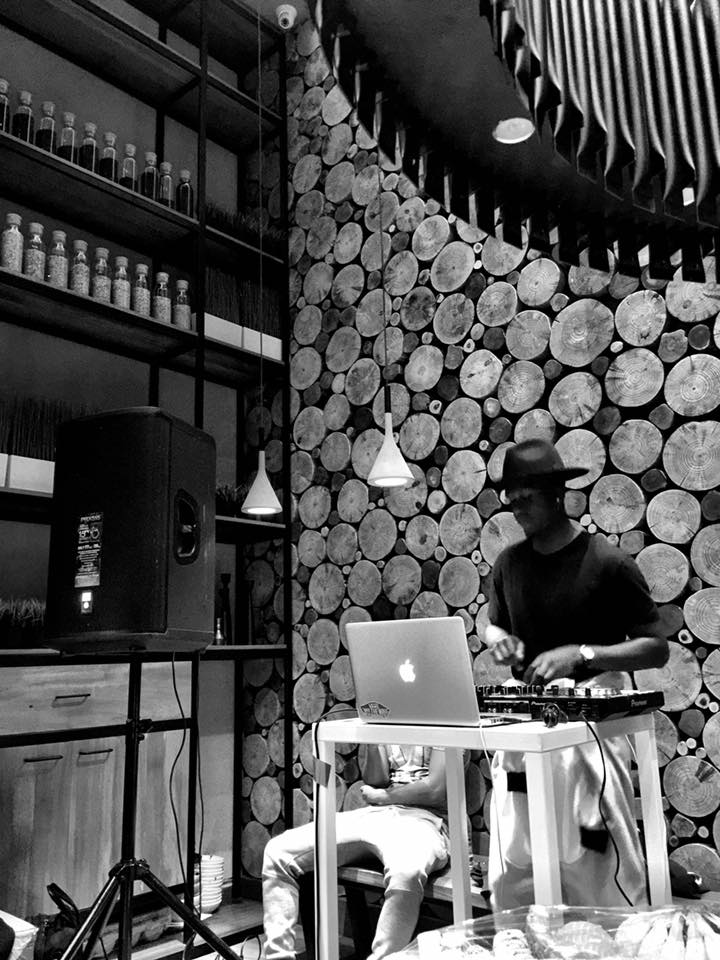
The Lipstick Make Up Team had a fabulous night was had by everyone in Downtown Dubai. The event was t mark the opening of the new restaurant where over 200 people gathered to mark the occasion with amazing gives from the DJ, wonderful sushi, great makeup for the Lipstick make Up Institute Team. Many joined in the theme of the evening by wearing onesies which was just great fun to see.
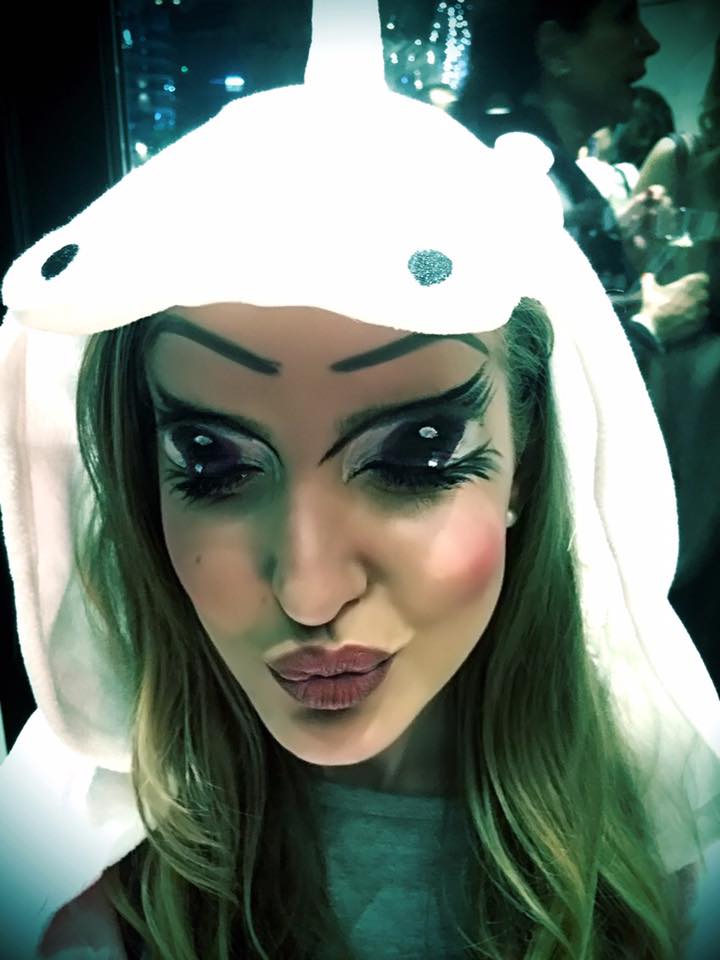

The flow of ladies just kept coming and were great sports and participated in all the nights fun.
Its amazing to see just how make up with the right technique can change a persons attitude and makes everyone feel part of a culture.
At The Lipstick make Up Institute we are always creating and having fun with our students on courses. Check out our Facebook page and see the diverse range of make up looks we do https://www.facebook.com/The-Lipstick-Make-Up-Institute-1660062514212667/
Our sister company : YH StudiosDXB http://yhstudiosdxb.com
Is part of the whole set up and this is why our students get the best of everything, make up, teaching, creativity, location shoots, studio shoots etc.
Check out our images, you will love them.
Our main photographer, Yasmin is from the UK and has been a photographer for over 26 years and works closely with the students so that they understand the relationship between make up and photography.
Please check out our courses. We have a range from 1 hour to 6 weeks. This is our passion too its not just a business, we do what we love and love what we do. Teaching is easy as our students really want to learn even if its just to learn how to apply their make up on themselves. Learn about contouring, Highlighting, how to apply the lipstick correctly. Its very thin line between applying make up correctly and un correctly. Get it wrong and the whole look does not work! You look like a painted doll. Call us on +971 52 83 49964 for advice on our courses.
Tips from the Lipstick Makeup Institute on Mascara and False Lashes
Sample 1
1
Size the lashes. Before gluing the lashes on, you will need to make sure they are not too wide for your eye. Hold the lash strips up against your eyelid, and trim them down on the sides if necessary.
- If the lashes are too long for your personal taste, consider trimming the individual lashes down to achieve a more natural look. Lashes should be longer toward the outer corner of the eye
- Apply the lash glue to the outer seam of the eyelash strip with an applicator or small brush. Allow the glue to dry for a moment before applying it to your lashes.
- Alternatively, you can squeeze a thin line of lash glue onto the back of your non-dominant hand. Then, gently run the outer seam of the eyelash strip along it.
3
Place the strip on your eyelid, positioning it as close as possible to your natural lashes. Bring the strip down from above, not from the front. This is to ensure that you get as close as possible to your lashline.[1]
4
Allow the glue to dry naturally. Once the strip is in place, you do not need to press or hold it. [2]
5
Apply mascara to your lashes. This will help blend your natural lashes with the false ones, achieving a more natural look. You can use black, brown, or dark gray mascara.
6
Apply liquid eyeliner along your upper lids. Be sure to fill in any gaps between the false lashes and your own to make them look more natural. Use black, brown, or dark gray liner.
7
Use makeup remover to remove false lashes. Dip a q-tip in eye makeup remover and gently rub it along your lash line. Allow the remover to sit for a minute, and gently pull off the strip.

CHOOSING MASCARA
1
Decide what you want out of your mascara. There is a mascara for just about any kind of lash enhancement–curling, volumizing, lengthening, defining, faster growth, waterproof–plus many products that combine these effects. Take a look at your lashes and decide what sort of enhancement they need.
- For sparse lashes, look for a thickening or volumizing mascara with a large, round brush with lots of bristles. You can also find a combination primer and mascara formula, which is perfect for bulking up lashes and keeping them healthy.[1]
- If you have short lashes, look for a lengthening mascara with a smaller brush with thick bristles. A small wand will allow you to get very close to your eye and make sure you coat each lash.[2]
- If your lashes are full but you want length and definition, choose a lengthening mascara, but one with a long brush with evenly-spaced bristles to separate your lashes.[3]
- To curl your lashes, try a mascara with a curved brush.[4]
- For a natural, everyday look, find a mascara with a rubber brush and evenly spaced bristles. Lots of drug store brands have these types of brushes. Waterproof mascara will likely last all day.[5]
- If your lashes are uneven in length or damaged, check the ingredients on the mascara. Phyto-keratin and panthenol can help your lashes grow. Use a fatter brush on your lashes.[6]
- You should only use mascara for three months before replacing it, so go ahead and experiment with different brands and formulas until you find your perfect mascara.
Pick your shade. For the most part, black is the way to go. It gives the illusion of thickness and length and can really make your eyes pop. If your lashes are red or blonde, however, make brown your go-to shade, wearing light brown for everyday and a dark brown to amp up the drama.[7]
- Experiment with colored mascaras. Green can bring out violet in blue eyes, purple can enhance green eyes, and blue and purple can brighten your complexion.[8]
Invest in an eyelash curler, while you’re at it. If you’re serious about getting knock-out lashes, an eyelash curler is key. This will lift your lashes and allow more light to hit your eyes so they look bigger and brighter.[9] It may not seem like it, but an eyelash curler can make a huge difference.
- Look for a curler with a rounded rubber pad, which will help curl your lash instead of bend it at a sharp angle.[10]
Applying Mascara to Upper Lashes
Curl your lashes first. Apply the curler to the base of your lashes and gently squeeze for about 10 seconds. Then slide the curler to the middle of of your lashes and squeeze for 10 seconds. Finally, curl the tips of your lashes with another 10-second squeeze. This will ensure you have a natural curve instead of lashes that are bent at a harsh angle.[11]
- If you don’t have a curler or you’re too afraid to use one, use your fingertips to push up and curl wet lashes.[12]
Remove the wand from the mascara tube by twisting back and forth instead of pumping it up and down. Twisting will allow the brush to pick up the mascara, which is what most people think they are doing when they pump the brush in the tube. What they are actually doing is forcing air into the tube, which dries out the mascara.[13]
Wipe off excess mascara on a tissue or on the lip of the tube. Too much product can lead to clumping. Giving the wand a little wipe will leave you with just the right amount.[14]
Look up to lift your lashes. You should still be able to see yourself in the mirror out of your peripheral vision.
- If you are afraid you are going to blink when you approach your lashes with the wand, open your mouth. It’s harder to blink when your mouth is wide open.[15]
Place the wand against the base of your lashes and wiggle it back and forth a little. You want the most product to be applied to the roots, which will make your lashes look longer and keep them from getting weighed down on the tips.[16]
- The wiggle will also help lift and curl your lashes.[17]
Pull the want out toward the tips of your lashes with a zig-zag motion, or another little wiggle. The zig-zag adds length and volume, and can reduce clumping.[18]
Go over your lashes with a second coat. Try to leave it at that–do a third coat at the most. The more you layer on the mascara, the more likely it is the mascara will dry on your lashes and cause the new coat to clump.[19]
- Mix mascaras if you want–do one layer lengthening, then a layer of thickening on top.[20]
Don’t neglect the lashes on the inner and outer part of your eyelid. A lot of times, people apply mascara only to the very center of their eyelid, which can actually make your eyes look narrower.[21] Make sure you apply to the inner, middle, and outer lashes.
- If you are having trouble reaching your inner lashes with your brush, you can very carefully bend the brush to a 90 degree or right angle (don’t worry, you can bend it back). This will make it easy to brush those inner lashes without getting mascara all over your face.[22]
Addressing Common Problems
Remove any mistakes with a cotton swab. If you get mascara on your face or eyelid, allow it to dry so you don’t smear it and make things worse. Once dry, press the tip of a cotton swab to the spot and spin. This should remove the spot without messing up your eyeshadow.[26]
De-clump with a clean mascara wand. Either use a disposable wand or repurpose an old one (wash it thoroughly with soap and water first). Comb through the top and bottom of the lash, spinning the brush as you sweep forward. This should remove clumps and give your lashes definition.[27]
- Try to comb through your lashes while the mascara is still wet.
- If you don’t have an extra wand on hand, try using a clean toothbrush to comb out any clumps.[28]
Thicken your lashes even further with baby powder. If you don’t feel like you’re getting the thick, voluminous lashes you want, try this trick. Apply one coat of eyeliner, then dust your lashes with translucent powder or baby powder (you can use a makeup brush or a cotton swab dipped in powder). Then add another coat of mascara.[29]
- The powder gives the mascara more to cling to, which allows you to build more volume.[30]
Remove your mascara every night with an eye makeup remover. It might not seem like a big deal, but it can dry out your lashes at night and cause them to become brittle and fall out.[31]
Tip of the Day: Always curl your lashes before applying mascara not after, it can break your lashes.
Stay tuned tomorrow as we will talk about
Choosing the Blush Colour
We have all seen those people that were far too much blusher and look a bit like a clown. This often causes many of us to stay away from blusher and not use it for fear of looking like a fool. The aim of this article is to explain the benefits of using blusher and how to apply it to get the right effect.
When Blusher is used correctly it will add a natural glow to the skin as well as adding contours to the face. It is a great tool and should appear in any woman’s makeup bag.
What Type of Blusher?
When looking for blucher you will find you can get it as a powder, cream of even a gel. They all have different qualities and it is a good idea to pick one that you feel comfortable using. The creams and gels will stay on the longest but the powders will come with more choice of colour. Powder must be applied over foundation whereas other types can be applied on bare skin.
What Colour should You Choose?
When choosing the colour of your blusher, you should first consider your skin tone and then, the look that you want to achieve. Now let’s consider the types of colours and how they work.
Cool colours – These are colours that tend to have a blue undertone and will add freshness and a healthy glow to your face. For light skin go for a pink and a plum or similar will work for darker skin. If you are wearing a brown or orangey lipstick don’t use a cool colour for your blusher.
Warm Colours – These will normally have orange undertones and they work best for contouring the cheeks and adding definition to the face. If you have a light complexion then you should think about using a light apricot whereas a burnt orange may be better for those with darker skin. Don’t use a warm blusher if you are going to wear a cool lipstick or a lip colour that has a blue undertone.
Universal Colours – These are those shades that generally come in between the cool and warm colours. The advantage of these is that they suit everyone and go with any share of lipstick. For light skin you are best to go with a peach, for medium skin rosewood works well and red is best for darker skin.
Natural Colours – These are the neutral beiges and browns. These have very little red in them and are best used as a bronzer rather than a blusher and can in fact be use alongside your usual blusher.
How to Apply your Blusher?
Now you have chosen the colour and type of blusher you are going to use let’s consider how to apply it. Below are the steps for applying powder blusher:
Step 1 – Never use the brush that comes with your blusher these are usually too small and will not give the right application. Get yourself a quality blusher brush before you start.
Step 2 – Look into the mirror and give yourself a big grin. This will allow you to see where the apple of your cheek is.
Step 3 – Dip the brush into the powder and remember to always shake off the excess before you begin. Brush over the apple of your cheek towards the ear using short up and down movements.
Step 4 – Now blend in the blusher. You can do this by adding a horizontal stroke over the vertical ones and then blot with a tissue.
For creams and gels follow the below steps:
Step 1 – Look into the mirror and give yourself a big grin. This will allow you to see where the apple of your cheek is.
Step 2 – Dab a small amount on the apple of your cheek and rub with your fingers. Ensure that you take the time to ensure this is blended properly.
TIP for the day:If you were at all worried about blusher you should not be now. Experiment, try different colours, just remember that blusher should be subtle and look natural.
Stay with us tomorrow as we talk about Mascara and Fake Lashes
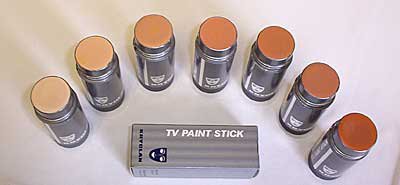
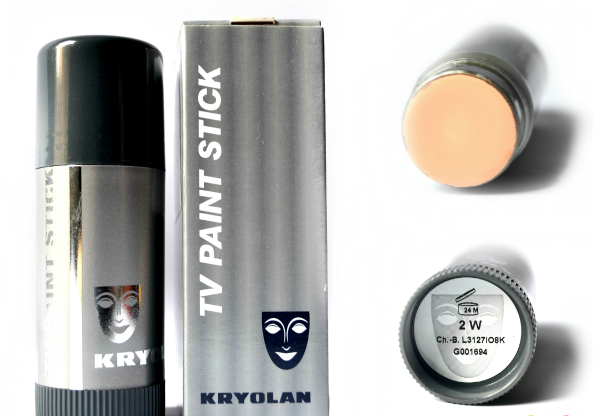
The magical TV Stick foundation
The absolutely favourite full coverage foundation is the Kryolan TV Paint Stick not only makeup artists but anyone loves it who wants a flawless skin just in few strokes.
As a texture is dry and giving a semi matte finish. Perfect for combination skin and effectively reduces the shiny on the oily skin also.
Mostly used in theatre, TV, bridal makeup but can be used for any occasion.
No primer required before the TV Stick. The foundation will stay for more than 12 hours on our skin with just applying the TV stick on a plain skin. What is really important to make sure that the skin is dry (not over moisturised and wet because of the moisturiser or primer). In this case the foundation will stick to the skin and in 40 minutes will absorb.
Because its full coverage we can use it for creating drag makeup and its perfect in blocking out the eyebrows also.
The application can be with a foundation brush and the latex sponge also.

The before and after picture of the Kryolan TV Stick Foundation application
Tip of the day: apply the TV Stick with a wet sponge for a natural look if you need more coverage apply the TV Stick foundation with foundation brush.
Stay tuned guys as tomorrow you can read about the HD foundations.
Flawless skin and full coverage with cream foundations
We all know our favourite liquid foundations which are giving a light to medium coverage.
But what should we do if we are struggling from skin problems, dark circles under the eyes, scars on the face ?
The liquid foundations coverage is not strong enough.
This is the moment when we will choose a cream foundation to cover and correct all these skin problems and correct the skin types.
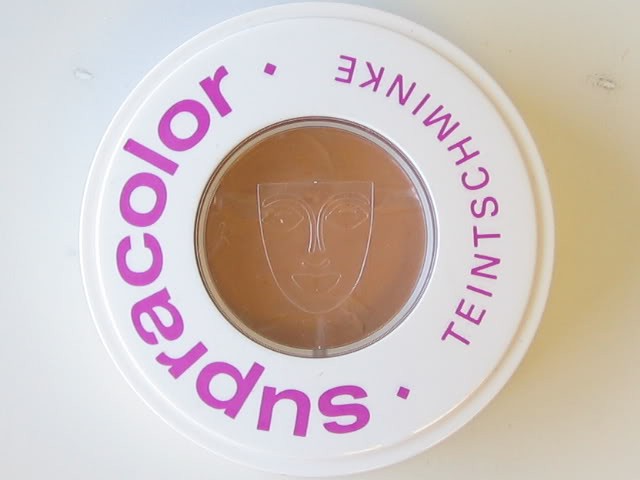
We will talk about the Kryolan Cream foundations.
For the first time you will say no, Kryolan is a Professional Stage Makeup and its only for stage or TV.
It is for makeup artists but if you know exactly how to use the products you can easily use them on a daily basis.
Lets do a quick and useful review of our amazing foundations:
- Supracolor is an oil based moisturising cream foundation also known as greasepaint. Perfect for normal to dry skin and for the mature skin. The best to apply with a wet sponge by dabbing for a full coverage, glossy finish.
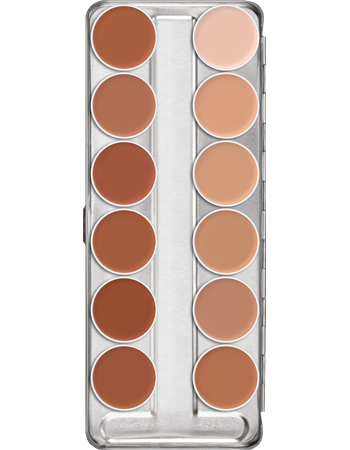
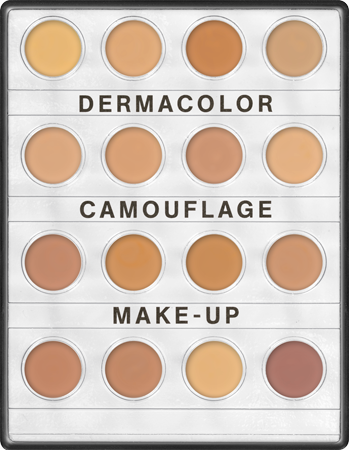
2. Dermacolor as a texture is a bit dryer than the Supracolor. Specifically made to cover the different skin problems, discolorations, tattoos and scars. Can be used for all the skin types. Application with wet sponge semi glossy finish with a full coverage.
3. Ultrafoundation is a creamy texture easy to apply and blend. Perfect for the dry skin. Application with a foundation brush with a full coverage and semi glossy finish.

Tip of the day: for a flawless skin and full coverage apply thin layers of the cream foundation. Build it up from very thin layers rather than applying a thick layer creating a mask effect on the skin.
Visit our blog tomorrow we will share with you some lovely infos about the TV Stick foundations and their usage on a bad skin.
