Tag Archives: dry

All about false lashes and how to apply it

12605495_1751012468451004_8182255944933402758_o
 1
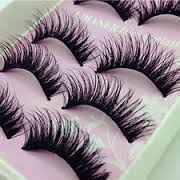
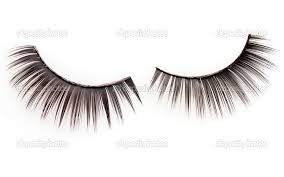
 Size the lashes. Before gluing the lashes on, you will need to make sure they are not too wide for your eye. Hold the lash strips up against your eyelid, and trim them down on the sides if necessary.
  • If the lashes are too long for your personal taste, consider trimming the individual lashes down to achieve a more natural look. Lashes should be longer toward the outer corner of the eye

2

Apply the lash glue to the outer seam of the eyelash strip with an applicator or small brush. Allow the glue to dry for a moment before applying it to your lashes.

  • Alternatively, you can squeeze a thin line of lash glue onto the back of your non-dominant hand. Then, gently run the outer seam of the eyelash strip along it.
3
Place the strip on your eyelid, positioning it as close as possible to your natural lashes. Bring the strip down from above, not from the front. This is to ensure that you get as close as possible to your lashline.[1]
4
Allow the glue to dry naturally. Once the strip is in place, you do not need to press or hold it.
5
Apply mascara to your lashes. This will help blend your natural lashes with the false ones, achieving a more natural look. You can use black, brown, or dark gray mascara.
6
Apply liquid eyeliner along your upper lids. Be sure to fill in any gaps between the false lashes and your own to make them look more natural. Use black, brown, or dark gray liner.
7
Use makeup remover to remove false lashes. Dip a q-tip in eye makeup remover and gently rub it along your lash line. Allow the remover to sit for a minute, and gently pull off the strip.
images-2
images-1

Thats all for today my ladies!

Tomorrow will learn about blusher application

Don’t miss it!

Dry Contouring

If you’re a contouring newbie, powder is the way to go. Powder is also easier to blend. If you’re hoping to achieve a matte look, powder contouring will help you define your features. You can most definitely be a contouring pro and go this route–it’s really more about ease and desired look. Powder on dry skin can enhance creases and make you look more chalky and less fab, so best to use this method if you have oily skin.

These are simply guidelines. You can mix and match product textures if you have different needs or combination skin.

The dry contouring gives you a soft and natural look. It works perfectly for daytime and high fashion looks.

Tip of the day: use greyish brown eyeshadows for contours it will give you a natural look.


tips-for-gorgeous-skin-600x400


Stay with us tomorrow as we will give you tips how to contour and highlight like the Hollywood Celebrities do.

Powder, cream or liquid

Whoever said choice was a good thing probably wasn’t a woman trying to find the right foundation. Years ago we just grabbed a bottle of beige cream and called it good, but now we have so many options to choose from, including liquids, powders, sticks, pressed powders, and of course the new mineral powders. How are we ever to pick the right one?

We’ve collected a bit of information here to help narrow it down for you. As a basic rule: oily skin types should go for more powder and matte formulas, whereas normal to dry can use more oil-based options. If your skin is  dry and dehydrated liquids works the best. Here are the foundations, and when it’s best to use each one.

Liquid: The most popular option, liquids have been around for a long time and continue to be favorites because they’re so flexible and natural-looking. Oil-based formulas are best for dry to normal skin, and water-based formulas are better for those with oily skin. Liquids also work well in color combinations, if you’re into making your own shades by mixing two or more colors. Be careful of the long-wearing, smudgeproof versions. Though they may stay on longer, they typically have waxy and oily ingredients that can cause skin irritation or breakouts. (In humid conditions, though, they can be lifesavers.) Oil-free options or matte finish brands are best for those with oily or acne-prone skin. Ultra-mattes can also be good for oily types, but tend to leave the skin dry and taut.

Ultra Fluid Foundation 9130-500x500


Cream: Cream foundation is a good choice for those with dry or mature skin. It provides medium to heavy coverage, and helps skin look soft and smooth.

Kryolan_UltraFoundation_Cream_24_Colors_Palette_9008-m

Sticks: These foundations come in solid form and have more of a drying effect, which may make them best for those with oily skin. They are also good for covering scars and flaws, and for creating more coverage. These are often used in photography sessions, but for everyday use, you may find them too heavy and thick-feeling.

KRYOLAN-TV-PAINT-STICK-REVIEW


Powder: Similar to pressed powder, loose-powder foundations help control shine. However, they can be too drying. All but the most oily skin types may want to use these for touch-ups only. They also work well when you’re in a hurry, and can be great options for young girls just starting out on makeup as they’re light and easy to apply.

base_image_33_4


Tip of the day: use  translucent powder to set your foundation to get a beautiful and matte finish.


Don’t forget to visit our blog tomorrow to read about setting your foundation and face powders.


Foundation application techniques

Master the foundation application and be your own makeup artist.

Brush? Sponge? Fingers? what works the best for you?

When its about foundation we are always sceptical what is the best way to apply it.

Well it depends what is the type of your foundation and what works the best for you. You have one main goal to achieve a flawless skin.

  1. Use your fingers if you are not happy with the brush strokes or the sponge.

3

2.Apply your foundation with a foundation brush if you want a strong coverage.

Apply-Foundation-and-Primer

3. Use a buffing brush if you like to keep your foundation dewy 

how-to-apply-foundation-tutorial-7

4.Use latex sponge and dab the foundation in your skin if you are using cream textures.

gallery_big_applying_foundation_with_sponge

5. Apply the foundation  with a foundation brush and use your beauty blender for a fully blended look. Note the beauty blender is for blending the foundation not for application!

shutterstock_118242388QCdjB5HwFOTaWQ8X4xMDoxOjA4MTsiGN

6.For a dewy skin apply water spray on your skin and while is wet start with a foundation.

0354485d-4901-4684-8563-22baf84bd514

7. The most important doesn’t matter what is your foundation texture (cream, liquid or stick) always apply it in thin layers.

tips-for-foundation-application

Tip of the day: for a perfect and flawless skin wet your latex sponge and apply your foundation on the face.  In this way your foundation will blend in more and will stick more to the skin.

Click on our blog tomorrow and get more infos about different foundation types and their best usage on your skin…see you all tomorrow

Skin types

Lets talk about skin types

The first thing we need to do is to find out what is  our skin type.

  1. If your skin have a healthy glowing and  feels smooth then you are the lucky one who have a normal skin.

shutterstock_16309612 opt 50kb-croped

2. Matte, dry and peeling skin is a dry skin.

3.Shiny at the T zone (centre of the forehead and bridge of the nose) the rest of the face is dry this will be a combination skin. 

beautiful-earth-skin-type-skincare-combination

4.Shiny sometimes with pimples and have a greasy touch is the oily skin

kak-pravilno-uxazhivat-za-zhirnoj-kozhej-lica

5.Your skin becomes red after every single touch even after washing your face with just water its a sensitive skin. 

Now we know our skin type so we  can start with the skin care and choosing the right makeup products.

Don’t forget it is essential to take care of your skin, no perfect makeup without a beautiful skin you can buy the best makeup products but if your skin is not cleaned and moisturised your makeup will look dull.