Tag Archives: application

Spooky Halloween here at YH Studios and The Lipstick Makeup Institute

Its that time of year again, halloween is nearly upon us!

I got the girls to get the stage make up out and get practising their spooky skills as we have many bookings over this crazy period that we love. Its different, fun and ever so creative.

We have many projects going on. My team are working at Billionaire Mansion which is in Touch Hotel this week too making the staff look spooky and creating a fun atmosphere in the Club.

There is no pattens really with Halloween make up unless you want something specific. You can just get a face and let your hands and mind start wondering! Thats the fun in it.

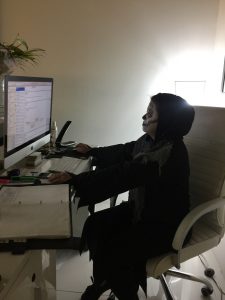
Look here is a ghost at my desk ha!!

If you are going to a party or just want to dress up  and have some fun with your friends then call us and we will be happy to make you look the scariest we can.

We have the talent, the skills and the enthusiasm to be creative with your face so let us ha ha.


Here at The Lipstick make Up institute we have fun and also our sister company  #yhstudiosdxb we photograph your memories so you get the best of both worlds.


Yh Studios DXB has been in Dubai for 4 years now and basically operates on repeat business as their reputation is proceeding them .


Not only are they professional , have an amazing studio, always include make up and hair with all their packages but are so talented that they are fast becoming the best photo studio in Dubai. In any industry consistency is everything!!


Anyway, if you want the best if both worlds, the best make up institute in Dubai and the best photography studio in Dubai then you know where to come!


See you soon hopefully for the best experience of a lifetime. Seriously, I know you will love it.


Here is the ghost that was occupying my desk ha ha!!


img_5549


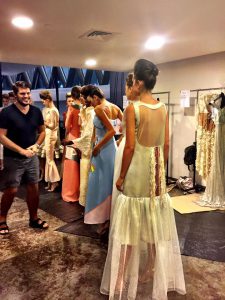
Day 3 Backstage photos of Arab Fashion Week

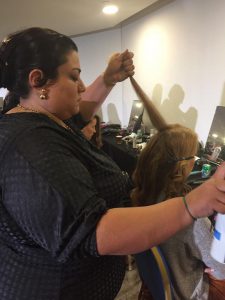
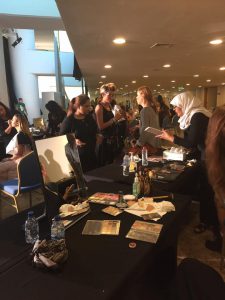
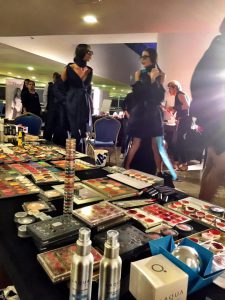
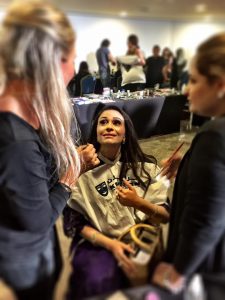
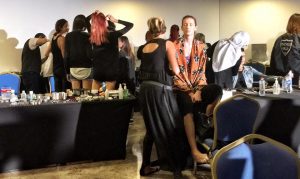
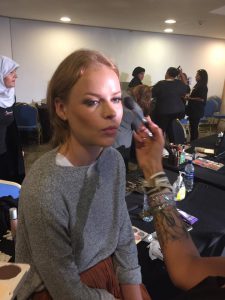
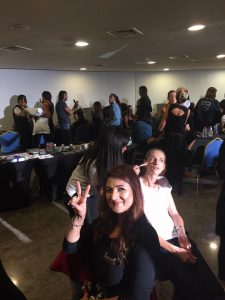
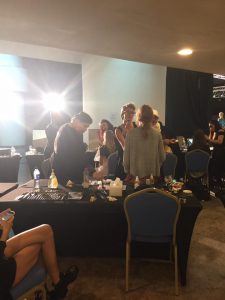
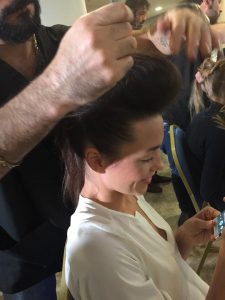
What a week so far, day 3 of Arab Fashion Week. The Lipstick Make Up Institute Teams are always hard at work. Behind the scenes making sure everything runs smoothly.

Working with International Models flown in from all over the world. Brazil, Italy, Switzerland, Russia and lots of places.

What a pleasure to work with such professionals.

Just amazing, all the Lipstick Teams loved it. We had major support from everyone. Feel so lucky and proud. after this event we can do anything in the world. Its on par with New York, Milan and London  Fashion Weeks.

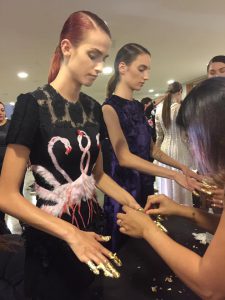
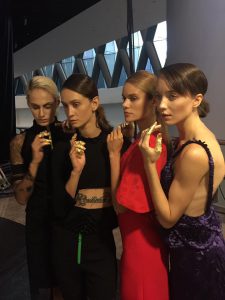
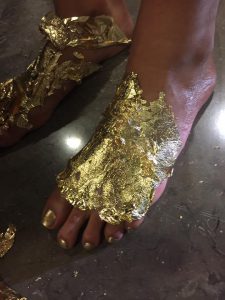
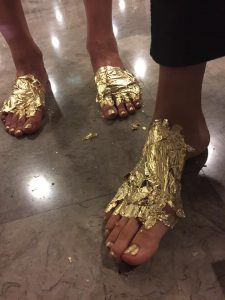
Day 3 of #Arabfashionweek . Backstage is where all the fun,action and tension is. What a team effort. Support from every angle . Amazing show other #aouadiparis with gold leaves applied to the models, fingertips, feet and one completely covered in gold.

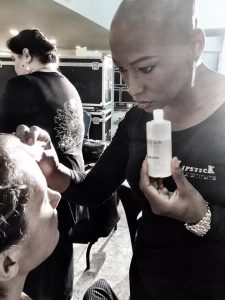
The Lipstick Make Up Institute is proud to announce that they are doing all the hair and make up and nails with the help from the hair teams #brownsugarhairsalon#wisamnourbeautysalon#resalonsspas#majanbeautysalon and #laquaswiss for supplying amazing products for skin preparation of the models. #kryolan for their amazing products and support. #kryolanofficial also #coverpagedubai for doing such an amazing job arranging the , models , guest management , after party and hostesses.

14517438_1856979391187644_984871486740848878_n 14517448_1856979204520996_3082289511352446159_n 14519694_10154591028305789_6144845560556491995_n 14519780_1856979051187678_8782851502975708007_n 14519909_1856979127854337_5742482605681582920_n 14520323_1856979444520972_6069004913835117521_n 14523117_1856979434520973_6359822948888767759_n 14563478_10154591029560789_3889252413447266900_n 14568068_10154591028530789_5564813804972865052_n 14570350_1856979207854329_1223791958735111079_n 14570465_1856979194520997_2428101177093488171_n 14572323_1856979214520995_1777177785466122608_n 14572362_10154591029890789_4191545434183451705_n 14572978_10154591028215789_4319662810887993613_n 14581547_10154591029020789_6328924976738973669_n 14590238_1856979021187681_7886127695472630561_n-1 14590317_1856979047854345_7703163124139363780_n 14595569_10154591029720789_5014177885255698349_n 14595590_10154591030235789_6771660179576449016_n 14595633_1856979094521007_6220286667216075544_n 14595662_10154591028330789_7624480497704043015_n 14595787_10154591029290789_2318268219974836990_n 14611023_1856979104521006_8230525197771152058_n 14611039_10154591030855789_2619533757317018581_n 14611053_1856979114521005_3173918806437518705_n 14632983_1856979294520987_3154479679891565470_n 14642380_10154591029135789_8705813574550934906_n 14642383_10154591029300789_4296657860339041054_n 14642394_10154591028950789_3565422701401300118_n 14657243_1856979494520967_524469729467556158_n 14657381_10154591029125789_8600448660155524009_n 14657471_1856979284520988_5035353428624638820_n 14666199_10154591029600789_3124870940545679_n 14666202_10154591028925789_8982234299233329673_n 14670885_1856979074521009_1785676074488877126_n 14671083_1856979394520977_2056696386521858646_n 14671352_1856979067854343_6119968682384088586_n 14680533_1856979027854347_8811062935402069524_n-1


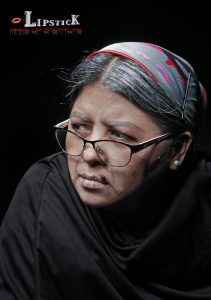
Special Effects Make Up To Oldify From Our Institute

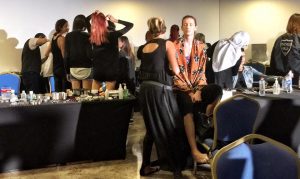
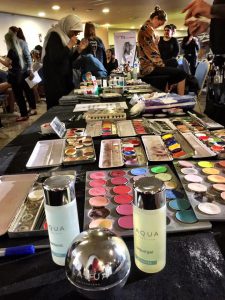
Well, it is always fun to learn at the Make up institute but especially when its a creative special effects day.

Our student chose our make up school as she did here research from South Africa and decided that we were the best make up school in Dubai to teach her all that she wants to know and she was absolutely right.

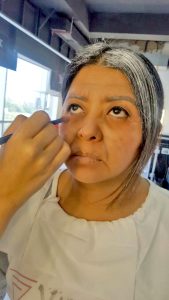
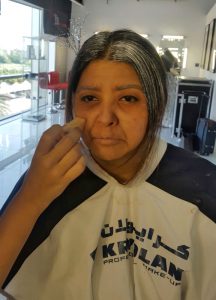
The daily task was to to make a relatively young person old and just take a look at the results.

Using the best makeup in our opinion, Kryolan , you can actually do anything. Once you learn the techniques then the make up will allow yo to explore the possibilities of your talent and give you the freedom to push yourself to the limits.

I am sure you agree that the results are great.  All our photos are shot by our sister photography studio,  YH Studios DXB. They have been here for 4 years and are the prefect partner for a make up school. In fact, I don’t know how the school would be without it. Everyone make up school should have one. The results of any make up lesson need to be recorded and thats what YH Studios does. Our students have this great advantage and we are the only make up school in Dubai to have such a partner company.

Have a little look at the videos too and see just what fun we have in the make up school on a daily basis.

See, learning is fun!

Please feel free to comment and ask any questions.

Here are a couple of videos from behind the scenes so you can see how we get our models into character.

Free Creative Demonstration Day

Here at Lipstick we always love to keep the team spirit going and keep the teams as tight as possible and learn together.

You can always advance yourself in any are of make up.

Contouring is really popular right now but what make up artists can learn more from is the creative applications.

This is all covered in Our Platinum Course that lasts for 6 weeks and you also leave with an International Diploma that will carry you through to start your journey  into the world of Make Up. We teach you not only how to apply make up but teach you to open your mind to the endless possibilities that you can do with make up and the amazing unique effects that can be produced.

Please just come in and see us to discuss anything or just for advice, we are always here to help and love to talk! Especially Liv about make up, she can talk for England.

Talk about passion, this girl was born with a mascara in her hand I think. I have never known anyone be so passionate about a shade of eye shadow or lipstick!

Once we went to a company to discuss using their Hollywood products in the school before we eventually decided on Kryolan, there was never really any competition with really but we had to be open to suggestions.

They showed us some  samples and I had to leave her there as it was just not exciting enough for me, 3,5 hours later she calls me to pick her up!

So that Liv, The Eurasian Number one in the world for Fashion Hair And Make Up. Liv is our main teacher in the school so you will be taught by the best to be the best!.

This is why all the girls love the demonstrations and they learn so much from it. Call us on +971 52 83 49964

Here are some shots of the Demonstrations today. The girls get up close to watch each and every stroke.

IMG_1404 IMG_1405 IMG_1406 IMG_1407 IMG_1408 IMG_1409


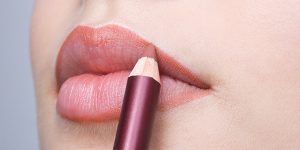
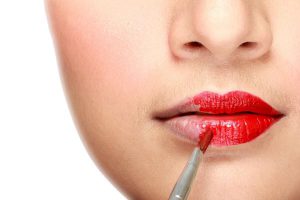
Lip liner application

Lead_lipstick1
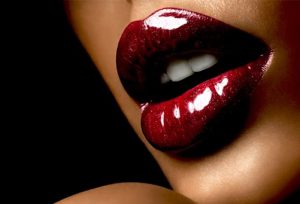
The Perfectly applied lipstick


Perfect lips?

Thats the dream of most of us.

How to achieve lips like this?

  1. First of all make sure that your lips are moisturised.
  2. Apply foundation or concealer on your lips to make the colour more intensive

5_steps_to_apply_lipstick_3v

3.Apply lipliner! If you are happy with your lips then just line the lips on the natural lip line. If you want to make them bigger then you will outline the lips just a bit above the natural lip line. Don’t go too high as it will look fake and we don’t want that. If you want to make your lips smaller, then line the lips from the inner side of the natural lip line.

lipliner_0

4.When you are done with the lip liner then you can fill up the lips  with lipstick.

5.The colour of the lip liner is usually the same colour as your lipstick. Don’t apply lighter liner as it won’t give any definition to your lips, go with a shade or 2 darker.

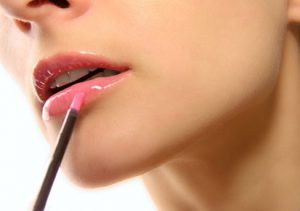
6.Make sure that you are applying your lipstick with a lip brush. Why? Because in this case your lipstick will last much longer, the lip brush will give you more precision in the application.

Sharon-Hart-Makeup-Lipstick-Application

7. Make sure you will blend the liner with the lipstick. No harsh outline on the lips is trendy anymore except you are doing a fantasy, high fashion  or lip art.

8.Be precise and clean. The ultimate must is to make your lips perfectly shaped and contoured, especially when you are working with dark and bold colours.

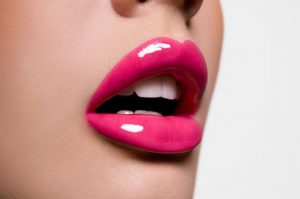
9.Apply gloss on the lips. You can apply coloured gloss or transparent to give a high shine to your lips.

lipstainvslipstick

10.Now you need to make sure that your lips are perfectly shaped.

11.Take your foundation brush or latex sponge and straighten the lines

12.For additional definition you can take a bit of a concealer and line perfect the lip lines.

13.To avoid runny lips because of the lip gloss use a bit of a translucent powder on your latex sponge and place it to the corners of the lips.

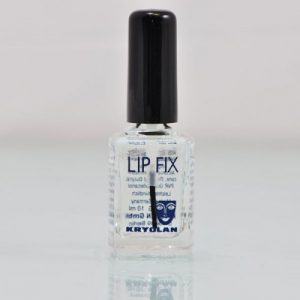
14.To make sure that your lipstick will last all night long use Kryolan Lip Fix

5216-500x500
Kryolan lip fix

pink-lipstick


lips-and-lipstick-clipart-1


All you need to do now is to practice, practice and practice!

My teacher told me you have to do at least 100 red lips to master it!

So its time for practice 🙂


Don’t forget to click on our blog tomorrow as we will talk about  dos and donuts in the lipstick application
Stay tuned see you!

Look gorgeous in 10 minutes

Rush, rush all the time.

We never have hours to spend in front of the mirror to do our makeup.

We are here today to give you some awesome tips how to enhance your beauty in only 10 minutes for daytime look

1. Use Kryolan Supra or Derma foundation  to get a perfect coverage yet natural look. Apply the foundation with wet latex sponge, dab into your skin to get a flawless look. This will take you 2 minutes.

2. Our foundation is super good so for daytime no need to correct and conceal. In the case you have extremely dark circles then you can dab a bit of corrector under your eyes and conceal it in 1 minute.

3. Daytime look is all about natural appearance don’t forget this while you are filling up your eyebrows! Don’t over do them! Use 2 or 3 shades lighter eye shadow to fill up your eyebrows it will take you 1,5 minute

4.Eyes. The same situation is with the eye makeup. Keep the eye makeup simple and fresh. Use light, matte colours. Avoid shiny base for daytime. Creams, beige, sand, browns are perfect for daytime makeup.

Use your all over brush to add a matte base to your lid.

With your fluffy blending brush swipe a bit of brown in your crease line and soften it just to add a bit of definition to your crease.

Take your angled brush, wet it and draw a very thin line on top and bottom lash line with a dark brown eyeshadow. Take the smudge brush and smudge that thin line.

Apply 2 layers of mascara

If you are a really experienced makeup lover this will take you 5 minutes!

5. Cheeks. Blusher is one of the most important elements of the fresh daytime look. Get a peachy – orange blush on your blusher brush and swipe it over on your cheek bones. Gently just with a very soft touch. With this step you will give more glow and live to your face and you will looks fresh immediately. 1 minute of your time

6.Lips. Apply gloss over your  lips. The gloss will make your lips look full and juicy it will take 1 minute of your time!


And here you go … you look fresh and flawless in just 10 minutes!

article-0-152E6976000005DC-500_306x423


maxresdefault-2

Practice your daily routine 10 minutes makeup and you will never be late to your work.

These steps are useful, easy and practical.

Stay with us  tomorrow as we will talk about the lipsticks and their different application techniques
Stay tuned


Our lovely Successful Student from Silver Media Make Up Course.

Another beautiful souland successful student  has just  passed  through, “The Lipstick Makeup Institute” has successfully fulfilled her course and departed armed with knowledge and  skills that will see her through her next phase of life as a successful make up artist.

Our lovely Tatiana was graceful enough to have chosen Lipstick to educate her and fuel her with the knowledge that she will only get from educators who really understand their field.

In this industry there are a lot of so called , “Make Up artists” out there who don’t know anything! That isn’t me just trying to make out that we are better than anyone else I am just stating a fact.

Tatiana just finished , The Silver Media Make Up course.

Here is the description of the Course, if you are interested.

Silver Make Up Course (5 days 30 hours)

Creative make up course:

  1. Fantasy make up
  2. Avant-garde make up
  3. Special visuals make up
  4. Face (body) painting make up
  5. Stage make up

 What the students get:

A course booklet which provides step to step guides

Professional set of brushes to use whislt on the course

All make up will be provided by the school

Set of products worth AED500

Opportunity to work with professional models

The rare chance to work in a professional operating studio

Working with professional photographers

3 professional photo of the students work

After completing the course our students are entitled for huge discounts with different brands

            International Certificate

The Silver make up course is for a make up artist who wants to improve its skills in the creative make up field.

Previous knowledge in make up is required.

Just take a look at Tatiana’s final Portfolio she left the course with as all students leave with professional images taken by our sister company, YH Studios DXB

_MG_0082e _MG_0952e _MG_1951e

So if you want a Porfolio like this and the best training you could possibly have then contact us. We would would so glad and proud to have you come and join us.


Makeup steps

How to start your makeup application?

Foundation first or eye makeup?

As you are checking the You Tube videos you will see so many different makeup application techniques and definitely you will be confused.

Makeup-tips-for-beginners
makeup steps

We are here to help you sorting out this confusion.

So lets see the makeup steps:

  1. Make sure your face is clean, the makeup will look much better on a clean skin than to add some makeup on to the existing makeup.
  2. Use a toner, the toner cleans up your skin perfectly, refreshing it and closing the pores, basically preparing your skin for the makeup application.
  3. Moisturise, especially if you have a dry skin!
  4. Depending on a foundation type apply primer. The primer will  prepare your skin for a foundation and will make your makeup lasting longer.
  5. Apply foundation, all over the face, eyelids, under the eyes, blend it to the neck area also.
  6. When is the foundation perfect? When you can’t see it because none wants to see the foundation just the flawless skin, forget about the caked up, mask effect foundation! That is out of trend for a long time.
step-by-step-makeup-tutorial
makeup application


7. Correct the skin imperfections. Most of the time we are mixing up the correctors with concealers. The correctors are in colours (yellow, peach, green and orange) and are useful in correcting the dislocations on  our face.

8.Then conceal it! Because of the concealers your skin will be green or orange depends what colours are you applying you have to conceal  it. That means the concealers are skin colours.

9.Contour and highlight and of course blend it!

make-up-tips-to-conceal-double-chin
contours and highlights

10.Set your base with a translucent powder

The-Ultimate-Steps-to-do-Your-Makeup-Flawlessly6
translucent powder

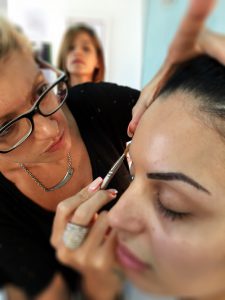
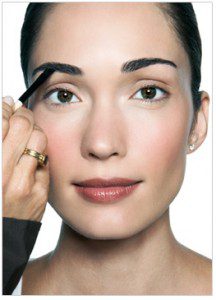
11.Start with your eyebrows in this case you can make sure that you won’t miss any part of your face

Perfect-Makeup-in-10-steps-by-Bobbi-Brown7
eyebrow correction

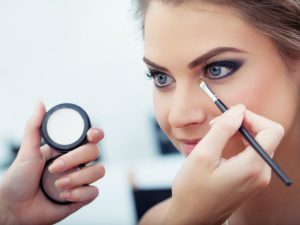
12.Apply the eye makeup

Make-up artist applying white eyeshadow in the corner of model's eye and holding a case with eyeshadow on background close up
eye makeup application

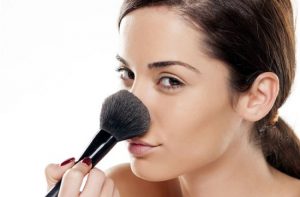
13. Blusher

beauty-tips-for-applying-makeup
blusher application

14.Lipstick

maxresdefault
lipstick application


Now you have a question why in this order?

There is a logical explanation for this.

When you start with a foundation you do 60% of the job and you will have a flawless canvas to work on. All the eyeshadow colours will show much better on the already corrected skin. Even if you do a smokey look or working with dark colours you can easily avoid the fall outs by applying translucent powder under the eye area before starting with eye makeup.

This technique is faster and more efficient all you need is to practice

Stay with us tomorrow as we will talk about dos and donuts in your makeup routine !
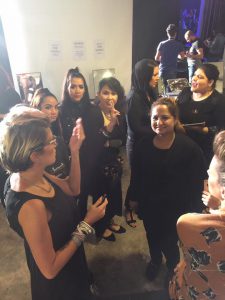
Have a nice day ladies

Perfect Smokey Eyes look part 2

Your smokey eye style makeup is comprised of a collection of different looks you create. Each element of makeup is characterised by its colour, finish, and performance. If your makeup is chosen correctly and your looks are skilfully combined, you are a woman with makeup sense.

The application


Smoky eyes application 1

Outline your eye contour with a black eye pencil, all the way around. Make the line thicker along the upper lashes.

Smoky eyes application 2

With a brush or a sponge applicator, apply your base colour eyeshadow on the mobile eyelid and above the crease, about halfway to the eyebrows, blending slightly.
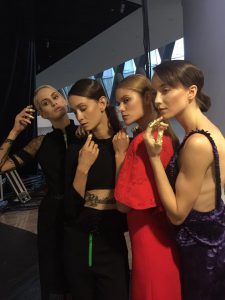
Smoky eyes application 3

With a pointy sponge applicator, apply contour colour eyeshadow all the way around your eyes, blending it well with the pencil line.

Smoky eyes application 4

Half-close your eyes and apply contour colour in the crease.

Smoky eyes application 5

You will now need to define the outside corners of your eyes using a horizontal “V” shape. The position of the pointy end of the “V” will control the apparent shape of your eyes.

Smoky eyes application 6

With a medium-sized soft round brush (you can also use a flat one, holding it sideways), blend the eyeshadows on the upper eyelid. With a flat brush, blend the eyeshadows on the lower eyelid.

Repeat your contour colour application with a sponge, as many times as needed to achieve a deep shade. Blend again with brushes after every application.

Apply highlight colour eyeshadow or facial powder under your eyebrows to ease the blending of the dark contour and add some volume to your eye makeup.

For an irresistible deep regard, outline the inside contour of your eyes with eye pencil. Use darker-than-usual eyebrows and lots of mascara to finish the look. Your eyes should now be smokier then ever before!

To keep your bright eye makeup in balance, try a stronger blush, and keep your lips pale with a light gloss application.


Don’t forget the perfect smokey eyes are all about blending and practice.
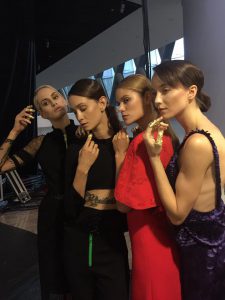
Smokey Eye
Smokey Eyes

See you all tomorrow as we discuss about Lipsticks and will give you amazing tips how to get perfect lips by applying the lipstick in a correct way
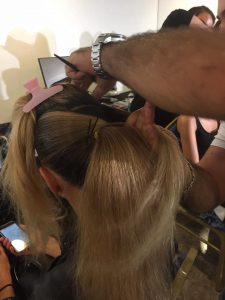
Tips from the Lipstick Makeup Institute on Mascara and False Lashes

 Sample 1
 12605495_1751012468451004_8182255944933402758_o
 1
 Size the lashes. Before gluing the lashes on, you will need to make sure they are not too wide for your eye. Hold the lash strips up against your eyelid, and trim them down on the sides if necessary.
  • If the lashes are too long for your personal taste, consider trimming the individual lashes down to achieve a more natural look. Lashes should be longer toward the outer corner of the eye
  • Apply the lash glue to the outer seam of the eyelash strip with an applicator or small brush. Allow the glue to dry for a moment before applying it to your lashes.
  • Alternatively, you can squeeze a thin line of lash glue onto the back of your non-dominant hand. Then, gently run the outer seam of the eyelash strip along it.
3
Place the strip on your eyelid, positioning it as close as possible to your natural lashes. Bring the strip down from above, not from the front. This is to ensure that you get as close as possible to your lashline.[1]
4
Allow the glue to dry naturally. Once the strip is in place, you do not need to press or hold it. [2]
5
Apply mascara to your lashes. This will help blend your natural lashes with the false ones, achieving a more natural look. You can use black, brown, or dark gray mascara.
6
Apply liquid eyeliner along your upper lids. Be sure to fill in any gaps between the false lashes and your own to make them look more natural. Use black, brown, or dark gray liner.
7
Use makeup remover to remove false lashes. Dip a q-tip in eye makeup remover and gently rub it along your lash line. Allow the remover to sit for a minute, and gently pull off the strip.
KR01353G
CHOOSING MASCARA
1

Decide what you want out of your mascara. There is a mascara for just about any kind of lash enhancement–curling, volumizing, lengthening, defining, faster growth, waterproof–plus many products that combine these effects. Take a look at your lashes and decide what sort of enhancement they need.

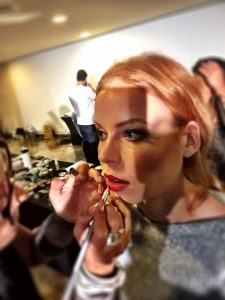
  • For sparse lashes, look for a thickening or volumizing mascara with a large, round brush with lots of bristles. You can also find a combination primer and mascara formula, which is perfect for bulking up lashes and keeping them healthy.[1]
  • If you have short lashes, look for a lengthening mascara with a smaller brush with thick bristles. A small wand will allow you to get very close to your eye and make sure you coat each lash.[2]
  • If your lashes are full but you want length and definition, choose a lengthening mascara, but one with a long brush with evenly-spaced bristles to separate your lashes.[3]
  • To curl your lashes, try a mascara with a curved brush.[4]
  • For a natural, everyday look, find a mascara with a rubber brush and evenly spaced bristles. Lots of drug store brands have these types of brushes. Waterproof mascara will likely last all day.[5]
  • If your lashes are uneven in length or damaged, check the ingredients on the mascara. Phyto-keratin and panthenol can help your lashes grow. Use a fatter brush on your lashes.[6]
  • You should only use mascara for three months before replacing it, so go ahead and experiment with different brands and formulas until you find your perfect mascara.
     

    Pick your shade. For the most part, black is the way to go. It gives the illusion of thickness and length and can really make your eyes pop. If your lashes are red or blonde, however, make brown your go-to shade, wearing light brown for everyday and a dark brown to amp up the drama.[7]

    • Experiment with colored mascaras. Green can bring out violet in blue eyes, purple can enhance green eyes, and blue and purple can brighten your complexion.[8]

 Invest in an eyelash curler, while you’re at it. If you’re serious about getting knock-out lashes, an eyelash curler is key. This will lift your lashes and allow more light to hit your eyes so they look bigger and brighter.[9] It may not seem like it, but an eyelash curler can make a huge difference.

  • Look for a curler with a rounded rubber pad, which will help curl your lash instead of bend it at a sharp angle.[10]

Applying Mascara to Upper Lashes

Curl your lashes first. Apply the curler to the base of your lashes and gently squeeze for about 10 seconds. Then slide the curler to the middle of of your lashes and squeeze for 10 seconds. Finally, curl the tips of your lashes with another 10-second squeeze. This will ensure you have a natural curve instead of lashes that are bent at a harsh angle.[11]

  • If you don’t have a curler or you’re too afraid to use one, use your fingertips to push up and curl wet lashes.[12]

Remove the wand from the mascara tube by twisting back and forth instead of pumping it up and down. Twisting will allow the brush to pick up the mascara, which is what most people think they are doing when they pump the brush in the tube. What they are actually doing is forcing air into the tube, which dries out the mascara.[13]

Wipe off excess mascara on a tissue or on the lip of the tube. Too much product can lead to clumping. Giving the wand a little wipe will leave you with just the right amount.[14]

Look up to lift your lashes. You should still be able to see yourself in the mirror out of your peripheral vision.

  • If you are afraid you are going to blink when you approach your lashes with the wand, open your mouth. It’s harder to blink when your mouth is wide open.[15]

Place the wand against the base of your lashes and wiggle it back and forth a little. You want the most product to be applied to the roots, which will make your lashes look longer and keep them from getting weighed down on the tips.[16]

  • The wiggle will also help lift and curl your lashes.[17]

Pull the want out toward the tips of your lashes with a zig-zag motion, or another little wiggle. The zig-zag adds length and volume, and can reduce clumping.[18]

Go over your lashes with a second coat. Try to leave it at that–do a third coat at the most. The more you layer on the mascara, the more likely it is the mascara will dry on your lashes and cause the new coat to clump.[19]

  • Mix mascaras if you want–do one layer lengthening, then a layer of thickening on top.[20]

Don’t neglect the lashes on the inner and outer part of your eyelid. A lot of times, people apply mascara only to the very center of their eyelid, which can actually make your eyes look narrower.[21] Make sure you apply to the inner, middle, and outer lashes.

  • If you are having trouble reaching your inner lashes with your brush, you can very carefully bend the brush to a 90 degree or right angle (don’t worry, you can bend it back). This will make it easy to brush those inner lashes without getting mascara all over your face.[22]
Addressing Common Problems 
Remove any mistakes with a cotton swab. If you get mascara on your face or eyelid, allow it to dry so you don’t smear it and make things worse. Once dry, press the tip of a cotton swab to the spot and spin. This should remove the spot without messing up your eyeshadow.[26]

De-clump with a clean mascara wand. Either use a disposable wand or repurpose an old one (wash it thoroughly with soap and water first). Comb through the top and bottom of the lash, spinning the brush as you sweep forward. This should remove clumps and give your lashes definition.[27]

  • Try to comb through your lashes while the mascara is still wet.
  • If you don’t have an extra wand on hand, try using a clean toothbrush to comb out any clumps.[28]

Thicken your lashes even further with baby powder. If you don’t feel like you’re getting the thick, voluminous lashes you want, try this trick. Apply one coat of eyeliner, then dust your lashes with translucent powder or baby powder (you can use a makeup brush or a cotton swab dipped in powder). Then add another coat of mascara.[29]

  • The powder gives the mascara more to cling to, which allows you to build more volume.[30]

Remove your mascara every night with an eye makeup remover. It might not seem like a big deal, but it can dry out your lashes at night and cause them to become brittle and fall out.[31]

 Tip of the Day: Always curl your lashes before applying mascara not after, it can break your lashes.
Stay tuned tomorrow as we will talk about