- If the lashes are too long for your personal taste, consider trimming the individual lashes down to achieve a more natural look. Lashes should be longer toward the outer corner of the eye
- Apply the lash glue to the outer seam of the eyelash strip with an applicator or small brush. Allow the glue to dry for a moment before applying it to your lashes.
- Alternatively, you can squeeze a thin line of lash glue onto the back of your non-dominant hand. Then, gently run the outer seam of the eyelash strip along it.
Decide what you want out of your mascara. There is a mascara for just about any kind of lash enhancement–curling, volumizing, lengthening, defining, faster growth, waterproof–plus many products that combine these effects. Take a look at your lashes and decide what sort of enhancement they need.
- For sparse lashes, look for a thickening or volumizing mascara with a large, round brush with lots of bristles. You can also find a combination primer and mascara formula, which is perfect for bulking up lashes and keeping them healthy.[1]
- If you have short lashes, look for a lengthening mascara with a smaller brush with thick bristles. A small wand will allow you to get very close to your eye and make sure you coat each lash.[2]
- If your lashes are full but you want length and definition, choose a lengthening mascara, but one with a long brush with evenly-spaced bristles to separate your lashes.[3]
- To curl your lashes, try a mascara with a curved brush.[4]
- For a natural, everyday look, find a mascara with a rubber brush and evenly spaced bristles. Lots of drug store brands have these types of brushes. Waterproof mascara will likely last all day.[5]
- If your lashes are uneven in length or damaged, check the ingredients on the mascara. Phyto-keratin and panthenol can help your lashes grow. Use a fatter brush on your lashes.[6]
- You should only use mascara for three months before replacing it, so go ahead and experiment with different brands and formulas until you find your perfect mascara.
Pick your shade. For the most part, black is the way to go. It gives the illusion of thickness and length and can really make your eyes pop. If your lashes are red or blonde, however, make brown your go-to shade, wearing light brown for everyday and a dark brown to amp up the drama.[7]
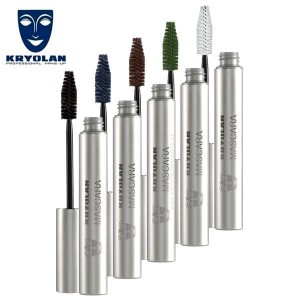
- Experiment with colored mascaras. Green can bring out violet in blue eyes, purple can enhance green eyes, and blue and purple can brighten your complexion.[8]
Invest in an eyelash curler, while you’re at it. If you’re serious about getting knock-out lashes, an eyelash curler is key. This will lift your lashes and allow more light to hit your eyes so they look bigger and brighter.[9] It may not seem like it, but an eyelash curler can make a huge difference.
- Look for a curler with a rounded rubber pad, which will help curl your lash instead of bend it at a sharp angle.[10]
Applying Mascara to Upper Lashes
Curl your lashes first. Apply the curler to the base of your lashes and gently squeeze for about 10 seconds. Then slide the curler to the middle of of your lashes and squeeze for 10 seconds. Finally, curl the tips of your lashes with another 10-second squeeze. This will ensure you have a natural curve instead of lashes that are bent at a harsh angle.[11]
- If you don’t have a curler or you’re too afraid to use one, use your fingertips to push up and curl wet lashes.[12]
Remove the wand from the mascara tube by twisting back and forth instead of pumping it up and down. Twisting will allow the brush to pick up the mascara, which is what most people think they are doing when they pump the brush in the tube. What they are actually doing is forcing air into the tube, which dries out the mascara.[13]
Wipe off excess mascara on a tissue or on the lip of the tube. Too much product can lead to clumping. Giving the wand a little wipe will leave you with just the right amount.[14]
Look up to lift your lashes. You should still be able to see yourself in the mirror out of your peripheral vision.
- If you are afraid you are going to blink when you approach your lashes with the wand, open your mouth. It’s harder to blink when your mouth is wide open.[15]
Place the wand against the base of your lashes and wiggle it back and forth a little. You want the most product to be applied to the roots, which will make your lashes look longer and keep them from getting weighed down on the tips.[16]
- The wiggle will also help lift and curl your lashes.[17]
Pull the want out toward the tips of your lashes with a zig-zag motion, or another little wiggle. The zig-zag adds length and volume, and can reduce clumping.[18]
Go over your lashes with a second coat. Try to leave it at that–do a third coat at the most. The more you layer on the mascara, the more likely it is the mascara will dry on your lashes and cause the new coat to clump.[19]
- Mix mascaras if you want–do one layer lengthening, then a layer of thickening on top.[20]
Don’t neglect the lashes on the inner and outer part of your eyelid. A lot of times, people apply mascara only to the very center of their eyelid, which can actually make your eyes look narrower.[21] Make sure you apply to the inner, middle, and outer lashes.
- If you are having trouble reaching your inner lashes with your brush, you can very carefully bend the brush to a 90 degree or right angle (don’t worry, you can bend it back). This will make it easy to brush those inner lashes without getting mascara all over your face.[22]
De-clump with a clean mascara wand. Either use a disposable wand or repurpose an old one (wash it thoroughly with soap and water first). Comb through the top and bottom of the lash, spinning the brush as you sweep forward. This should remove clumps and give your lashes definition.[27]
- Try to comb through your lashes while the mascara is still wet.
- If you don’t have an extra wand on hand, try using a clean toothbrush to comb out any clumps.[28]
Thicken your lashes even further with baby powder. If you don’t feel like you’re getting the thick, voluminous lashes you want, try this trick. Apply one coat of eyeliner, then dust your lashes with translucent powder or baby powder (you can use a makeup brush or a cotton swab dipped in powder). Then add another coat of mascara.[29]
- The powder gives the mascara more to cling to, which allows you to build more volume.[30]
Remove your mascara every night with an eye makeup remover. It might not seem like a big deal, but it can dry out your lashes at night and cause them to become brittle and fall out.[31]


